I love this light Japanese cheesecake which involves mainly 2 eggs, 20g butter and 80g of cream cheese. Relatively light in terms of the fat content as compare to other similar cake recipes I used. The cheesecake was equally creamy :P
A cheesecake looks more pleasant if it is crack-free. This has always been my challenge when baking this type of cake. There are so many recipes with different recommended baking method. This round I decided to bake by eyes, not by following recommended temperature and duration. Although this is rather troublesome as I have to stand by the oven window gazing at the rising cake constantly, it helped to minimize the chance of developing a deep canyon in the middle of the cake.
Pan size: one 16cm round cast iron pot, or 6x3" round cake pan wrapped with aluminum foil.
Ingredients
All ingredients in room temperature
Using 55g Omega-3 eggs
80g cream cheese
20g unsalted butter
60g fresh milk
2 egg yolks
20g top/cake flour
15g corn flour
2 egg whites
50g fine sugar
1/2 tsp lemon juice
Directions
1. Line the base of a 16cm Le Crueset round cast iron pot with parchment paper, and grease the wall with butter or non-stick spray.Preheat the oven to 160 degree Celsius.
2. Add cream cheese, unsalted butter,and milk in a heat resistant mixing bowl, and place over a double-boiler. Stir over low heat till all the ingredients melted into a smooth batter.
3. Remove the cheese batter from the double boiler, and stir in the two egg yolks, one at a time.
4. Sieve in the top/cake flour and corn flour. Mix well. Cover and set aside.
5. Whip up egg whites in a dry and grease-free mixing bowl. Add in the sugar, in 3 batches, after the egg white has become frothy (medium low speed)
Add in the lemon juice after adding the 3rd batch of sugar. Whip at low speed still almost reaching the soft peak stage.
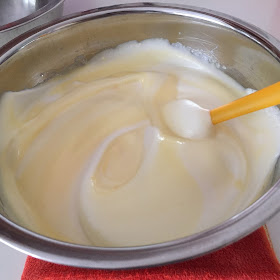
6. Scoop some meringue to mix with the cream cheese batter at (4), using a spatula.
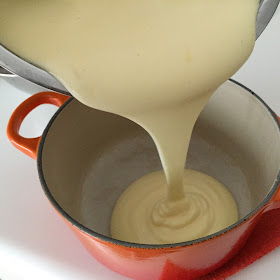
7. Pour the batter to the prepared Le Crueset pot. Bang lightly to remove any trapped air bubbles.
8. Place a wire-gauze in a 20x20cm square pan, and pour about 1 cm of hot water into it.
Lower the pot into the warm water bath.
The baking temperature and duration are only for reference purpose. Please adjust according to your oven and batter conditions.
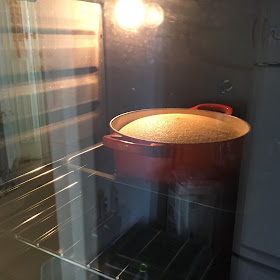
9. Bake at the lowest rack of a preheated oven at 160 degree Celsius for 25 minutes , or till the top of the rising batter has formed a flat top.
Reduce the oven temperature to 140 degree Celsius, when the top of the batter has formed a plateau. Bake for another 25 to 30 minutes, till the top beginning to brown.
If small crack starting to be seen, open the oven door for about 5 to 10 seconds to reduce the temperature.
Turn off both the heating coils, and let the cake stays in the closed oven for about 15 minutes. This enable the cake to brown more evenly, and shrink gradually.
10. After transferring the cake out of the oven, lightly bang the cake over a kitchen towel. This will help to minimise the cake from over-shrinking. Let the cake rest over a wire rack for about 10 minutes, and invert it out onto the cooling rack. (After the side of the cake pulls away from the wall of the pot.)
11. After the cake has cooled down to room temperature, refrigerate it for about 3 hours before cutting.
Enjoy it cool :)


Is the cake perfectly rise? Any shrinkage or "waistline" after cooling down?
ReplyDeleteI think there was a light waistline developed after cooling down 😊
Deleteyummy recipe
ReplyDeleteThank you Samia 💕😊
Delete