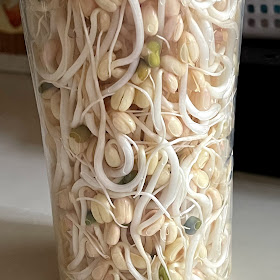
Taking advantage of the higher temperature in my tropical country, I only need about 3 days to grow the mung bean sprouts from seeds to juicy and crunchy sprouts 🌱🌱🌱
All I need was a tall transparent plastic bottle, a rolled up soft cardboard or thick paper, some organic mung beans, and regular soaking and showering of the growing sprouts. Easy steps involved, and my family get to enjoy freshly harvested mung bean sprouts. 😋🍜
The mung bean sprouts can be used in sandwiches, salad, stir-fried noodles, or light noodle soup 😋
1x 500ml plastic bottle
Towards the end of the 8 to 10 hours of soaking, some beans will begin to germinate🌱
2. Prepare a clear tall plastic bottle, and roll up a thick paper or cardboard to serve as light shield for the transparent bottle.
3. Pour away the soaking water, and transfer the beans into the bottle.
Loosely cover the bottle with an opaque lid.
Cover the bottle with the rolled paper light shield.
4. Keep the entire setup in a dark, cool cupboard.
5. Soak the beans for about 3 to 10 minutes at an interval of about 1 to 3 hours.
1x thick paper or cardboard as screen
Ingredients
25~35 g organic mung beans
Directions
Day 1
Rinse the beans till the water runs clear. Soak the beans for about 8 to 10 hours, or overnight.
Repeat the soaking process.
I prefer to remove the unsightly husks during draining of water. This step is optional.
At the later half of the day, the beans can be seen growing longer. A shorter interval, or more soaking frequency, help the beans to grow faster.
Day 3
You can start to harvest the bean sprouts on Day 3 when the sprouts have grown to your desired length.
When the bean sprouts grow longer and become more compact, you can stand the bottle in an inverted position once in a while.
Day 4
Harvest
The bean sprouts grow longer and have longer roots too.


No comments:
Post a Comment
I love seeing your comment and sharing it with other readers. Your comment would be published after moderation. Thank you :)