
I wanted to shape my sweet milk buns into bunny shape. But, oops, they looked more like chinchilla than rabbit. I continue to call them bunny buns hoping one day my buns will really look like rabbits :)
Yield: 9 pieces of 5cm buns
Appliances: Whirlpool BM1000
Raw bread weight: ~ 413 g
Ingredients
120g whole milk 全脂牛奶
15g condensed milk 炼乳
30g unsalted butter 无盐奶油
30g fine sugar 细糖
1/4 tsp salt 盐
15g condensed milk 炼乳
30g unsalted butter 无盐奶油
30g fine sugar 细糖
1/4 tsp salt 盐
20g beaten egg 蛋液
180g bread flour 高筋面粉
20g rice/top flour 粘米粉/低筋面粉
1/2 tsp instant dry yeast 即发干酵母
Some bread flour for sprinkling
Direction
1. Pour fresh milk, condensed milk and unsalted butter in a heat resistant bowl.
Keep warm in a rice cooker for about 10 minutes.
This step is optional. I prefer to work with warm ingredients :)


2. Pour the warm ingredients from (1) into the bread pan.

3. Add in the sugar and salt.

4. Pour in the beaten egg.

5. Add in the bread and rice/top flour.

6. Dig a hole and pour in the instant dry yeast.

7. Place the bread pan into the bread maker. Select "dough" function and start the process.


8. The dough is ready.

9. Sprinkle some bread flour over both the work top and dough before inverting it out.

10. Flatten the dough to remove the trapped air. Divide the dough into 9 equal portions, each about 46g.
The dough maybe quite sticky, so wear a pair of disposable gloves to handle it.


11. Shape the doughs into 9 balls by pull down the sides and seal at the base.

12. Shape the dough into a slightly oval shape and place on a floured non-stick baking pan.


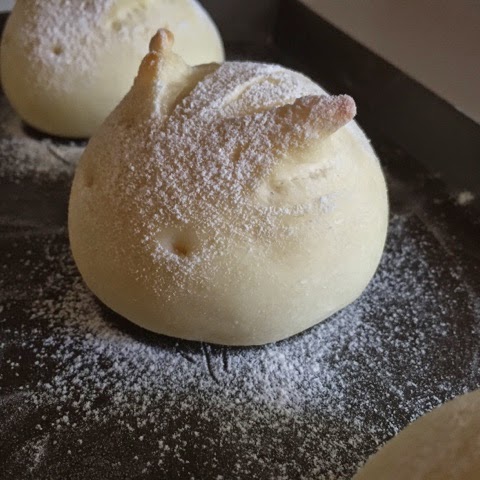
13. Use a bamboo stick (coated with flour) to poke two holes as "eyes" of the bunny. Spray some water and let them rest in a closed oven for about 30 minutes.


14. After the 30 minutes rest, remove the tray of doughs from the oven, and start to preheat the oven to 160 degree Celsius.
15. Use a pair of kitchen scissors to snip out two ears of the bunny. You can snip a few times to get longer ears


16. Pull back the ear slightly to extend the length. This also helps to prevent the ears from shrinking during baking.

17. Use the bamboo stick to help you shape out the head of the bunny by tucking in the bottom.

18. Sprinkle some bread flour over the dough using s small sieve.

19. Bake the dough in middle rack, at 160 degree Celsius for 10 minutes, and reduce the temperature to 150 degree Celsius and continue to bake for about 8 minutes, or till the ears turn slightly brown.

20. Allow the bunny buns to cool down in room temperature before serving.


This was my first bake, the ears were shorter ><


Very cute bunnies!
ReplyDeleteHi, thank you very much :)
DeleteVery cute and adorable looking bunnies! Love the texture of your bread, so soft and fluffy. Thanks for sharing. And thanks for dropping by my blog.
ReplyDeleteHi Veronica, thank you for liking my bunny buns and dropping by too. I love your blog too. You and I shared the same mission in setting the blogs. I'm also leaving behind my culinary legacy for my daughter, who hasn't shown interest in cooking yet :)
ReplyDeleteHi. Can i check how to maintain the softness and fluffiness of the bread. I tried a few recipe and for the first few hours, they are soft and fluffy but after that they turn hard. Any idea what went wrong or improvements I should make
ReplyDelete