Saturday, 29 January 2022

Rice Cooker Pineapple Rice

During Lunar or Chinese New Year festive, we like to serve foods which have prosperity or auspicious theme. Pineapple ι»„ζ’¨ and Dahfa brand dried fish fillets, which both signify prosperity, would be the auspicious ingredients to be added to the new year dish.
The golden cashew nuts, which symbolized golden ingots, are being sprinkled over the golden pot of prosperity rice.

Have a golden pot of rice at the beginning of a Lunar New Year, and blessed with continuous good luck and fortune πŸ’°πŸ’°πŸ’°πŸŽˆπŸŽ‰πŸŽ‡πŸŽ†πŸ€…πŸ€…πŸ€…

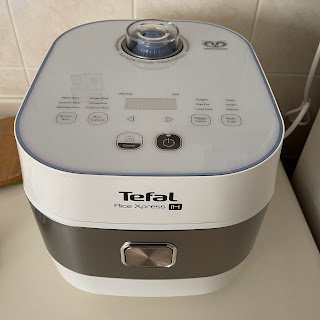
Rice Cooker: IH Rice Cooker with soup function


Servings: about 2 to 3 persons

Ingredients
230g Thai long grain rice
270g water to soak rice
90g water, to be added depending on your preference of the rice softness

80g honey pineapple
50g chinese chicken sausage
7g garlic, chopped
60g onion, cut coarsely
35g carrot, diced

2 eggs

15g raisins
30g cashew nuts
15g Dahfa dried fish fillet, strips

2 tbsp of chopped spring onion and coriander leaves

Condiments
10g dark brown sugar/raw sugar
15g light soy sauce
5g rice wine, θŠ±ι›•ι…’

1g mushroom/chicken seasoning powder

some pepper powder


Directions
1. Soak rice with 270g of water for about 30 to 60 minutes.
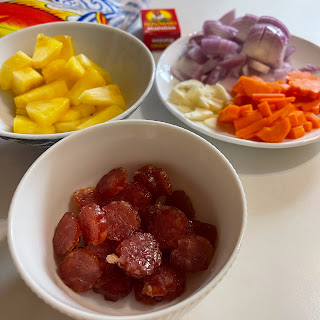
Chinese chicken sausage - remove the skin, and cut into 2 to 3 mm thick slices
Garlic - sliced
Onion - cut coarsely
Carrot - diced or cut into flower shape
Pineapple - remove the core, and cut into triangular chunks


2. Preheat the rice cooker pot by turning on the "Soup Function" for about 5 minutes.

3. Add a little grapeseed oil/vegetable oil and stir-fry the cut chinese sausage till fragrant.

Scoop out the fragrant sausage slices and set aside.

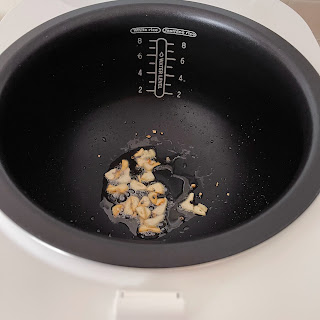
4. Add in garlic and stir fry till golden and fragrant. Scoop out the garlic crisps and set aside.

5. Stir fry the onion till soft and fragrant. Add in cut carrot and pineapple chunks to stir fry for about 2 to 3 minutes.

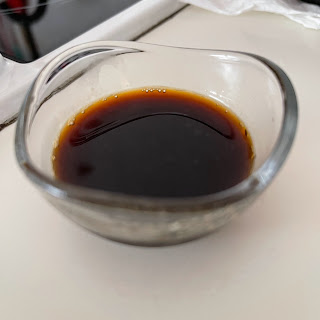
6. Combine dark brown sugar, light soya sauce and rice wine under the Condiments in a small bowl.

Add the condiment combination to the pot, and wait for the sauce to bubble.

7. When the content starts to bubble, add in the soaked rice with the water.

Add about 90g of additional water depending on the rice type and your preference of softness of the rice.

9. Stir in about 1g of mushroom powder or chicken stock powder to the content.


10. Turn off the "Soup" function of the rice cooker. And turn on the "Jasmine Rice" or "Rice" cooking function. Wait for the rice cooker to beep when the rice is cooked.

11. While the rice is cooking, we roast some cashew nuts and the Dahfa dried fish fillets.
Rinse the raw cashew nuts before drying up in paper kitchen towel. Roast the cashew nuts in a preheated oven at 150℃ for about 10 minutes. Toss the cashew nuts every few minutes to roast them evenly.
Toast the Dahfa dried fish fillet strips in a warm oven at 100℃ for about 10 minutes, or till crispy and fragrant. Keep the dried fish fillet strips in the oven till serving.

12. Add about 1 tbsp of milk, 1/2 tsp of low-salt fish sauce, 1/4 tsp Maggie Seasoning sauce, and some pepper powder to 2 beaten eggs. Fried the egg batter into a golden crispy omelette. Set aside.

13. Get all the topping ingredients ready before the rice is cooked.

14. After the rice cooker has beeped or the rice is cooked, turn off the rice cooker, and let the rice simmer for about 20 to 30 minutes to let the rice grains absorb the moisture.

15. After the 20 to 30 minutes simmering, loosen the rice with a spatula. Shake some pepper powder over the hot rice and mix well.

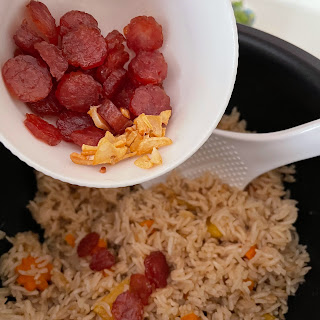
Add in the fragrant sausage slice, garlic crisps,

and raisins.

Break the omellete into smaller pieces and mix into the rice.

Finally, add in the spring onion and coriander leaves, and give the rice a thorough mixing.

The pineapple rice is about done πŸ˜‰


16. Scoop the pineapple rice to serving bowls, and top with roasted cashew nuts and Dahfa dried fish fillet strips. Enjoy πŸ˜‹πŸ˜‹


Saturday, 22 January 2022

Pumpkin Rose Pineapple Tart

I have been using an old recipe I obtained from a radio program decades ago to bake my past pineapple tarts. This year, I have decided to change the recipe based on my preference. For a change, I have added pumpkin powder and bread flour to the dough to add a little natural golden tone to the tart shell, and also to prevent the tart shell from cracking badly during baking.

I prefer cookies that have been baked to a little brown to release that nice aroma, and this also ran a risk of cracking the tart shells. I was happy with the result despite a few tarts developed hairline cracks after baking. Most importantly, the pineapple tarts🍍 smelt and tasted wonderful to me πŸ˜‹πŸ˜‹

I baked the pineapple tarts in two batches with different designs - rose shape, and ball shape decorated with coloured design. Each baker has he or her own design, and these are my preferred pineapple tart designs πŸ˜‰πŸ˜œ


Crumbly tart shell that melts in your mouth - the type I loveπŸ˜‹

Short video clip of the pineapple tarts πŸ˜ƒ


Yield: about 64x3cm tarts

Ingredients 

200g unsalted butter, softened
40g icing sugar

1 egg yolk

1/2 tsp vanilla essence

225g plain flour plus/plain flour
50g bread flour/plain flour plus/plain flour
10g pumpkin powder/custard powder/corn starch
5g custard powder/corn starch
4g low-sodium salt

Filling

450g pineapple paste/jam

Click the link for homemade pineapple paste recipe:


Direction 
1. Shape pineapple paste into balls and keep in a glass container till needed (about 7 to 8g each)
Wet your hands slightly can prevent the pineapple paste from sticking to your hands, and make shaping easier. Separate each pineapple ball layers with plastic sheets.
Keep the unused pineapple balls in the fridge.

2. Cream softened butter till light and fluffy.

3. Add in icing sugar and mix well.


4. Add in egg yolk and vanilla essence. Mix well.


5. Sieve and fold in pumpkin powder and custard powder.


6. Sieve and fold in plain flour plus and bread flour.


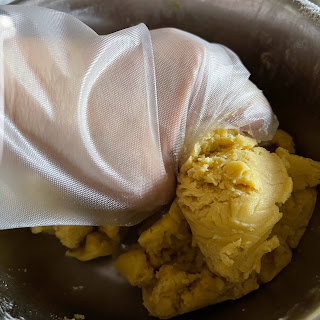
7. Hand mix the dough for a more thorough mixing.

Take a small portion of the dough to check whether the dough is pliable and does not crumble when touch.


8. Split the cookie dough (about 554g) into two portions, about 278g each. Store in two plastic bags, and sealed container in a fridge for about 1 hour. You can also keep them overnight.
By dividing into two portions, you can have the option to bake the second batch in a later date.


9. Take out the cookie dough and pineapple balls about 1 hour before moulding. 
Divide the cookie dough into small portions, about 8 to 9 g each. You'll get about 64 portions. Keep the remaining cookie dough for coloured decoration later.

Take a portion of the cookie dough, and flatten using your hands. Place the pineapple ball in the middle of the dough and wrap it up. Slowly push up the dough to close up the opening.
Shape the dough into a ball by rolling it between two palms.

10. You can decorate the dough ball using a cookie pincher to your desired design, or leave it plain.

Place the shaped dough over a baking tray lined with parchment paper.

11. Preheat oven to 200℃ for about 8 to 10 minutes. 
Bake in a preheated oven at middle rack. Lower the oven temperature to 180℃ after the pineapple cookie dough is in the oven, and bake for about 15 minutes. Turn off the heating and continue to bake for about 2 to 3 minutes, or till the cookie has slight brown edges at the petals.

12. Let the cookies cool down before storing them in an air tight container :)
The cookie is very soft when hot, so let it cool down before transferring it  πŸ˜πŸ˜‹


For a festive and more colourful appearance πŸ’—πŸ’›πŸ’š
Shape the pineapple dough into balls.

Use the remaining cookie dough, mix with food colours, and shape into your desired patterns 😍🌸🌹⭐

Preheat oven to 200℃ for about 8 to 10 minutes.
Bake in a preheated oven at middle rack. Lower the oven temperature to 180℃ after the pineapple cookie dough is in the oven, and bake for about 16 minutes. Turn off the heating and continue to bake for about 2 minutes, or till the cookie has a slight tanned crust.

Let the cookies cool down before storing them in an air tight container :)
The cookie is very soft when hot, so let it cool down before transferring it  πŸ˜πŸ˜‹