This interesting recipe was first posted by my Facebook friend, Barry Apek, who learned it from a Sarawak friend. Melted butter and sugar were first combined with flour and milk powder, into a paste before wrapping in the bun dough. This additional process helped to prevent the melted butter from seeping through the base of the buns during baking. The soft filling tasted just like bean paste but with sweet butter taste.
I altered the recipe slightly by adding cooca powder to the dough, and dried cranberry bits to the filling. To make the filling slightly more nutritious, I added a small amount of cornmeal to the plain calorie-ridden milk-butter paste 😉
Yield: 9 buns in a 20cm square pan
Raw dough weight: 257g
Bread maker: Mayer MMBM12
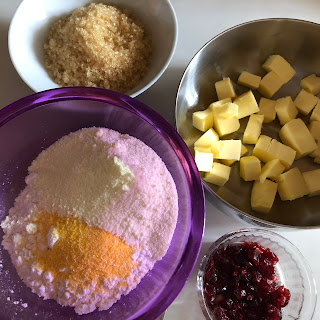
Milk-Butter Paste Filling
Ingredients75g salted butter
75g light brown sugar/fine sugar
75g top/cake flour
15g milk powder
3g cornmeal/corn grits/polenta, optional
15g dried cranberries, optional
5g hot water, optional
Directions
1. Cut dried cranberries into bit size and add hot water to softened them. Set aside.
2. Melt butter and light brown sugar over low heat.
3. Remove the melted sugar-butter from stove, and add combined flours (top/cake powder, milk powder and cornmeal) in spoonful to the hot liquid.
4. Finally, add in the cranberry bits. Let the mixture cool down before shaping. The hot mixture was very sticky, but the stickiness would reduce when cold.
5. Divide the mixture into 9 portions, about 28g each. Store in a box and place in the fridge.
Cocoa Bun Dough
IngredientsOriginal recipe quantities in green print
80 (107)g cold fresh milk
20 (0)g water
25 (35)g light brown sugar/fine sugar
2g fine salt
20(25)g egg
40 (0)g active natural yeast/preferment, 100% hydration *
165(200)g bread flour
20(0)g superfine wholegrain flour
10(0)g cocoa powder
1(3)g instant dry yeast
To be added at the 12 to 13th minute
20g cold unsalted butter
* natural yeast can be replaced by 20g each of bread flour and water, and 1g instant dry yeast.
 |
| Mix bread flour, superfine wholegrain flour and cocoa powder in a bowl before use. |
Directions
1. Feed active natural yeast and wait for it to double in volume.
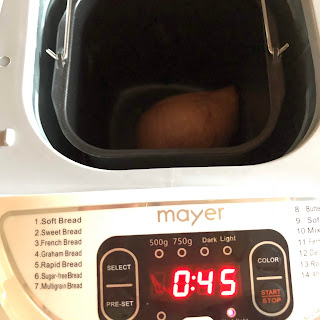
2. Add all ingredients, except the cold unsalted butter, into the bread maker. Select "C-11 Ferment Dough" and start the program. At about 13th minute into kneading, dispense 20g of cold unsalted butter to the kneading dough.
Stop the program manually when the countdown timer reads "0:45".
Transfer the dough to a plastic bag lightly grease with oil. Tie a loose knot at the end, and double protect with another external plastic bag. Keep the dough in a covered bowl, and store in the refrigerator for about 12 to 15 hours overnight.
3. Take out the cold dough and cold milk-butter paste balls from the fridge, remove the external plastic bag, and invert the bread dough. Let the dough rest for about 1 hour in room temperature.
4. Turn the dough out onto a floured work top. Deflate the dough and divide it into 9 portions, about 48g each.
Shape the dough into 9 balls, cover and let them rest for about 15 minutes.
5. Take a dough ball and roll it into a flat round shape with the center thicker than the edge.
Place a milk-butter paste ball in the centre.
Wrap up and shape into a ball shape.
And place the stuffed dough balls into a 20cm square pan lined with parchment paper.
Spray some water over, cover and let them rest for about 90 to 100 minutes.
6. When the dough balls have expanded to about double in size, start to pre-heat the oven to 180℃ for about 10 minutes.
Dust some bread flour over and score some patterns over the top of the dough using a razor.
7. Let the buns bake for about 5 minutes at 180℃, and reduce to 170℃ for about 15 to 17 minutes.
As the crust was too dark to tell whether the bun is cooked, just observed the edge of the buns. If the buns are cooked, the sides will shrink away from the wall, and you can smell the nice aroma of the buns.
8. Remove the hot buns from the oven and pan, and let them cool down over the wire rack till warm/cool.
Enjoy 😋
Recipe adapted from Barry Apek's sharing over Facebook with appreciation 😃


