Monday, 23 March 2020

Honey Egg Bread


A soft and fluffy bread with a lovely yellow hue coming from a greater portion of egg and honey. If you expect a very sweet bread, then you may be disappointed. The bread was just mildly sweetened with a thin coat of honey over the soft crust 😋

Serving: 1 loaf
Stand Mixer: KitchenAid Mini
Raw dough weight: 594g
Pan size: 21x13x10cm, 1.5L
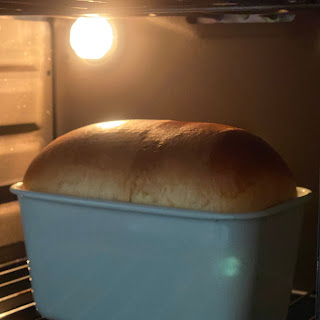
Baking temperature: Preheat oven to 190℃, bake at second lowest rack, at 180℃ for 15 minutes, 170℃ for 20 minutes, or till golden.

Ingredients

260g bread flour
25g Prima plain flour plus/plain flour
20g raw sugar
8g milk powder
2g instant dry yeast

50g natural yeast, 100% hydration *
120g milk, cold
40g beaten egg
20g honey mixed with 10g warm water, 
15g water, add according to dough condition/moisture

3g fine salt, to be added after 18 minutes

30g unsalted butter, softened, to be added after 25 minutes

* 50g natural yeast can be replaced by 25g water + 25g bread flour + 1g instant dry yeast


Directions

1. Mix all dried and wet ingredients, except the salt and butter, together. Cover and stand for 15 minutes.

2. Start kneading process of a stand mixer until gluten form, about 3~4 minutes at Speed 2. Gradually add in the salt while the stand mixer is kneading.

3. After about 4~5 minutes when the dough becomes smoother, add in the softened butter.

After about 2~3 minutes of kneading at Speed 1, or till the butter has incorporated to the dough, increase kneading speed to Speed 5, and knead for about 15 minutes, or till window pane stage.

4. Give the dough about 10 to 15 slap-and-folds before shaping it into a ball and place in an oiled mixing bowl to proof. Cover with a lid and proof for about 60 minutes.
End of 60-minute proofing

5. Turn the dough onto a floured work top, deflate, fold in the four sides, invert and let it rest for 15 minutes.

6. Roll the dough into a flat dough, flip over to let the smoother side face down. Roll up the dough.


And place in a bread pan lightly greased with butter. Spray some water, cover with a tea-cloth and let the dough proof for about 50 to  60 minutes.
Beginning of 2nd proofing

End of 2nd proofing
 7. Preheat oven to 190℃ for about 10 minutes. Brush either milk or egg wash over the top.

Bake at second lowest rack, at 180℃ for 15 minutes, 170℃ for 20 minutes, or till golden.

8. Remove the bread from the oven and bread pan quickly.

Brush a thin coat of honey water over the hot crust to give the crust a glossy look and a thin coat of sweetness. This step is optional.

Let the bread cool to room temperature before cutting 🍞


Enjoy 😋


Saturday, 21 March 2020

Sweet Split Mung Bean Soup 豆爽


A popular local sweet mung bean dessert which can be enjoyed with or without the dough fritter or 油条. And it is easy to prepare with simple ingredients 😋

Servings: about 2 to 4 persons

Ingredients

60g split mung beans

460g water
2 blades pandan leaves
60g honey rock sugar/rock sugar

16g potato starch
40g water


Directions

1. Rinse split mung beans for about 5 to 6 times, or till the water runs clear. Let the beans soak for about 3 hours, changing water about once or twice.

End of 3-hour soaking.

2. Cut a series of openings on a sheet of parchment paper.

Spread out the soaked beans over a steamer lined with the cut parchment paper.

Pour about 150g of water into the pot of a mini rice cooker, and place the steamer in.

Start the cooking process and a 15-minute countdown timer.

When the countdown timer rings, briefly stir the beans, close the lid and switch to keep warm mode for 5 minutes.


End of cooking, the beans should be soft and fluffy when being pressed. Set aside.

3. While steaming the beans, you can start to prepare the sweet soup. Boil 460g of water with pandan leaves. When the water starts to boil, add in the honey rock sugar.

4. Add 40g of water to the potato starch, and stir to mix.

When the honey rock sugar dissolved, remove the pandan leaves, and stir in the potato starch water from above.

Turn off the heat when the soup has thickened.

5. Stir in the steamed beans,

and the dessert is ready to be served 😋


You can either serve it plain,

or with dough fritter 油条. They are equally delicious 😋


Wednesday, 18 March 2020

Growing Mung Bean Sprouts from Carton


Growing mung bean sprouts from an used milk or juice carton was simple, easy and fast. Just about 3 days and your bean sprouts are ready to be harvested. Home-cultivation of mung bean sprouts is especially suitable for me as I only required about a small bowl of them weekly. And they can be grown from just about 2 tablespoons of organic mung beans. Most important of all, it does not need sunlight, so it can be kept and grown in any dark corner or cupboard in the house 🌱🌱🌱

Update: 8 May 2020
I've tried to shorten the soaking time for the bean sprouts from 10 minutes to 30 seconds for the latest round of bean sprout cultivation. The growth rate seemed quite close to the 10-minute soaking batches. However, the seed leaves of the latest batch seemed to be slimmer than the previous batches. Therefore, if you prefer a more crunchy and developed seed leaves, soak the growing bean sprouts for 5 to 10 minutes each time 😀


Direction

1. Rinse a used milk or juice carton clean. For milk carton, ensure the interior of the carton is not greasy.

2. Cut four top corners of the carton to create four small ventilation and drainage holes.

3. Soak about 20 to 30g of organic mung beans for about 3 hours.

4. Drain away the water and feed the soaked beans through the sprout of the carton.

Screw back the cap and leave it in a dark cupboard away from sunlight.

5. In an interval of about 3 to 4 hours, soak the beans for about 10 minutes, then drain away the water, and return the carton to the cupboard. Repeat this soak-and-drain process for about 5 to 6 times daily. Minimum twice a day - morning and evening.

The bean sprouts grows quite fast, you will be able to feel the weight at the end of second day.


6. On the day of harvest, cut across the carton to pour out the grown bean sprouts.

7. Remove the husk and the long roots.

8. Let the fresh bean sprouts dry in room temperature before keeping in the fridge.