Sunday 24 October 2021

Pandan Soya Milk Bread (SSL)


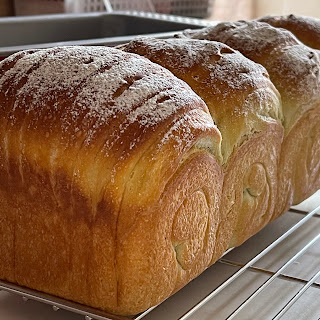
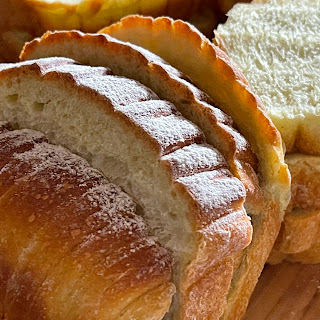
A great flavour pandan bread added with Oats and Quinoa Soya Milk and Sweet Stiff Levain. The only sad thing about this bread was I could not cut a neat thread pattern to the crust. Hope I can update with a more decent photo of the crust in my subsequent attempts 😉💪💪💪


Video of the bread 👇


Yield: 4 mini loaves in one long pan
Pan size: 26x9x7 cm Ikea long pan
Raw dough weight: 673g
Baking temperature: Preheat oven to 190℃, middle rack, bake at 180℃ for 15 minutes, reduce to 170℃ for 15 minutes, turn off oven and continue to bake for 3 minutes. 
My Teka HLB840 oven has a Temperature Surround feature which allows the bread to baked at a shorter duration. 

Sweet Stiff Levain (SSL)

Ingredients
37g cool boiled water
15g raw sugar
20g natural yeast, 100% hydration*
80g unbleached bread flour

* 20g natural yeast can be replaced by 10g bread flour + 10g water + 1/8 tsp instant dry yeast


Let the sweet stiff levain stands in room temperature for about 6 to 8 hours, or triple in volume, before adding to dough.
sweet stiff levain (👈click to access the preparation method)

Pandan Milk Bread

Ingredient
A
220g bread flour
25g superfine wholegrain flour/plain flour
40g raw sugar
5g milk powder
1g instant dry yeast

B
150~155g sweet stiff levain 

C
130g Oats & Quinoa soya milk/low fat milk

D
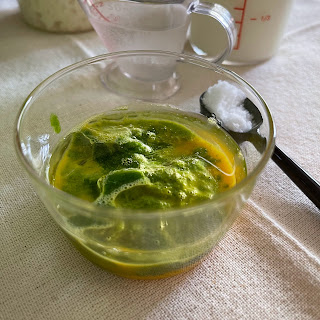
30g fresh pandan paste #
20g beaten egg
20g grapeseed oil/mild flavour vegetable oil ^

E
30g water, cold (to be added depending on dough condition)
 
F
4g low-sodium fine salt

# Blend 20g pandan leaves with 50g water into very fine texture. Collect 30g for use, and keep the balance in fridge.

^ avoid adding butter and coconut oil to pandan bread. To me, these two oils will give the bread a rancid smell after baking.


Directions

Knead the dough following your preferred method till reaching window pane.

1. Mix Ingredient A in a big mixing bowl. Tear Ingredient B into smaller pieces and add to Ingredient A mixture.

2. Add Ingredient C to above mixture. Mix Ingredient D in a small cup before adding to the dough. Add Ingredient E gradually to the dough depending on dough condition. Cover with a lid and let the dough rest for 15 minutes.

3. Knead the dough using an electric hand mixer fitted with a pair of dough hooks till the dough is smoother. Knead in Ingredient F. Perform about 200 sets of " slapping and folding" till the dough reaching window pane stage.

4. Shape the dough into a ball,

and keep it in a plastic bag coated with some cooking oil. Tie a loose knot, and keep in a second plastic bag before storing in a big mixing bowl with a lid.
Store the dough in the fridge for about 12 to 16 hours, or overnight to undergo cold fermentation. 
My fridge temperature is about 4℃.

5. In the next morning, take out the cold dough from the fridge. Remove the outer plastic bag, invert the dough and let it thaw for about 90 to 120 minutes.

6. Turn the dough onto a floured worktop. Deflate the dough and divide into 4 portions.

Shape into 4 balls, cover, and let them rest for about 15 minutes.

7. Roll out a dough ball into a flat dough, fold in the two wings overlapping each other. Roll out again to achieve uniform thickness.

Use a dough cutter to cut about 1/3 of the dough length into thin strands.


Roll up the dough starting from the un-cut end towards the cut end.


8. Place the shaped dough into the prepared bread pan brushed with a coat of homemade non-stick baking spread, or butter. Cover with a piece of tea cloth, and let them proof for about 60 minutes, or when dough top almost reaching the brim of the pan.
Beginning of second proofing

End of second proofing

9. Preheat oven to 190℃. Dust some bread flour over the top of the dough. Bake at 180℃ for 15 minutes, reduce to 170℃ for 10~15 minutes, turn off oven and continue to bake for 3~5 minutes.
My Teka HLB840 oven has a Temperature Surround feature which allows the bread to baked at a shorter duration.

10. Invert out the bread immediately after leaving the oven. Cool over a wire rack.


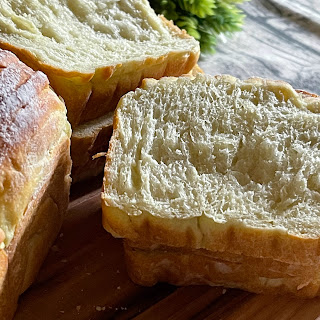
11. Cut the bread after it has completely cool down 😍 Enjoy 😋


Saturday 23 October 2021

Braised Thawed-Frozen Tofu in Angelica Root Flavour


If you love braised soya bean cakes and angelica root or 当归 eggs, you most probably would love this dish 😋 Using porous thawed-frozen soya bean cakes helps to absorb the angelica root flavored stock faster and more readily. And the firmer and slightly chewy texture also prevented the soya bean cakes from breaking during stirring and cooking.

Using a mini rice cooker and yosenabe sauce to cook the dish help to make the cooking process simpler. And most importantly, the dish was still very delicious 😋


Servings: 2 to 3 persons
Equipment: mini rice cooker

Ingredients
280g small soy bean cake, 2 cakes
1 dried shiitake mushroom, soaked and sliced, keep the mushroom water
2 small kampong eggs

Braising Stock
About 300~350g water
About 40ml mushroom water
35g Kikkoman Yosenabe sauce
5cm white scallion
2 slices angelica root 当归片
2 cubes rock sugar
a little dark soya sauce for adding colour


Directions
1. Freeze 2 small soya bean cake in their packaging for about 3 to 4 hours, or till totally solidified. Then thaw them in room temperature till totally softened.
I usually will keep a fresh pack of soya bean cakes in the freezer, so I can thaw them any time to cook them.
Cut the thawed-frozen soy bean cake into 8 pieces for each cake. Set aside.

2. Prepare two hard-boiled eggs by steaming. As the eggs I used were smaller in size, I only needed to start the countdown timer at 10 minutes instead of 15 minutes recommended in the recipe.
Peel the eggs and set aside.


3. Pour all the Braising Stock ingredients into the inner pot of a mini rice cooker. Start the cooking process. Do not lock the lid, and stay close to the mini rice cooker before the content boils! 

When the stock starts to boil, add cut soya bean cakes and hard boiled eggs to the stock.

When the content start to boil again, switch the cooking mode to "food warming" mode. Lock the lid after the boiling has subsided. Let the content simmer for about 30 to 60 minutes. Stir the content occasionally to ensure uniform coating of the stock to the soya bean cakes and eggs.
Beginning of the simmering

End of 1-hour simmering
4. Serve the dish warm and garnish with green scallion and coriander leaves 😋😍


This dish became the main dish of my Saturday Meat-less lunch 😀