
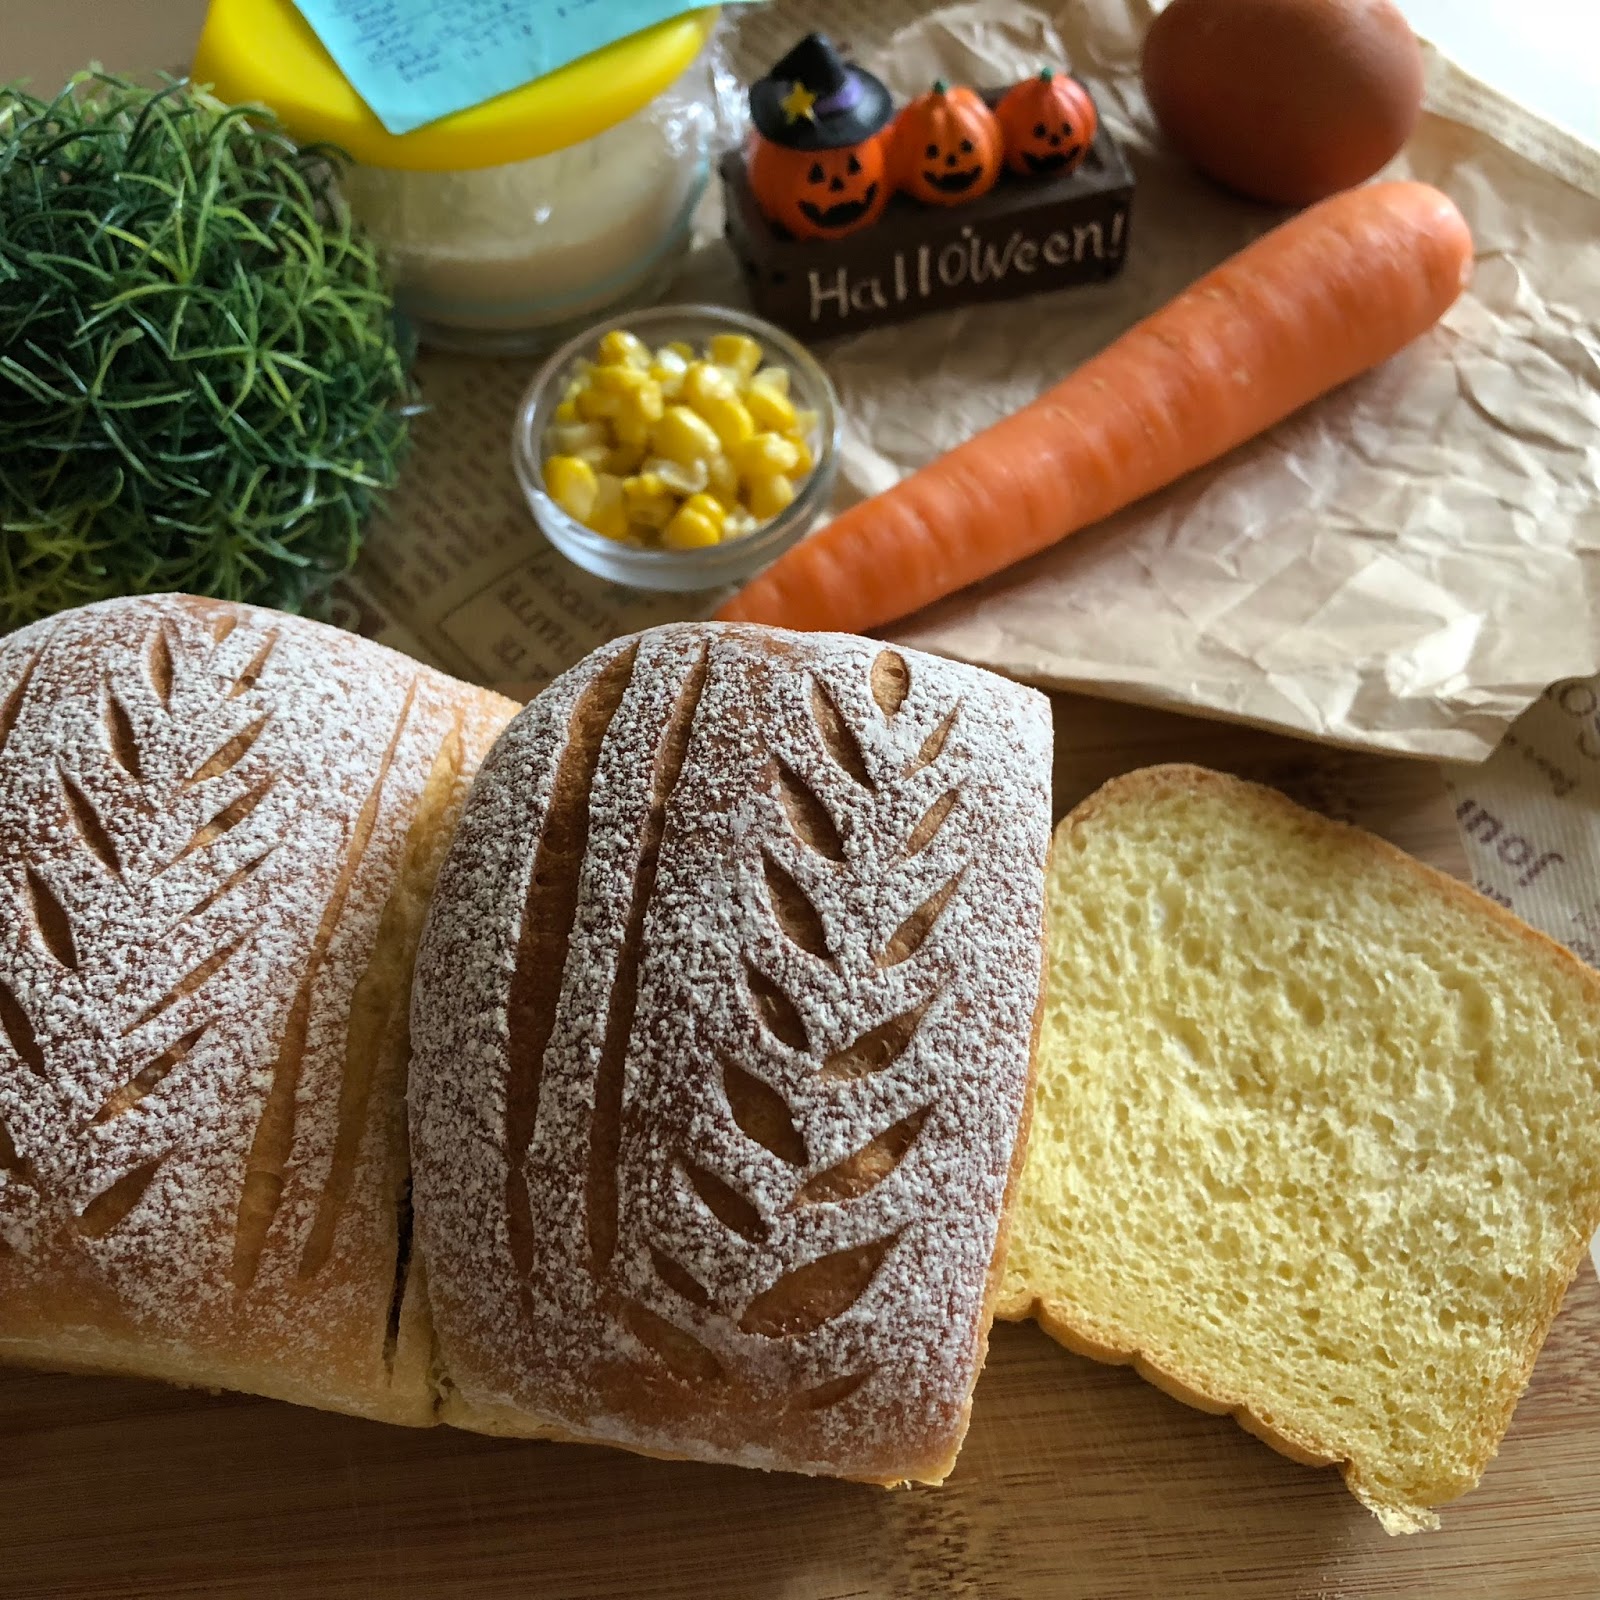
Besides the colour, these ingredients also helped to give this bread a soft texture and nice aroma 😋

Yield: one loaf of bread
Pan size: 26x10x7.5cm
Bread maker: Mayer MMBM12
Bread maker: Mayer MMBM12
Raw dough weight: 570g
20g water
10g active natural yeast *
* Natural yeast can be replaced by 5g bread flour + 5g water + 1/8 tsp instant dry yeast
Click the link for Cultivating natural yeast using grapes
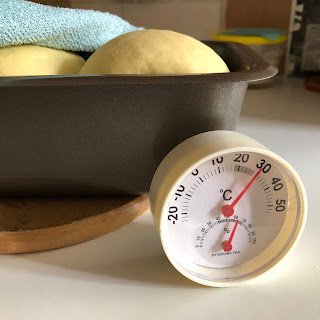
Combine the 3 ingredients and let them undergo fermentation at room temperature, about 28 to 30°C, for about 6 to 8 hours.

Pre-ferment/Natural Yeast/Sourdough
20g bread flour20g water
10g active natural yeast *
* Natural yeast can be replaced by 5g bread flour + 5g water + 1/8 tsp instant dry yeast
Click the link for Cultivating natural yeast using grapes
Combine the 3 ingredients and let them undergo fermentation at room temperature, about 28 to 30°C, for about 6 to 8 hours.

Ingredients
25g steamed corn kernels
10g steamed pumpkin
10g steamed carrot
130g soy milk, lightly sweetened
15g beaten egg
40g raw sugar
3g fine salt
50g pre-ferment from above
230g bread flour, unbleached
20g top/cake flour, unbleached
5g milk powder
1/4 tsp instant dry yeast
To be added at the 10th minute
25g cold unsalted butter


2. Add ingredients, except the butter, into the bread pan of a bread maker following the ingredients' sequence listed. Select "C-11 Ferment Dough" and start the program.
Directions
1. Blend steamed corn kernels, carrot, pumpkin and soy milk into a smoothie using an electric food processor.


Collect a total of 175g corn-milk mixture in a glass beaker. If the corn-milk mixture collected falls below 175g, just top up the difference by soy milk.

When the countdown timer reads "1:20" add the cold butter into the bread pan.
When the countdown timer reads "0:45" and after the kneading blade stops rotating, stop the program manually.

3. Transfer the dough to a plastic bag pre-coated with a little oil. Squeeze out most of the air, and tie a loose knot at the opening end. Double-protect with another plastic bag, place in a mixing bowl, cover with a lid, and refrigerate for 12 to 15 hours, or till the next morning (cold fermentation).

4. In the next morning, invert the dough with the first plastic bag, and thaw for about 1 hour.

5. Turn out the dough onto a floured work top, deflate the dough, and divide it into 3 portions.

Shape the doughs into 3 balls, cover with a lid, and let them rest for about 15 minutes.

6. Take a dough and roll out into about 1 cm thick.

Roll up from the shorter end into a log.

Cover and let the dough rest for 10 minutes.

Roll out the dough again,

and roll up from the shorter end into a roll.

Place the 3 rolls of bread dough into a loaf pan pre-coated with butter. Spray some water over the surface,

cover with a tea towel, and let them proof in room temperature for about 80 to 90 minutes,

or till the dough rises to about 1 cm above the rim of the loaf pan.
7. Start to pre-heat the oven to 180°C for 10 minutes. While waiting, sprinkle some bread flour over the surface of the dough.

And make some scoring using a razor blade. This step is optional.

8. Bake at lower rack of the oven at 180°C for 10 minutes. Lower the oven temperature to 170°C and bake for 20 minutes. Finally, turn off the oven, and let the bread stays in the oven for another 5 minutes.

End of baking.

9. Remove from the oven.


Transfer the bread out of the pan immediately, and allow to cool over a wire rack.

10. Cut the bread after it has completely cooled down. Enjoy 😋


Hi, your breads are so beautiful! May I ask, do you see a difference between Mayer and Whirlpool? Are the recipes you posted interchangeable between the two brands of breadmaker?
ReplyDeleteHi, thank you for liking my breads 😘😘 For kneading function, both BMs are about the same. The main differences are: Mayer BM allows the program to pause manually, while Whirlpool doesn’t permit. Whirlpool has an independent baking function, while Whirlpool has a roasting function which I am yet to try.
DeleteThe recipes for both BM should be interchangeable except must do some adjustments in terms of procedure. For example, Mayer BM allows me to pause the program to shape, then return to the BM to continue to proof and bake. While Whirlpool BM after kneading and first proofing, you need to stop the program and do the shaping followed by proofing. After the 2nd proofing then use the baking function to bake.
In fact, I’ve stopped using the full bread program of both BM for quite some time, so only can recall these 😊
I see. Thank you!
ReplyDelete