Should I name this bread as Cocoa 3 Bread? The cocoa stripes in the pattern of a numerical "3" in the middle of the bread was a mere coincidence. Surprisingly, the pattern was quite symmetrical :D
This aromatic multigrain soya pulp sweet bread has a cocoa centre and a sunflower seeds sprinkled top drizzled with honey. Sound delicious, right? I like to munch on the sweet crust with burst of nutty taste :)
Yield: one loaf of 12x12x14cm
Bread weight: 497g
Raw dough weight: 520g
Breadmaker: Mayer MMBM12Multigrains Soya Pulp
Bread added with multigrains soya pulp not only has the nice aroma of the beans, but also the aroma of pandan that was added during the soya milk making process.
These are the dried beans I used in the soya milk making.

The multigrain soya pulp and the milk.

Bread dough
Ingredients
130g cold fresh milk 冷鲜奶
20g condensed milk 炼乳
35g multigrain soya pulp 五谷豆渣
25g beaten egg 蛋液
35g raw sugar 黄砂糖
1/4 tsp salt 盐
20g cold unsalted butter冷无盐奶油
225g Prima bread flour 百龄麦高筋面粉
25g Prima superfine wholegrain flour 百龄麦超细全麦面粉
3/4 tsp instant dry yeast 即发干酵母
1 tsp cocoa powder 可可粉
Toppings
Some egg wash
2 tbsp sunflower seeds
1/2 tsp honey

Directions
1. Mix cold fresh milk, condensed milk and soya pulp. Keep in the fridge for about 15 minutes to lower the temperature.


2. Mix bread flour and superfine wholegrain flour in a bowl.

3. Pour ingredients, except the cocoa powder, into the bread pan in the sequence as they are listed in the ingredients list.


4. Transfer the bread pan to the bread machine. Select "C-02 Sweet Bread" function, "500g" weight, crust colour, and activate it.


5. When the countdown timer read "1:30" h, a series of beeps can be heard. Pause the program by pressing the "Stop" button.

Take out the dough,


6. Place the dough onto a floured surface. Flatten it with your palm to release the trapped air.


7. Divide the dough into 1/3 and 2/3.

Roll up the 2/3 portion into a ball, cover with a lid and set aside.

8. Add 1 tsp of cocoa powder to the 1/3 portion dough and knead it into a smooth dough.
Cover with a lid and let it rest for about 10 minutes.


9. Roll out the two doughs separately into about a 1cm thick flat dough.


Flip over the plain dough, so the smoother side will be facing out when roll up.

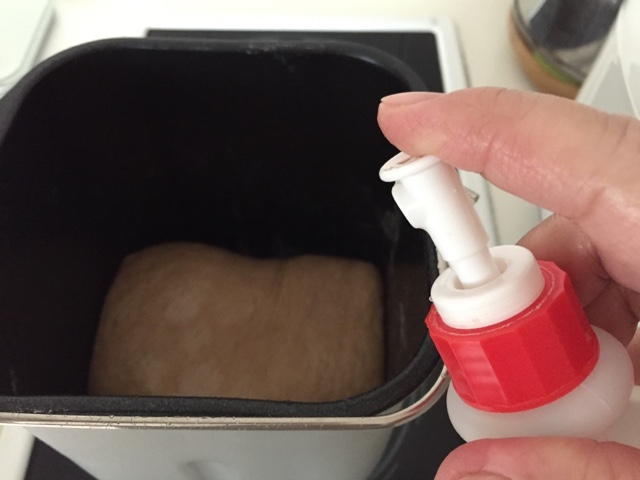
Spray a little water over the dough surface.

Overlap the cocoa dough above the plain dough. Use a rolling pin to roll briefly to ensure good contact between the two layers.

10. Roll up the dough from both the shorter ends towards the centre.
To me, this method of rolling up the dough would better accommodate the turning pin protruding from the base of bread pan.


Flip over.

11. Return the dough to the bread pan, spray some water, and press the "stop/start" button to resume proofing program.


12. When the countdown timer reads "0:52" h, press the "stop/start" buttom to pause the program.
As the decorating process needs a longer time, so I pause the program earlier.

Brush some egg wash over the top.

Arrange sunflower seeds over the surface evenly spread out.

Drizzle a little honey over.
Try to avoid the edge as I don't want the honey to get burnt at the sides.

Press the "stop/start" button to resume the proofing process.The baking process will start at "0:45"h.

13. Cover the window with a sheet of aluminum foil. This is to minimize heat loss through the window.

14. The bread is ready *\(^o^)/*

15. Remove the bread from the bread pan and cool on a wire rack.

16. After the bread has cooled down completely, slice the bread and enjoy :)