
I prefer cookies that have been baked to a little brown to release that nice aroma, and this also ran a risk of cracking the tart shells. I was happy with the result despite a few tarts developed hairline cracks after baking. Most importantly, the pineapple tarts🍍 smelt and tasted wonderful to me 😋😋
I baked the pineapple tarts in two batches with different designs - rose shape, and ball shape decorated with coloured design. Each baker has he or her own design, and these are my preferred pineapple tart designs 😉😜

Crumbly tart shell that melts in your mouth - the type I love😋

Short video clip of the pineapple tarts 😃
Yield: about 64x3cm tarts
Ingredients
200g unsalted butter, softened
40g icing sugar
4g low-sodium salt
1 egg yolk, 18g
3g egg white
1/2 tsp vanilla essence
225g plain flour plus/plain flour
50g bread flour/plain flour plus/plain flour
10g pumpkin powder/custard powder/corn starch
5g custard powder/corn starch
5g milk powder
Filling
450g pineapple paste/jam
Click the link for homemade pineapple paste recipe:


Direction
1. Shape pineapple paste into balls and keep in a glass container till needed (about 7 to 8g each)
Wet your hands slightly can prevent the pineapple paste from sticking to your hands, and make shaping easier. Separate each pineapple ball layers with plastic sheets.
Keep the unused pineapple balls in the fridge.

2. Cream softened butter till light and fluffy.

3. Add in icing sugar and low-sodium salt, mix well.


4. Add in egg yolk, egg white, and vanilla essence. Mix well.


5. Sieve and fold in pumpkin powder, custard powder, and milk powder.


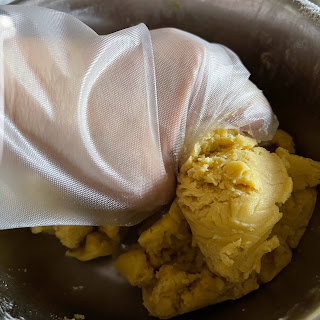
Take a small portion of the dough to check whether the dough is pliable and does not crumble when touch.


8. Split the cookie dough (about 554g) into two portions, about 278g each. Store in two plastic bags, and sealed container in a fridge for about 1 hour. You can also keep them overnight.
By dividing into two portions, you can have the option to bake the second batch in a later date.


9. Take out the cookie dough and pineapple balls about 1 hour before moulding.
Divide the cookie dough into small portions, about 8 to 9 g each. You'll get about 64 portions. Keep the remaining cookie dough for coloured decoration later.
Take a portion of the cookie dough, and flatten using your hands. Place the pineapple ball in the middle of the dough and wrap it up. Slowly push up the dough to close up the opening.
Shape the dough into a ball by rolling it between two palms.

10. You can decorate the dough ball using a cookie pincher to your desired design, or leave it plain.


11. Preheat oven to 200℃ for about 8 to 10 minutes.
Bake in a preheated oven at middle rack. Lower the oven temperature to 180℃ after the pineapple cookie dough is in the oven, and bake for about 15 minutes. Turn off the heating and continue to bake for about 2 to 3 minutes, or till the cookie has slight brown edges at the petals.

12. Let the cookies cool down before storing them in an air tight container :)
The cookie is very soft when hot, so let it cool down before transferring it 😍😋


For a festive and more colourful appearance 💗💛💚
Shape the pineapple dough into balls.


Bake in a preheated oven at middle rack. Lower the oven temperature to 180℃ after the pineapple cookie dough is in the oven, and bake for about 16 minutes. Turn off the heating and continue to bake for about 2 minutes, or till the cookie has a slight tanned crust.


Let the cookies cool down before storing them in an air tight container :)
The cookie is very soft when hot, so let it cool down before transferring it 😍😋
No comments:
Post a Comment
I love seeing your comment and sharing it with other readers. Your comment would be published after moderation. Thank you :)