Steamed vanilla cake is an easy to prepare cake which can be "transformed" into other flavour cake simply by adding creams, spreads, or sliced fruits to it. The cake is soft, moist and spongy. In order to get a flat-top cake, the warm batter is steamed at medium to low temperature. A pot with a glass lid is an advantage as you can keep a close watch over the rising cake. Be careful not to over-steam the cake which may cause it to shrink excessively after cooling down.
This is a low-fat recipe as only 10g of oil has been added :)
Vanilla Sponge Cake
All ingredients in room temperature
Ingredient A
55g fresh milk
10g condensed milk
10g rice bran/vegatable oil
1/2 tsp vanilla extract
Ingredients B
70g top/cake flour
Ingredient C
2 egg whites
50g fine sugar
2 egg yolks
Directions
1. Line a 14 cm round cake tin with parchment paper.

2. Mix ingredient A together and set aside.

You can keep warm the mixture in a rice cooker. It helps to warm up the cold ingredients faster as compare to leaving in room temperature.

3. Loosen ingredient B using a hand whisk. Set aside.

4. In a clean and dry mixing bowl, beat egg white of ingredient C till frothy.

Slowly add in the fine sugar, in 3 batches. Continue to beat till the whisks can draw up a long and narrow meringue.


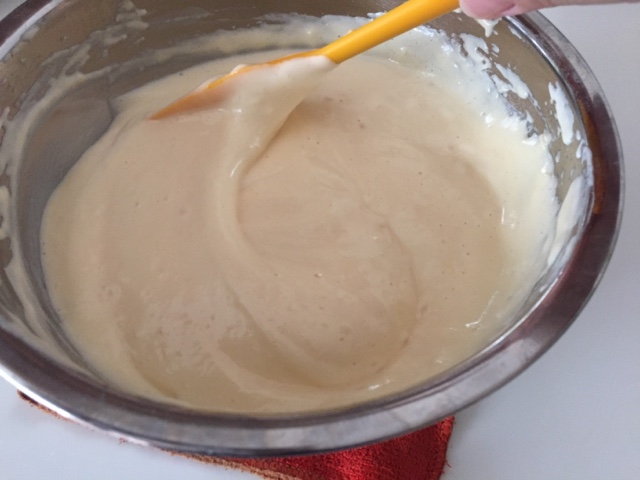
5. Beat in the egg yolks, one at a time. Continue to beat till the batter can hold its shape for at least 5 seconds.


6. Fold in ingredient A and B in alternating sequence. Start with flour and end with flour.


7. Give the batter a thorough mixing using a spatula. Ensure no liquid ingredients sink at the bottom.
Do not over mix.

8. Pour the batter into the lined cake pan.


Steam at medium heat for 8 to 12 minutes. The duration will depend on the batter temperature. This is also the duration for the centre of cake to rise from concave to plateau.
Reduce the heat to low and continue to steam for about 8 to 10 minutes, or till an inserted cake tester drew out clean.
Keep the temperature low, so the cake will not rise too high and form a high dome top, not very nice for frosting.
Do not open the lid while the cake is steaming! The cake will collapse if this happens.
Do not open the lid while the cake is steaming! The cake will collapse if this happens.

When the top of the batter starts to flatten from concave, it is time to lower the heat.
When the batter rises, it will starts to rise from the side, and gradually move towards the centre. So the centre of the cake is the last to be inflated.
When the batter rises, it will starts to rise from the side, and gradually move towards the centre. So the centre of the cake is the last to be inflated.

End of steaming.


Test the cake with a cake tester while the cake is still in the pot.
Picture for demonstration purpose only.
Picture for demonstration purpose only.

Drop the hot cake with the pan 3 times from a height of about 10cm. This is to prevent the cake from over shrinking.

9. Allow the cake to cool in the pan for about 5 minutes, before transferring out.
Let the cake cools down completely on a wire rack.

10. After the cake has completely cooled down, cover with an inverted container and keep in the fridge for about 1/2 an hour if you are applying cream and fresh fruit.


11. Trim the parchment paper and divide the cake into 3 portions.


12. Spread whipped cream and lay sliced strawberries in between layers. Cover and refrigerate for about 1 hour before cutting.


13. Slice the cake and enjoy it cold :)


So sorry I'm not good at whipping cream, please pardon me of my crude method of whipping the cream.
Whipped cream
Ingredients
60g cold whipping cream
10g icing sugar
Directions
1. Keep a metal bowl, a damp cloth and a hand whisk in the freezer for about 1/2 to and hour. You need cold equipment to whip up the cream.
2. Pour whipping cream into a cold metal bowl and place the cold cloth under the bowl.
Our warm climate posed difficulty in whipping up the cream, so you may have to return the whole set up to the fridge for a few minutes before continuing.

3. Beat the cream till it becomes frothy. Add in the icing sugar and continue to whip till the cream can cling to the ball of the whisk.
Do not over whip the cream as it would segregate into butter milk and butter.


4. Keep the cream in the fridge for about about 30 minutes before applying on cake.