Monday, 10 March 2014

Honey Chocolate Cupcakes 蜂蜜巧克力杯子蛋糕


I prefer cupcakes with a compact texture and low in fat. This is a recipe which involves only 2 eggs and 20g butter, and without baking powder being added. The condensed milk gives these cupcakes a rich milk aroma. Nice soft texture cupcake awaits ...

Yield: 10 cupcakes 杯子蛋糕

Ingredients
2 eggs, separated, room temperature 
50g fine sugar

50g milk
10g condensed milk
10g honey
1/2 tsp vanilla essence
20g unsalted butter

70g top flour

1 tsp cocoa powder
2~3 tsp hot water

2 粒蛋,蛋白蛋黄分开,室温
50g 细糖

50g 牛奶
10g 炼乳
10g 蜂蜜
1/2 小匙 香草精
20g 无盐奶油

70g 低筋面粉

1 小匙 可可粉
2~3小匙 热水

Directions
1. Line 10 cupcake moulds with cupcake papers. Set aside.
将杯子蛋糕模铺上烘烤纸。

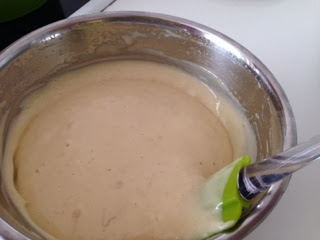
2. Pour milk, condensed milk, honey, vanilla essence and butter in a bowl. Place them into a rice cooker to keep warm for about 6~8 minutes. And let the content sits in the rice cooker for another 10 minutes, or till the butter melted.
Let the content cool to our room temperatures before adding to the batter.
将牛奶、炼乳、蜂蜜、香草精和奶油倒入一碗中。将材料放进电饭锅保温6~8分钟烘,再让材料继续留在锅中10分钟,直至奶油溶化。
在使用前,需让材料回复室温。


3. Mix cocoa powder with hot water into a thick paste.
把可可粉和热水混合。

4. Whip egg white in a clean mixing bowl at medium high speed using an electric mixer till frothy (about 1/2 minute).
在一干净的钢盆打入蛋白,用电动打蛋器,以中高速略打发蛋白,大约1/2分钟。

5. Reduce the mixer speed to low and add in the fine sugar. When all the sugar is well blended with egg white, resume the mixer speed to high. Stop the mixer when the egg white can form a dipped tip when lifted up.
减速后加入细糖,等糖和蛋白混合后,增速到高速,将蛋白和糖打到当提起打蛋器时,蛋白尖端会略弯曲。


6. Add in the egg yolk, one at a time.
逐一将蛋黄加入。

7. Sieve in the flour in three lots. Mix using the whisks detached from the mixer. Stop mixing when no flour can be seen.
将面粉分三次筛入蛋糊中,用手操作打蛋器,将面粉与蛋糊混合。一旦不见面粉,就可停止操作。


8. Stir the milk mixture from (2) before pouring into the batter to mix. First mix with the whisks, then use a spatula to scrap the side and bottom of the mixing bowl.
将(2)的牛奶混合物搅匀,再加入面糊中。先用打蛋器混合,再以刮刀混均。


9. Transfer about 1/4 of the batter to mix with the chocolate paste from (3).
将1/4的面糊与(3)的可可糊混合。

10. Pour the batters into the lined cupcake moulds, alternating between vanilla and chocolate batters.
将原蛋糕糊与可可蛋糕糊交替倒入杯子蛋糕模中。


11. Preheat the oven to 170 degree Celsius.
预热烤箱到170度C。

12. Pump about 5 to 6 sprays of water over the top of the batter. This is to prevent the top of the cake from over-baking too fast.
在将蛋糕糊送入烤箱前,向蛋糕表面喷5、6次水,这可避免蛋糕表面太快变焦。

13. Bake the cupcake in the oven for about 17 to 18 minutes till the top turn golden.
让蛋糕在烤箱中烤17~18分钟,直至表面呈金黄色。

14. Immediately remove the cupcake from the moulds after leaving the oven.
Allow the cupcakes to cool in a wire rack.
蛋糕离开烤箱后,立即脱模,放架上降温。

15. Enjoy with a cup of tea or coffee :)
可与咖啡或茶一起享用 :)

Thursday, 6 March 2014

Baked Rice Flour Cupcake


This is a feathery light gluten-free cake baked using rice flour instead of the usual wheat flour. Due to the small in quantity, the recipe can be baked in a oven toaster which has temperature control.

Yield: 7 cupcakes 

Ingredients
1 egg
1 yolk
25g fine sugar
10g milk
10g honey
20g unsalted butter 
35g rice flour

Direction
1. Place milk, honey, and butter in a bowl.

2. Keep warm the ingredients from (1) and eggs, in the rice cooker for 6 minutes, then let the ingredients sit in the rice cooker for another 10 minutes, or till the butter melts.


3. Warm some water till about 50 degree Celsius.

4. Put 1 egg and 1 yolk into a mixing bowl, then place on top of the warm water

5. Beat egg till frothy using an electric mixer, add in sugar. Beat for about 9 minutes, till the batter reaches ribbon stage.


6. Sieve in the rice flour and mix well,


7. Stir the honey mixture from (2) before adding to the batter. First mix using the whisks, then use a spatula to scrap the side and bottom of the mixing bowl.


8. Pour the batter into cupcake mould lined with paper casing.

9. Preheat the oven toaster to 170 degree Celsius.

10. Pump about 5 sprays of water over the surface of the batter. This helps to prevent the top of the cake from getting brown too fast during baking.

11. Bake the cake at 170 degree Celsius for about 16 to 17 minutes, or till the cupcakes turns golden.


12. Remove the cake moulds from the cupcakes immediately. Allow the cupcakes to cool on a wire rack.


13. Serve and enjoy :)

Monday, 3 March 2014

Last-Banana Steamed Cake 香蕉蒸蛋糕


When our kitchen is left with a few over-ripen bananas, it's a common practice to bake a banana cake. However, a recipe which involves a small quantity of just one banana is rare, or almost none. That's the reason why I decided to 'concoct' a new recipe which involves only one banana and 10g of butter. It's a surprise to see the cake rose and sunk, but still remained soft when cut.

Yield: one 14 cm round cake

Ingredients
2 eggs, separated, room temperature
50g fine sugar

60~70g ripen banana, mashed
30g milk
10g unsalted butter
1/4 tsp vanilla essence

75g top flour
1/4 tsp baking powder
1/8 tsp baking soda 

2粒 蛋,蛋白蛋黄分开,室温
50g 细糖

60~70g 熟透香蕉,压成泥
30g 牛奶
10g 奶油
1/4 小匙 香草精

75g 低筋面粉
1/4 小匙 泡打粉
1/8 小匙 小苏打粉

Directions
1. Line a 14 cm round cake tin with parchment paper.
将一个14cm圆蛋糕模铺上防沾烘烤纸。

2. Mashed banana in a bowl. Cover and set aside.
将香蕉压成泥。盖上盖子放一旁。


3. Place milk, butter and vanilla essence in a bowl. Keep warm the mixture in a rice cooker for 10 minutes, and let it remains in the rice cooker for another 10 minutes to melt the butter. 
Allow the mixture to cool to room temperature before use. 
将牛奶、奶油和香草精放到电饭锅保温10分钟,再留在锅中10分钟,直至奶油溶化。用前需退温至室温。


4. Mix flour, baking powder and baking soda in a bowl. Set aside.
将面粉、泡打粉和小苏打粉混均在一起。待用。

5. Beat egg white in a clean mixing bowl for about 1/2 minute at medium high speed till frothy. Lower the mixer speed to add in the sugar.
将蛋白打在一个干净搅拌盆,以中高速打1/2分钟,直到蛋白发泡。降低速度,加入细糖。

When all sugar has been well incorporated into the egg white, return the mixer speed to medium high. Beat the egg white till it can form a curve-down tip when lifted up.
当糖与蛋白结合,调高速度至中高速,继续将蛋白打到,当提起打蛋器时,蛋白尾端会弯曲。

6. Add in egg yolk, one at a time to the egg white.
将蛋黄逐一加入。

7.  Mix in the mashed banana till the batter become light and fluffy.
加入香蕉泥,再与蛋糊打至蓬松。


8. Sieve in the flour mixture from (4), and stir to mix. Stop mixing when no flour can be seen. Over mixing will result in a tougher cake.
筛入(4)的面粉混合料,并用打蛋器用手搅合。不见粉料就可立即停止搅拌,避免过度搅拌。

9. Add in the milk mixture from (3). 
将(3)的牛奶混合料加入。
First mix with a pair of whisk,
先用打蛋器搅拌,
then use a spatula to scrap the side and bottom, to ensure no unmixed flour or liquid settle there.
再用刮刀将边缘和底部的面粉或牛奶,刮出混均。

10. Pour the batter into the lined cake tin. Tap the cake tin to remove trapped air from the batter.
将蛋糕糊倒入铺上烤纸的蛋糕模。敲打蛋糕模以震出汽泡。

11. Prepare a pot with some boiling water and a steamer rack.
烧开一些水于蒸锅中,并置入蒸架。

12. Steam the cake batter at medium high heat for 10 minutes, and medium low heat for about 9 to 10 minutes.
以中高火蒸10分钟、再调低至中小火,继续蒸9~10分钟。

  
13. Allow the cake to cool in the cake tin for 5 minutes before removing the tin to cool completely.
让蛋糕在模中停留5分钟,再脱模。


14. Cut the cake and serve :)
切片享用 :)