

However, I tweak the yudane method by using hot water instead of boiling water. Our warm environment with daily average day temperature ranging between 27 to 31℃, should be fine to use hot water of around 90 to 80℃ to prepare a small amount of yudane dough😉 But, I needed to warm up the container or cup used in preparing the yudane dough before adding the flour and hot water. This is to minimize heat loss to the surrounding - applying the science concept I learned during school days, hehe 😆


2. Pour away the hot water, and pour the bread flour into the cup. Dig a hole in the middle of the flour.

Pour 14g (20g) of hot water to the flour.


The dough will be about 50℃ after mixing.

3. Wrap the yudane dough using cling wrap.
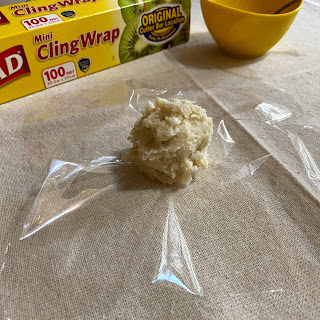
Let the yudane dough cool down to room temperature before cooling in the fridge. The usual practice is to keep the yudane dough in the fridge overnight, but I only kept it in the fridge chiller for about 20 to 30 minutes, or till the yudane dough was cold. The yudane dough has a better texture after overnight chilling.

If you want to keep the yudane dough overnight, keep it in a small plastic container before storing in the fridge.


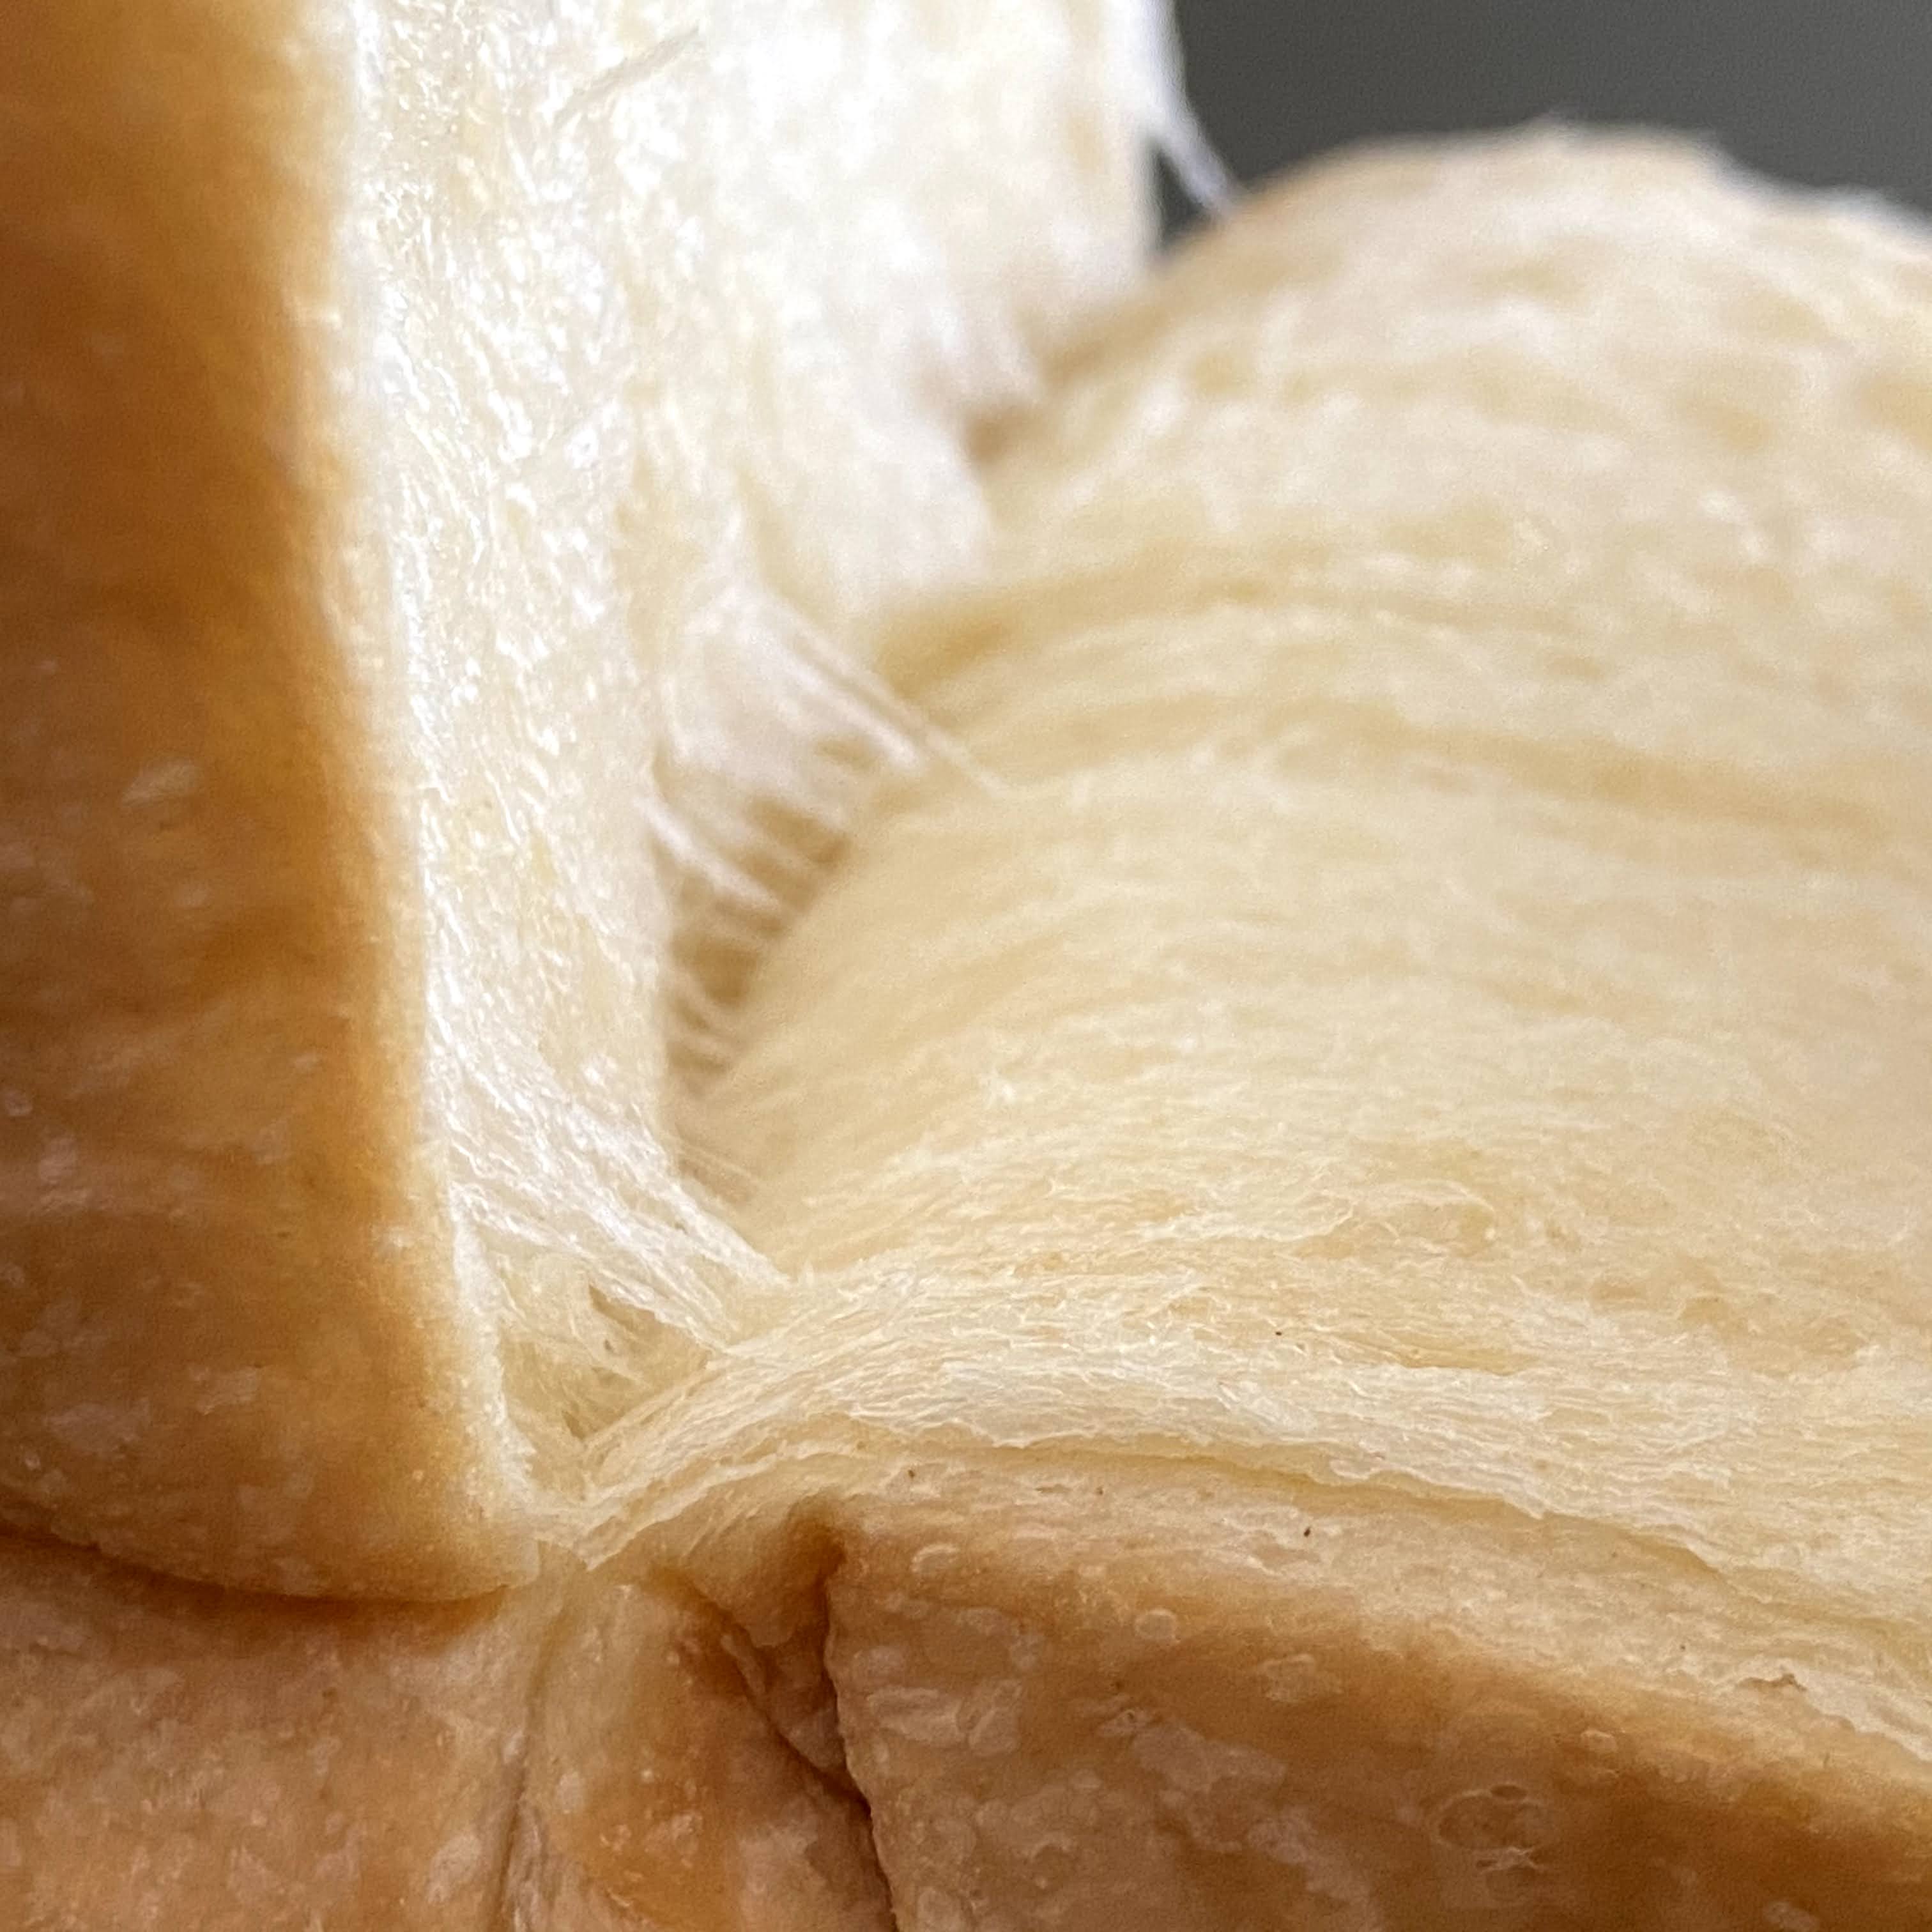
I love the bread prepared using the yudane method - heavy, dense, and yet spongy and moist 😍

Update: 27 Feb 2021
Added more yudane dough and increase the proportion of superfine wholegrain flour in my second attempt. The bread was softer and can last longer😍 The new quantities have been updated in the recipe below in ( ).


Update: 10 March 2021
The bread could last for 4 days and still soft, though a bit dry on the surface 😀
Yield: one loaf
Pan size: 21x13x10 cm 1.5L
Raw dough weight: 623g (638g)
Baking temperature: Preheat oven to 190℃, lower rack, bake at 180℃ for 15 minutes, reduce to 170℃ for 15 minutes, turn off oven and continue to bake for 5 minutes.
Yudane dough
Ingredients
15g (21g) bread flour, room temperature
14g* (20g) very hot water, 80 to 90℃
* I prefer to reduce the standard water volume by 1g, to make the dough less sticky.
Directions
1. Pour some hot water to a silicone cup or any non-metal cup, and let it warm up the cup for about 1 to 2 minutes.
Using non-metal cup helps to store some heat in the cup, and minimise heat loss to the surrounding during mixing later.


Pause for about 15 seconds before mixing the ingredients into a sticky dough.


Milk Bread Dough
Ingredient A
250g (230g) bread flour
30g (50g) superfine wholegrain flour/bread flour
40g raw sugar
2g instant dry yeast
Ingredient B
50g natural yeast/sourdough, 100% hydration
28g (40g) yudane dough from above, cold
10g evaporated milk/milk
160g milk, cold
15g beaten egg
15g (20g) water, cold, to be added depending on dough condition
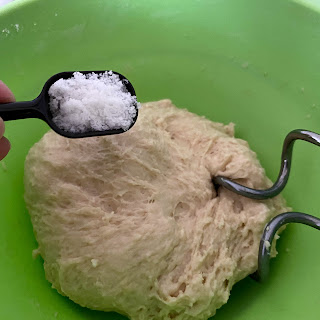
3g low-sodium salt
30g unsalted butter, softened
some milk as milk wash before baking
butter-honey wash after baking
(melt 1~2g unsalted butter + 1 drop honey + tiny amount of salt)


Directions
You can knead the dough till window pane using your prefer method.
1. Mix Ingredient A in a mixing bowl.

Mix the ingredients into a ball using a spoon stir in one direction. Cover the dough and let it rest for about 20 minutes.

3. Use an electric hand mixer fitted with a pair of dough hooks to knead the dough till smoother., about 2 minutes at low speed. Add in the salt, and continue to knead for about 1 minute at low speed.
Knead in the softened butter till no trace of butter can be seen.

Perform about 500 sets of "slaps and folds" or till the dough reaching window pane stage. I took about 15 to 20 minutes to complete them.
4. Shape the dough into a ball, spray some water over, cover with a lid, and let the dough undergo first proofing for about 75 minutes, or till double in size.

5. Invert the dough over a floured worktop, deflate and divide into 2 portions. Shape into two balls, cover, and let them rest for 15 minutes.

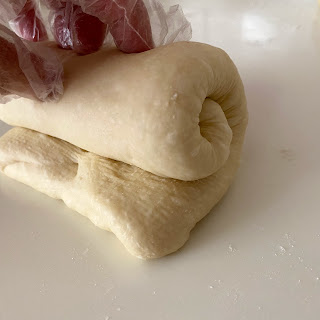
6. Roll out a dough to about 1 cm thick.

Flip over and fold in the two wings towards the middle.

Roll flat the dough to a more even thickness

Roll up the dough into a swiss-roll shape.

Place the shaped dough into the bread pan coated with butter. Spray some water over, cover with a tea cloth, and let them proof for about 60 minutes, or reaching the rim of the pan.

7. Preheat the oven to 190℃ for about 10 minutes. While waiting, brush a thin coat of milk over the dough.

Bake at lower rack, reduce the temperature to 180℃ after closing the oven door, and bake for 15 minutes. Further reduce to 170℃ for about 14 minutes. Turn off the oven, and continue to bake for about 3 to 5 minutes.


8. Un-mould the bread soon after leaving the oven.

Brush butter-honey wash over the hot crust.
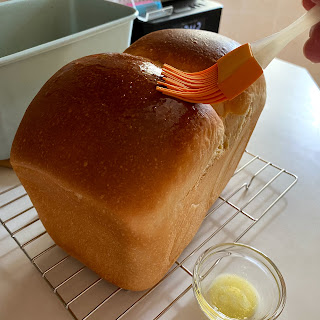
Let the bread cool down to room temperature.

9. Slice and enjoy 😋


 |
| Kneading dough is like a mild workout that drives up your heart beats. Burn calories but not the fuel - a slogan taken from a rental bicycle |
 |
| The slaps and folds |
 |
| Reaching window pane |
4. Shape the dough into a ball, spray some water over, cover with a lid, and let the dough undergo first proofing for about 75 minutes, or till double in size.

 |
| 75 minutes later |
5. Invert the dough over a floured worktop, deflate and divide into 2 portions. Shape into two balls, cover, and let them rest for 15 minutes.


 |
| End of 60-minute proofing. |
7. Preheat the oven to 190℃ for about 10 minutes. While waiting, brush a thin coat of milk over the dough.


While waiting for the bread to bake through, melt the butter-honey wash in a rice cooker using "Keep Warm" mode for about two minutes, or till the butter melted.


 |
| tiny grains of salt over the shiny crust |
9. Slice and enjoy 😋


Wow, it is beautiful!
ReplyDelete