Monday, 6 April 2015

Corn Custard Bun 玉米奶油馅面包


Yield: 10 x 7cm diameter round buns
I: powerful food processor 
Breadmaker: Whirlpool BM1000 
Raw dough weight: 424g

An all- corn bun with corn custard filling. The creamy custard tasted like corn ice cream with crunchy corn kernels. This bread is conveniently kneaded by breadmaker and baked in an oven :)


Custard filling
Ingredients

140g fresh milk 牛奶
30g whipping cream
15g top flour 低筋面粉
5g corn flour 玉米粉
1 egg, beaten 蛋液
10g unsalted butter 无盐奶油
1/2 tsp vanilla extract 香草精
30g fine sugar 细糖
40g steamed corn kernels 蒸玉米粒 

Direction
1.  Mix fresh milk, whipping cream, top flour and corn flour in a bowl.


2. Pour beaten egg into (1) and blend well. Strain the mixture through a sieve and heat up the mixture in low heat till thicken. Stir regularly using a hand whisk.


3. Remove the bowl of custard from the stove. Add in the butter, vanilla extract, and fine sugar. Mix well.


4. Collect 40g of the custard for "doodling" the buns later. 
Add 40g of steamed corn kernels to the remaining custard as filling later.
Chop 1/2 of the steamed corn kernels into fine bits. This helps the corns to infuse the flavour into the custard better.


5. Cover both bowls of custard by food wrap. Set aside.


Bread dough
Ingredients
72g whole milk 全脂牛奶
62g steamed corn kernels 蒸玉米粒
15g condensed milk 炼乳
30g unsalted butter 无盐奶油

30g raw sugar 黄砂糖
1/4 tsp salt 盐
25g beaten egg 蛋液
185g bread flour 高筋面粉
10g top flour 低筋面粉
3/4 tsp instant dry yeast 即发酵母粉

Some beaten egg as egg wash

Direction
1. Collect corn kernels from cob and steamed at high heat for 12 minutes. Or, steam in a rice cooker for 8 minutes, and let it stay in the rice cooker for 5 minutes.
You may want to add a pandan leaf to the corn while steaming to give it a sweet scent.


Allow the steamed corn kernels to cool down slightly before use.

2. Blend 62g of corn kernels with 72g milk in a food processor till creamy.
You may add 1/2 blade of pandan leaf to blend for additonal sweet scent.


3. Add condensed milk and butter  to corn milk in (2). Warm up in a rice cooker for 8 minutes to melt the butter. 


4. Pour corn milk mixture into the bread pan.

5. Add in beaten egg.

6. Add in sugar and salt.

7. Pour in bread flour and cake flour.

8. Dig a hole and pour in the instant dry yeast.

9. Place the bread pan into the bread machine.

10. Select "8" Dough Kneading function; and press "Start".

11. The dough is ready.


12. Turn out the dough onto a floured surface. Flatten it with your palm to release the trapped air.


13. Divide the dough into 10 equal portions, about 42g each.

14. Roll up the small dough, pull down the sides several times to stretch out the dough surface, and seal at the bottom. Lightly coat with some flour and place in a plate, cover with a lid, to rest for 15 minutes.


15. Roll out the dough with the centre thicker than the edge. Flip the dough over so the smoother face will be facing out when wrapped.

Scoop a heap tsp of custard, about 20g, onto the dough, wrap and seal by pinching.


Wrap your palm around the dough and let it roll within your grip, to shape it.

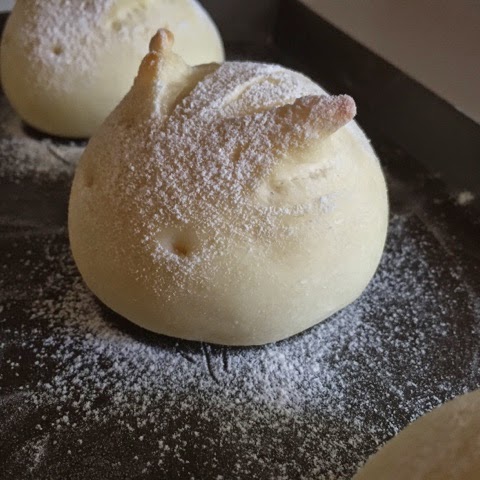
16. Place the dough onto a non-stick baking sheet, spray some water over, and transfer to a closed oven to proof for about 30 minutes.


17. Transfer the remaining 40g of custard to a piping bag fixed with 0.5cm nozzle for "doodling" on the buns at the end.

18. After the final proofing, remove the dough from the oven. Preheat the oven to 170 degree Celsius for about 10 minutes.
Apply egg wash over the dough, then pipe the custard to "doodle" over the surface.


19. Bake in the oven for 20 to 22 minutes,or till the top becomes golden.


21. Allow the buns to cool down over a wire rack. Enjoy :)


Friday, 3 April 2015

Sweet Mango Tangy Mousse


If you have no patience to make ice cream on a hot day, this easy to prepare mousse is a good alternative. The slight tangy taste reduce the richness of the cream, and the sweet mango purée and chunks add good flavour to the cool dessert. This easy to prepare dessert can be ready within an hour :)

Yield: 4 x 200ml pudding bottles

Ingredients
300ml 35% thickened cream
30g icing sugar
1 tbsp lime juice 
1 medium size ripen mango

Directions
1. Keep a damp kitchen cloth, a deep metal mixing bowl, and a pair of whisks in the freezer for 1/2 an hour.
Keeping the equipment cold is essential in whipping up the cream in our hot climate.


2. Cut some of the mango in chunks and use a spoon to scoop out the rest.

3. Purée those scooped out mango using a blender.
Keep the mango purée and chunks in a fridge till needed.

4. Collect 1 tbsp of juice from a large lime. Set aside.

5. Remove the cooled equipment from the freezer. Pour thickened cream and icing sugar into the cold mixing bowl standing on the cold damp tablecloth. 

6. Fix the cool whisks to the hand mixer and start whipping the mixture at high speed for about 2.5 to 3 minutes.
Do not over whip the cream to prevent it from segregating into butter and water.

7. Pour in the lime juice and mix briefly.


8. Scoop the whipped cream, mango purée and chunks into 4 cooled pudding bottle in alternate layers.
You can keep the pudding bottles in the fridge earlier before use.

9. Run a thin butter knife in circles to create a swirl pattern.

10. The mango in tangy mousse is ready. Serve immediately:)


Thursday, 2 April 2015

Bunny Sweet Bun 兔子甜面包


I wanted to shape my sweet milk buns into bunny shape. But, oops, they looked more like chinchilla than rabbit. I continue to call them bunny buns hoping one day my buns will really look like rabbits :)

Yield: 9 pieces of 5cm buns
Appliances: Whirlpool BM1000
Raw bread weight: ~ 413 g

Ingredients
120g whole milk 全脂牛奶
15g condensed milk 炼乳
30g unsalted butter 无盐奶油

30g fine sugar 细糖
1/4 tsp salt 盐

20g beaten egg 蛋液

180g bread  flour 高筋面粉
20g rice/top flour 粘米粉/低筋面粉

1/2 tsp instant dry yeast 即发干酵母

Some bread flour for sprinkling

Direction 
1. Pour fresh milk, condensed milk and unsalted butter in a heat resistant bowl.
Keep warm in a rice cooker for about 10 minutes.
This step is optional. I prefer to work with warm ingredients :)


2. Pour the warm ingredients from (1) into the bread pan.

3. Add in the sugar and salt.

4. Pour in the beaten egg.

5. Add in the bread and rice/top flour.

6. Dig a hole and pour in the instant dry yeast.

7. Place the bread pan into the bread maker. Select "dough" function and start the process.


8. The dough is ready.

9. Sprinkle some bread flour over both the work top and dough before inverting it out.

10. Flatten the dough to remove the trapped air. Divide the dough into 9 equal portions, each about 46g.
The dough maybe quite sticky, so wear a pair of disposable gloves to handle it.


11. Shape the doughs into 9 balls by pull down the sides and seal at the base. 

12. Shape the dough into a slightly oval shape and place on a floured non-stick baking pan.


13. Use a bamboo stick (coated with flour) to poke two holes as "eyes" of the bunny. Spray some water and let them rest in a closed oven for about 30 minutes.


14. After the 30 minutes rest, remove the tray of doughs from the oven, and start to preheat the oven to 160 degree Celsius.

15. Use a pair of kitchen scissors to snip out two ears of the bunny. You can snip a few times to get longer ears


16. Pull back the ear slightly to extend the length. This also helps to prevent the ears from shrinking during baking.

17. Use the bamboo stick to help you shape out the head of the bunny by tucking in the bottom.


18. Sprinkle some bread flour over the  dough using s small sieve.

19. Bake the dough in middle rack, at 160 degree Celsius for 10 minutes, and reduce the temperature to 150 degree Celsius and continue to bake for about 8 minutes, or till the ears turn slightly brown.


20. Allow the bunny buns to cool down in room temperature before serving.


This was my first bake, the ears were shorter ><