Friday, 18 October 2013

Butter Buns


Yield: one 8 inch ring loaf

Ingredients
200g bread flour
1/2 tsp instant dry yeast
2 egg yolks (about 35g)
30g fine sugar
1/8 tsp salt
95g milk
35g unsalted butter, softened

Beaten egg as egg wash

Direction
1. Mix all the dry ingredients together. Add in 65g of milk to the dry ingredients. The remaining 30g of milk to be added gradually to the mixture while kneading.
(Pic 1 to 3)

2. When the ingredients in (1) have been kneaded into a smooth dough, add in the softened butter. 
(Pic 4)

3. Continue to knead until the dough can be stretched into a window pane.
(Pic 5 to 7)

4. Place the dough in a container lightly coated with butter. Spray a thin mist of water over the dough, then cover with a lid or food wrap. Allow the dough to proof for about 1 hour, or till it's size doubles.
(Pic 8 to 9)

5. After the proofing, sprinkle some flour over the surface of the dough. Invert out the dough to a surface dust with flour.
(Pic 9)

6. Compress the dough to release all the trapped air. Divide the dough into 9 equal portions.
(Pic 11 and 12)

7. Shape the dough into 9 balls and set aside.
(Pic 13 to 16)


8. Coat an 8 inch tube mould with a thin coat of butter. Then sprinkle a thin layer of flour over it.
(Pic 17 to 18).

9. Place the dough into the tube mould.
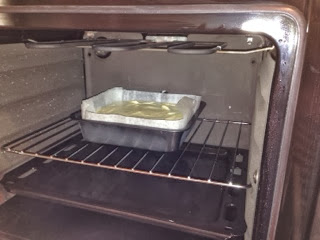
Spray a thin mist of water over the dough and allow the dough to proof inside an oven for 40 to 50 minutes, or till the dough increases to 1.5 time in size.
(Pic 19 to 23)

10. During the final 10 minutes of proofing, remove the dough from the oven. Preheat the oven to 190 degree Celsius.

11. Apply a thin coat of egg wash over the surface of the dough.
(Pic 24 to 26)

12. Bake the dough in a preheated oven with temperature reduced to 170 degree Celsius for about 20 minutes, or till the surface becomes golden.
(Pic 27)

13. When the loaf has been baked, transfer it to a wire rack to cool.
(Pic 28)


Recipe adapted from 


Thursday, 17 October 2013

Soya Ogura Cake 豆浆相思蛋糕


A soft and moist sponge cake using steam-bake method. You can add lemon or orange skin zest to enhance the flavour of the cake.
一个湿润绵密的海绵蛋糕,吃起来有如乳酪蛋糕般,特别是加入了柠檬削。

Yield: 18 x18 cm square cake 方形蛋糕

Ingredients
5 egg whites 蛋白
70g fine sugar 细糖
1/4 tsp cream of tartar 酒石/嗒嗒粉

5 yolks 蛋黄
1 egg 全蛋
65 g sweetened soy milk 甜豆浆
40g corn oil 玉米油
65g top flour 低筋面粉
1/8 tsp salt 盐
1/2 tsp lemon skin zest 柠檬皮削

Direction
1. Line a 18x18cm cake tin with parchment paper.
将一个18x18 cm 的方形蛋糕模铺上烘烤纸。

2. Place egg white in a clean and grease-free mixing bowl. Beat egg white using an electric mixer at high speed till the egg whites becomes frothy.
将蛋白放入一个干净无油的钢盆,用电动打蛋器高速打发。

3. Mix cream of tartar and fine sugar in a bowl. Add the sugar mixture to the egg white in 3 lots and mix in low speed.
Increase the mixer's speed to high and beat egg white till soft peaks formed (the tips of the egg white slightly bent). Set aside.
把嗒嗒粉和糖混合,分三次,以低速加入蛋白中混均后,再以高速打至湿性发泡(当提起打蛋器,竖立的蛋白尖端会微下弯)。


4. In a separate bowl, beat egg yolks, 1 egg, and corn oil at high speed till foamy (about 2 minutes). Then add in soya milk and beat for about 1 minute at medium speed.
取另一大盆,将蛋黄、全蛋和玉米油以高速打至松发(大概2分钟)。再加入豆浆,以中速打一分钟。


5. Add salt to flour. Loosen the flour and salt using a hand whisk. Blend the flour mixture and lemon zest into the yolk mixture in (4) till smooth using the whisks detached from the hand mixer. 
Do not over mix the batter.
把盐加入面粉中,以打蛋器混松后,与柠檬削,分三次,一起搅入(4)的蛋黄糊中,混至不见粉就行,避免过分搅拌面糊,以影响蛋糕口感。


6. Fold in 1/3 of the egg white into the yolk batter in (5).  Then follow by the remaining 2/3 egg white. Stop mixing when no trace of egg white can be seen.
将1/3的蛋白糊加入(5)的蛋黄糊中混均,再加入其余的蛋白混均。


7. Pour about 400 g of hot water to the baking tray place at the bottom shelf of the oven. Preheat the oven to 160 degree Celsius.
将400g的热水倒入放在底层的托盘,再将烘炉预热至160度C。

8. Pour the batter into the lined cake tin. Give the tin a few light taps to get rid of trapped air bubbles.
将面糊倒入蛋糕模中后,轻敲蛋糕模数下以抖掉隐藏在面糊中的气泡。

9. Place the cake tin into the preheated oven and bake for about 30 minutes at 160 degree Celsius. Then lower the temperature to 140 degree Celsius and bake for 20 minutes. Check with a stick for readiness of the cake.
先以160度C烘30分钟,再以140度烘20分钟。插竹签以检查蛋糕熟度。


10. Remove the cake from the oven. Immediately, invert out the cake from the cake tin onto a wire rack to cool.
把蛋糕从烤箱移出,立即倒扣于网架上摊凉。


12. After the cake has cool down,  cut and serve :)
等蛋糕冷却后就可切块来享用 :)

Monday, 7 October 2013

Rice Cooker Egg Custard Tarts 电饭锅蛋挞


This is a small portion recipe which produces four egg custard tarts using a rice cooker to bake. The quantity is ideal for a family of four for a light tea break.
For quantity more than 4 tarts, baking in an oven would be a better choice. 

Yield: 4 x 5cm round egg tarts

Using 60g egg

Crust Ingredients
30g unsalted butter, softened
15g icing sugar
10g beaten egg
60g all purpose flour
1/8 tsp salt
1/2 tsp lemon zest (optional)

挞皮食材
30g 无盐奶油,室温回软
15g 糖霜
10g 打散的蛋
60g 普通面粉
1/8茶匙 盐
1/2茶匙 柠檬皮碎 (可不加)

Egg filling iingredients
35g beaten egg
20g fine sugar
55g milk
Pinch of salt

蛋馅食材
35g 打散的蛋
20g 细糖
55g 牛奶
少许盐

Directions
1. Strain the lightly beaten egg before use.
1. 将打散的蛋过滤。

2. Loosen the flour and salt by using a hand whisk.
用打蛋器搅散面粉和盐。

3. Cream the softened butter till it becomes pale yellow. Add in the icing sugar and mix well.
将软化的奶油稍微打发,加入糖霜混合。

4. Slowly add in the 10g (about 2.5 tsp) beaten egg and mix well. Followed by lemon zest.
慢慢加入10g的蛋(大概2.5茶匙)混均。再加入柠檬皮碎。


5. Fold in the flour using an spatula till the mixture turns into a soft smooth dough.  Shape the dough into a long cylindrical shape and wrap with food wrap. Let it cool in the fridge for 20 minutes.
加入面粉用搅拌器混合成无粉粒的顺滑面糰。将面糰整成长条状,再用保鲜纸包好,放入冰箱冷藏20分钟。


6. While waiting for the dough to be ready, we can prepare the egg custard filling. Mix  the remaining beaten egg (about 35g) with sugar and milk. Try to stir lightly to minimize air bubble from forming.
在等待面糰的时候,我们可以准备蛋馅。将剩余的蛋液 (大约35g) 和糖跟牛奶混均。避免在搅拌时产生太多气泡。

7. When the dough is ready, divide it into 4 equal portions ( about 30g each) and shape into small balls.
将面糰平分成4份 (各大约30g),滚成圆球。

8. Place a dough in a chicken pie or mini tart mould. Press the dough to follow the wall of the mould to about 3/4 height.
将小面糰放入圆模中,用手指压成碗状,高度约3/4模高。


9. Pour in the egg custard mixture from (6) into the four tart shells. 
将混合好的蛋液倒入挞模中。

10. Place the four raw tarts into the rice cooker. Select the 'Quick Cook' function, or normal rice cooking function, and start the first cooking cycle.
If you are using the 'Cake'function to bake, stop the baking process at around 25 to 30 minutes. The full 45 minutes cycle will over-cook the egg filling.
将生蛋挞放入电饭锅中。选择“快煮”功能或一般煮饭功能,启动功能做第一轮的烹煮。
如果你用“烤蛋糕”功能来烤,只需烘至25~30分钟。一般电子锅的“烤蛋糕”功能需40~45分钟,过长的烘烤时间会让蛋糊干掉。


10. When the rice cooker beeps, indicating the cooking process is over, re-select the 'Quiick Cook' function, and let the egg tarts go through a second round of cooking process.
当烹煮完成,再启动第二轮的烹煮。蛋挞经过两轮的烹煮,效果较佳。

11. When the second cooking process is over, open the rice cooker lid to check whether the tarts are cooked.
当第二轮的烹煮结束,打开锅盖再查看蛋挞是否煮熟。

If the egg tart is cooked, the crust will detach from the mould, and the egg custard is firm.
如果蛋挞已熟,挞皮会离模,蛋馅会凝固。

12. Transfer the egg tarts to a wire rack to cool down for about 10 minutes. Remove the tarts from the mould when it is still warm.
将蛋挞放凉10分钟。当蛋挞还有微温时,将蛋挞脱模。


13. Serve warm:)
乘热享用 :)


Yon can also bake these tarts in a oven set at 170 degree Celsius for about 20 to 25 minutes.

Baked on 6 March 2017