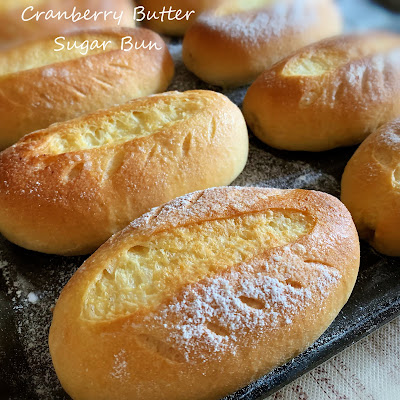
A relatively simple bun to bake, yet with great buttery flavour 😋
Yield: 8 buns
Baking temperature: 200℃ for 5 minutes, 180℃ for 12 to 15 minutes.
Ingredients
200g bread flour10g superfine wholegrain flour/top flour
1/2 tsp pumpkin powder, optional
7g milk powder
2g instant dry yeast
35g raw cane sugar
2g low-sodium fine salt
20g water roux details in Step 1
20g beaten egg
90g cold water
20g rice bran oil/mild flavour vegetable oil
5~10g water, to be added during kneading depending on dough condition
20g dried cranberries, cut into small bits
30g unsalted butter, cold
1~2 tsp icing sugar
Directions
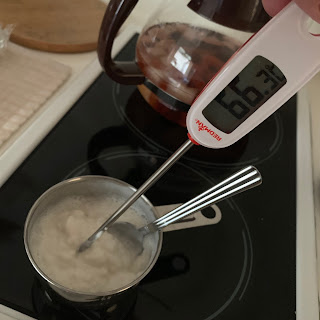
1. Mix 3g bread flour with 2g glutinous rice flour in a heat resistant cup.Pour 25g warm water into the flour mixture, and blend well.
Stir the content over low heat till the content reaches about 65℃, or till thickens into a glossy translucent water roux.
Cover with cling wrap, and cool down before use. Set aside.
 |
| The water roux gave the bread the moist and springy texture |
Knead at Speed 1 to mix all the ingredients together. Increase the Speed to 5 and knead for about 3 minutes. Cover and let the dough rest for about 30 minutes.
Knead at Speed 5 for about 12 to 15 minutes, or till reaching window pane stage.
Slap the dough about 20~30 times into a smooth dough.
3. Transfer the dough to a big mixing bowl greased with a little oil. Cover with a lid and let it proof for about 80 minutes or till dough in size.
End of first proofing.
4. Invert out the dough onto a well floured work top. Deflate the dough and divide it into 8 portions.
Shape the individual dough into balls, cover with a lid, and let them rest for about 15 minutes.
5. Take a dough and roll out into a flat dough of about 0.5cm thick.
Add some cranberry bits to both ends of the dough.
Roll both the shorter ends toward to center.
Pinch to seal.
Arrange the shaped dough on a non-stick baking tray dusted with a little bread flour. Give the shaped dough a few pumps of fine water mist.
Keep the shaped dough in a cold oven to undergo second proofing for about 85 minutes, or till the dough double in size.
End of second proofing.
While waiting for the dough to proof, cut the cold butter into strips, and store in the fridge till needed.
6. Transfer the shaped dough out of oven, and start to preheat the oven to 200℃ for about 10 minutes.
Dust some bread flour over the top of the shaped dough.
Use a razor blade to cut a series of shallow slits along the longer edge of the dough.
Cut a deeper slit along the centre line of the shaped dough.
Place the cut cold butter along the deeper slit, and dust a thick layer of icing sugar over.
7. Bake at 200℃ for 5 minutes, reduce the temperature to 180℃ and bake for about 12 minutes, or till the buns turn golden.
The sizzling butter while baking 😍
8. Transfer the buns to cool down over a wire rack.
8. Transfer the buns to cool down over a wire rack.
9. Enjoy it warm 😋


