Showing posts with label Rice. Show all posts

Tuesday, 10 January 2017

Rice Cooker Pineapple Rice 电饭锅黄梨饭


This is not a standard Thai pineapple rice - just my own version of a lightly flavoured pineapple rice cooked using a mini rice cooker. Amazingly, the rice tasted soft and nicely flavoured, not to forget the sweet pineapple chunks. While the rice was still cooking in the rice cooker, the sweet fragrance of the rice and pineapple prompted my family members, who were at different corners of the house, asking what rice was I preparing :)
Try it out, the ingredients are simple :)


Ingredients

1 cup of rice, 140g
50g ripen pineapple, diced
1 tsp fried shallot
1/2 tsp garlic powder 
1/8 tsp turmeric powder
Dash of black pepper 
1 tsp raw sugar
1/4 tsp fine salt
1/4 tsp seasoning/chicken stock powder
1/4 tsp low salt light soya sauce 
Water


Directions 

1. Rinse rice and soak for about 15 to 30 minutes.
I added some multi grains to the white rice.


2. Add about 1 1/2 tsp of vegetable oil and 1 tsp of fried shallot into the inner pot of a rice cooker. Close the lid and turn on the rice cooking function.


3. When you start to smell the aroma of the fried shallot, or when the rice cooker switches to "Keep Warm" mode, add in garlic powder, turmeric powder and black pepper. Close the lid and turn on the "Rice Cooking" function again. 


4. After about 1 minute, add soaked rice and water into the pot. Fill the water to about 1 cm above the rice. 
As the pineapple chunks will release juice to the rice, so need not add as much water as you usually do when cooking rice.


5. Add sugar, salt, light soya sauce and seasoning powder to taste. Give the ingredients a good stir.


6. Drop the pineapple chunks onto the rice without stirring it. Close the lid, and start the rice cooking function.

You may add sausages, too.


7. After the rice cooker switches to "Keep Warm" function, turn off the rice cooking function, and let the rice simmer for about 15 to 20 minutes, to allow the rice to fully absorb the moisture.

This is the pineapple rice after about 15 minutes of simmering.


Enjoy it with your favourite roast chicken, or pork floss :)

An auspicious rice dish for the Chinese new year feast 🍍


Rice Cooker BBQ Pork Pineapple Rice

You can serve the pineapple rice with BBQ pork slice 肉干. Just let the BBQ pork steamed over the cooked rice will do. Very simple 😁 


1. Cut out BBQ pork slice into "heart" shape using a vegetable cutter. While for the remaining slice, cut it into smaller bits. Set aside.


2. Prepare and cook the pineapple rice as above mentioned.
After the rice has cooked, let the rice simmer for about 10 minutes.


3. Place the prepared BBQ pork slices and bits over the top of the cooked rice, close the lid, and let the steam softened the BBQ pork slices.


4. Serve the rice warm after about 20 minutes. Enjoy 😋


The pineapple rice went well with sweet & sour cucumber, BBQ pork/char siew, and pork floss too.


Tuesday, 11 August 2015

Rice Cooker Luncheon Meat Kimchi Rice 电饭锅午餐肉泡菜饭


Using mostly canned food to prepare this delicious rice cooked in a mini rice cooker. Besides preparing entirely in a rice cooker, the dish can be partially prepared in a cooking pot, then transfer to a rice cooker to finish up the cooking.
Less oil is needed as compared to pan-frying the rice :)

Yield: 2 servings

Ingredients
1 cup rice, soak for 1/2 hour 
75g Korean kimchi, cut into small slice
50g luncheon meat, diced
4 whole button mushrooms, sliced
1/4 yellow onion, diced 
1 tsp garlic, chopped


Directions
1. Fill the soaked rice with water. The water level should be about 0.8 cm above the rice. This give a rough estimation of the amount of water to be added. Set aside.


2. Add 1.5 tsp of olive oil to the rice cooker inner pot and followed by garlic, onion and luncheon meat.

Close the lid and start the the "Cooking" process. 
If the rice cooker switches to "keep warm" mode when you open the lid, you need to set it back to "cooking" mode when you cover it back.

2. When you can hear the sizzling sound coming from the mini rice cooker, open the lid and give the ingredients a few stirs. Cover and let it cook till fragrant.

3. Stir in the kimchi, cover to cook for about 3 minutes.

4. Pour in the rice water and add seasoning like sugar, salt, seasoning powder and the remaining kimchi sauce.
The quantity of seasoning to depend on individual taste.


5. Add in the rice and button mushrooms.

Give the ingredients a few good stirs, lock the lid and let the cooking continues.

6. After the rice cooker switches to keep warm mode, let the keep warm mode runs for about 10 minutes. Turn off the power supply, and let the rice simmer for another 10 to 15 minutes.

7. Scoop out the rice to two serving bowls, top up with fried egg, kimchi and green scallion. Enjoy :)


Friday, 10 July 2015

Mini Rice Cooker Tomato Rice 迷你电饭锅番茄饭

There was a craze for whole tomato rice cooker rice about a year ago. The rice was simple to prepare - just add a raw whole tomato over the rice and cook. However, I felt the taste of the tomato was a bit raw. To me, only through heating and frying in hot oil, the nice aroma of the garlic, onion and tomato can be released.
In this recipe, garlic, onion and tomato were first stir-fry before adding the rice to cook. The result was a nice frangrant rice with nice orange colour 😋
I use a simple mini rice cooker with a spring thermostat to prepare this meal. In other words, the rice cooker could not  turn on the "Cooking function" without a lid, or insufficient food weight in the pot. Therefore, in the initial stage of cooking, I have to close and open the lid several times. The process would be much easier if it was prepared in a advanced rice cooker. Just select the "Quick Cook" function to start ccoking :)

Yield: 3 adult portions

Ingredients 
1 1/2 cup rice 米
1 clove garlic, chopped  蒜蓉
1/2 onion, diced 大葱丁
1/2 stalk celery, sliced 西芹片
1 ripe tomato, peel and diced 去皮番茄丁

1/2 tsp light soya sauce 新抽
2 tsp tomato paste 浓番茄酱
1/4 tsp coarse black pepper 黑胡椒碎
Water or chicken stock 水或鸡汤
Salt & sugar to taste 盐和糖适量

Directions
1. Rinse and soak rice for about 20 to 30 minutes.

2. Prepare the ingredients accordingly.

3. Before cooking starts, submerge soaked rice in water to about 1cm deep. By measuring the water this way, you would not over add the water after the other ingredients have been added.

4. Add about 2 tsp of olive oil and chopped garlic to the rice cooker pot. 
 
Cover with a lid and turn on the "Cooking" button.


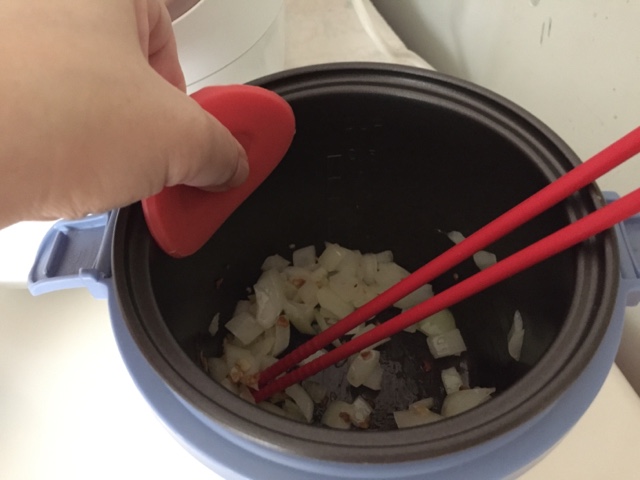
Wait for the garlic to become fragrant, then stir in the diced onion. Close the lid and wait for the onion to release the frangrance.

Stir the ingredients occasionally.


5. Add in the light soya sauce, then followed by celery and diced tomato. Close the lid and let the ingredients heat up for about 3 minutes. 


6. Add in tomato paste, sugar, salt and coarse black pepper. Stir till all the ingredients are well mixed.


7. Pour in the rice and water.

8. Add salt and seasoning powder to taste. Cover and let the rice cooking process continues.
If you are using chicken stock, then you need not add the seasoning powder.


9. When the thermostat switches to "keep warm" mode, allow the process to continue for 10 minutes before switching off the power.

10. After the power supply has been cut off, let the rice sit in the rice cooker for about 20 minutes to let the rice dry up.
If you stir the rice too early before waiting for the content to dry up partially, the rice grains would be sticky.


11. Loosen the rice with a spatula and give it a brief mix before serving 😄

Serving with pan-fried honey pork belly and Japanese cucumber :)