Saturday 26 February 2022

Pumpkin Milk Bread (SSL)


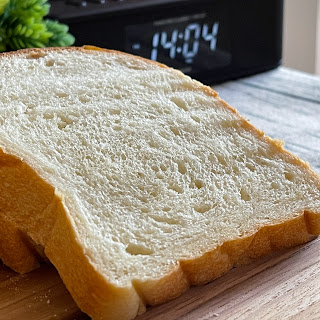
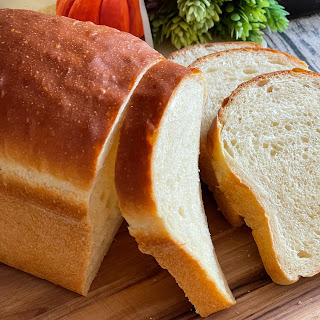
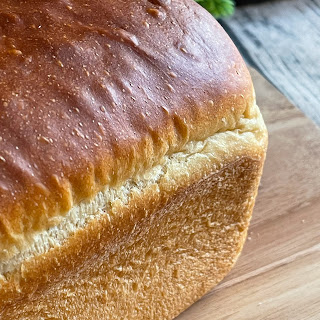
A soft and delicious pumpkin milk bread using pumpkin powder and some whipping cream. The pumpkin powder I used was premixed with tapioca powder, so the colour tone was not very bright. The butter-brushed crust not only softened the crust, but also gave it a light buttery aroma ๐Ÿ˜‹

Sweet Stiff Levain SSL (120 ~ 125g)
Ingredients
30g water
12g raw sugar
20g natural yeast, 100% hydration
60g superior bread flour/bread flour

- Add water, raw sugar and natural yeast in a small bowl. Stir to mix well.
- Add in the bread flour, and stir in one direction till it pulled to form a dough.
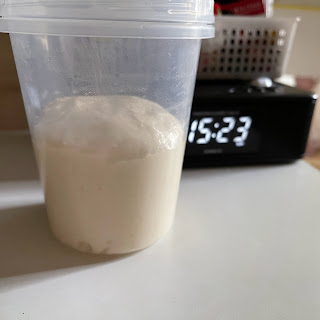
- Store the sweet stiff levain in a tall container for about 6 hours, or till it triples in size.


Ready to use ๐Ÿ˜


Pumpkin Milk Bread Dough

Ingredients
A.
205g superior bread flour/bread flour
20g superfine wholegrain flour/plain flour
10g pumpkin powder
30g raw sugar/fine sugar
1g instant dry yeast
pinch of vanillin powder, optional

B
120~125g sweet stiff levain from above

C
150g low fat milk
20g whipping cream
30g cold water

D
3g low-sodium salt

E
20~30g salted/ unsalted butter


Milk/Butter wash
Some milk as milk wash before baking
Some butter spread as glazing after baking


Directions

Knead dough into window pane using your prefer method

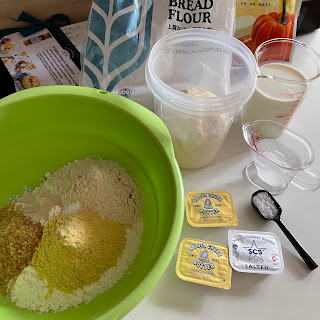
1. Mix all ingredient A in a big mixing bowl.

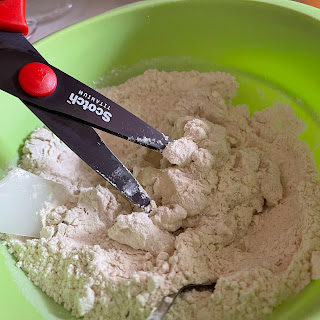
2. Add ingredient B into the mixing bowl. Use a pair of kitchen scissors to cut the sweet stiff levain into smaller pieces to facilitate mixing. Or, you can pull the SSL into small pieces using your fingers. I prefer the latter if I have the time.


3. Gradually add in Ingredient C, mix in one direction, till the dough pull away from the side of the mixing bowl, and form into a ball. Cover and let the dough rest for about 15 minutes.

4. Use a hand mixer fitted with a pair of dough hooks, and knead the dough till smoother. Add in Ingredient D, followed by Ingredient E. Knead the dough till smoother.
Performance about 200 sets of "slapping and folding" till reaching window pane.

5. Shape the dough into a ball and keep in a plastic bag coated with a thin layer of oil. Tie a loose knot, keep in a second plastic bag, and put in a covered bowl. Store in the fridge to undergo cold fermentation for about 14 to 16 hours, or overnight.

6. Remove the outer plastic bag, invert the dough and let it thaws in room temperature for about 60 to 90 minutes.

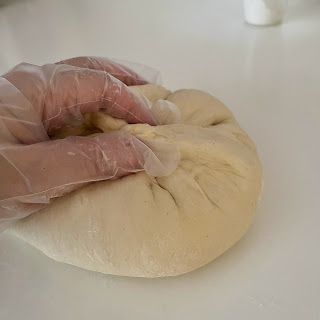
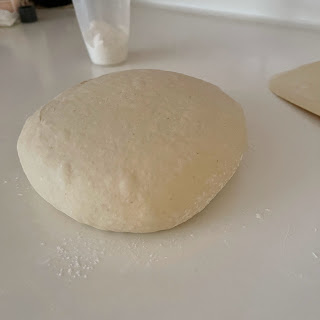
7. Remove the plastic bag and turn out the dough onto a floured work top. Deflate the dough, and shape into a ball again.

Let the dough rest for about 15 minutes.

8. Roll out the dough to a thickness of about 5 to 8mm.

Flip over, and turn the dough 90°, roll the dough into a uniform thickness.

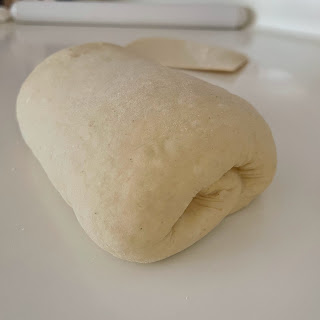
Fold in the two wings towards the center.

Roll flat the dough to get an even thickness.

Roll up the dough,

into a swiss roll shape.


9. Lower the shaped dough into a bread pan coated with butter or homemade non-stick baking spread.
Cover the pan with a tea cloth, and let it proof for about 60 to 90 minutes.

Or till the dough reaches about 4/5 height of the pan.

10. Start to preheat oven to 190℃ for about 10 minutes.
While waiting, apply some milk over the top of the dough.


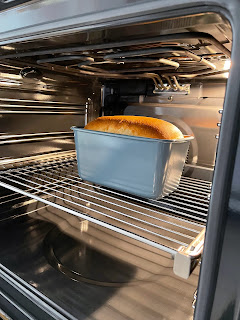
11. Bake in a preheated oven at middle rack. Reduce the temperature to 180℃ after closing the oven door. Bake for about 15 minutes, before further reduce the temperature to 170℃ and bake for about 20 minutes, or till golden.

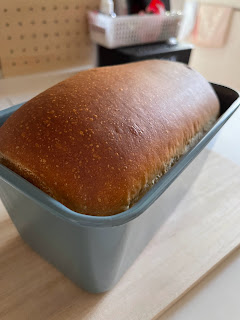
12. Remove the bread from the hot pan immediately after leaving the oven.

Let the bread stands over a wire rack.

Immediately brush some butter spread over the top of the hot bread.

Let the bread cool down to room temperature over a wire rack.

13. Cut and enjoy ๐Ÿ˜‹


Saturday 19 February 2022

Rose & Milk Glutinous Rice Ball


Yuan Xiao ๅ…ƒๅฎต, the last day of the lunar or Chinese New Year, is also known as oriental Valentine's Day. To celebrate this special occasion, I prepared tangyuan ๆฑคๅœ† in heart shape ๐Ÿงก๐Ÿ’œ๐Ÿ’›instead of the usual spherical shape. To give these plain glutinous rice balls a more interesting flavour, the purple ones were added with rose flavour, while the white ones were added with milk powder.

The tangyuan were served in pandan and cane sugar flavour syrup ๐Ÿ˜‹๐Ÿ˜‹
The chewy glutinous rice balls are not easy to digest especially for elderly. So, I prefer to serve this dessert in very small portion ๐Ÿ˜Š

Video of the dessert


Ingredients

Milk Glutinous Rice Ball (56g)
31g glutinous rice flour
2g caster sugar
3g milk powder
5g hot water
18 to 20 g water

Rose Glutinous Rice Ball (59g)

30g glutinous rice flour
1 tsp purple sweet potato powder
2g caster sugar
A little rose flavouring
5g hot water
18 to 20g water

Pandan Cane Sugar Syrup
25 to 30g raw sugar
180g pandan water


Directions

1. Mix the dry ingredients under the Milk Glutinous Rice Ball, followed by hot water. Gradually add in the 18 to 20g of water. Knead the dough to get a smooth, pliable, and not-sticky texture. Adjust the texture by adding more glutinous rice flour or water.
Cover and let the dough rest for about 30 minutes.

2. Mix the dry ingredients and rose flavoring under the Milk Glutinous Rice Ball, followed by hot water. Gradually add about 18g of water. 
Knead the dough to get a smooth, pliable, and not-sticky texture. Adjust the texture by adding more glutinous rice flour or water.
Cover and let the dough rest for about 30 minutes.


3. Divide the two dough into smaller portions of about 6 g each, and roll them into balls.

4. Use a tapered edge plastic blade to push down from the top of a dough ball to create a cleave. At the same time, gently push in the base to create a sharper end. Shape the dough to replicate heart shape ๐Ÿ’œ๐Ÿค using the tips of your fingers.
You may have to try a few times to get to the right shape. Just shape the failed dough into a ball again to repeat the trying ๐Ÿ˜‰

5. Boil some water in a pot with a blade of pandan leaf.
When the pandan water boils, add about 180 to 200g of the pandan water to the 25 to 30g raw sugar in a beaker. Stir to dissolve the raw sugar. Set aside.

Add the shaped dough to the remaining slow boiling pandan water. Stir regularly to prevent the dough from sticking to the base of the pot.
The glutinous rice balls will float when cooked. 

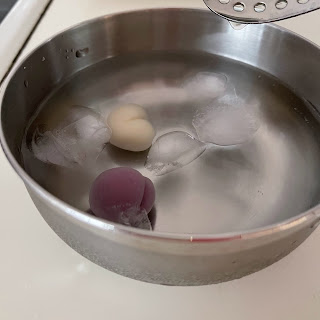
Transfer the cooked glutinous rice balls to a bowl of icy water.

6. Scoop the glutinous rice balls to the serving cups.

Add the pandan syrup water from Step 5 to the serving cups. Serve and enjoy ๐Ÿ˜‹


If you're not serving the dessert immediately, you can keep the glutinous rice balls and pandan syrup in separate containers. Combine the two when you are about to serve them. This will prevent the glutinous rice balls from becoming soggy over time ๐Ÿ˜‰

Sunday 13 February 2022

Mandarin Orange Butter Cake (2-egg)

A small mandarin orange flavour butter cake baked for the family supper. These days I prefer to bake small size butter cakes as it's better to eat these high calorie cakes in moderation but enough to satisfy the craving ๐Ÿ˜‹๐Ÿ˜€

Ingredients
All ingredients in room temperature
Using 57~59g Omega 3&6 eggs
{A}
75g unsalted butter
30g caster sugar
20g raw sugar/caster sugar

{B}
2 eggs, 119g
10g raw sugar/caster sugar

{C}
50g top/cake flour
34g plain flour plus/plain flour
8g milk powder
2g baking powder

{D}
15g mandarin orange juice
10g golden syrup/honey
8g mandarin orange zest
1/4 tsp vanilla extract


Direction

1. Coat the cake pan with some butter. Set aside.

2. Wash the mandarin orange with vegetable wash before using it. This is to get rid of any chemical residue on the fruit skin.
Peel the orange skin and slice away the pith.

Chop about 8g of orange rind into fine bits. Set aside.

I use a garlic crusher to extract the mandarin orange juice. Collect about 15g of mandarin orange juice.

Combine{D} ingredients, i.e.. 10g golden syrup, 15g mandarin orange juice, 8g mandarin orange rind and 1/4 tsp vanilla extract in a small glass. Set aside.

3. Combine {C} in a small bowl. Set aside.

4. Whisk eggs under {B} till foamy, add in 10g of raw sugar, continue to whisk for about 5 minutes using a hand whisk.  Set aside.


5. Cream softened butter under {A} till light. Add in the two sugars, continue to cream for about 5 minutes till the buttercream is light and fluffy.


6. Slowly add in the beaten egg from Step 4. Add in beaten egg when the previous batch has been well combined with buttercream.

7.  Add about 2 tablespoons of flour mixture from Step 3 to the batter and mix well. This helps to prevent the beaten eggs from separating from the buttercream. 

Fold in the rest of the flour mixture {C} into the batter using a spatula.

8. Finally, fold in {D} to the batter into a smooth one.

9. Pour the batter into the prepared cake pan from Step 1.
Rap the pan to get rid of trapped air bubbles and to level the batter.

10. Bake the batter in a preheated oven at middle rack, at 140℃ for 30 minutes, increase the temperature to 150℃ for 5 minutes, further increase to 160℃ for about 10 to 13 minutes, or till an inserted cake tester draws out clean.
My Teka HLB840 oven has a Temperature Surround feature which allows the cake to be baked at a shorter duration.

11. Let the cake cool for about 10 minutes over a cooling rack.

Invert out the cake once the cake starts to shrink from the wall of the pan.

12. Cut and enjoy ๐Ÿ˜‹๐Ÿ˜‹