Tuesday, 28 July 2015

Butter Honey Glazed Milk Bun 蜂蜜奶油牛奶面包


Mini soft milk buns coated with golden butter-honey glaze which caramelised at the base after melted from the top crust during baking. A simple bread but with great flavour and texture :)

Yield: 16 small buns in a 20cm square pan
Raw Dough weight: ~506g
Temperature170 degree C
Baking time: 18~20 minutes

Appliances:
Whirlpool Breadmaker BM1000

Ingredients A
150g fresh milk 鲜牛奶
20g condensed milk 炼奶
30g unsalted butter 无盐奶油
30g raw sugar 黄砂糖
1/4 tsp salt 盐
25g whole yolk+white 整个蛋黄+蛋白

Ingredient B
230g bread flour 高筋面粉
20g rice/cake flour 粘米粉/低筋面粉

Ingredient C
3/4 tsp instant dry yeast 速发干酵母

Glaze
10g unsalted butter 无盐奶油
10g honey 蜂蜜
10g raw sugar 黄砂糖
20~30g egg white 蛋白*
* using the remaining egg white

Directions
1. Line a 20cm square pan with parchment paper. Set aside.


2. Warm up fresh milk, condensed milk and unsalted butter in a rice cooker for about 10 to 15 minutes to melt the butter.


3. Pour the warm ingredients from (2) and the rest of the ingredient A into the bread pan.

Add egg white to yolk to make up 25g.


4. Mix ingredient B before adding on top of ingredient A. 


5. Dig a hole in the centre of the flour, and pour ingredient C in.

6. Select "kneading" function and press start. The process will take about 1:30 hour to complete.


End of the process.


7. Invert the dough out of the bread pan and onto a floured work top. 
Press down the dough to release the trapped air. 
Wear a pair of disposable gloves to handle the rather sticky dough.


8. Divide the dough into 16 equal portions, about 31g each. Shape them into 16  ball shape doughs, by pulling down the sides of the dough, and seal at the bottom.


Roll to shape.

Place the dough in a 20cm square pan lined with parchment paper.


9. Spray some water over the doughs and place in a warm closed oven to proof for about 35 to 40 minutes, or till the dough almost reach the brim of the cake mould.


10. While waiting for the dough to proof, add honey and sugar to softened butter. Mix to combine. Then combine with egg white into a glaze to be used later.


11. Preheat the oven to 170 degree Celsius.

12. Apply the glaze over the dough evenly. Pour the rest of the glaze sauce over the dough.


13. Baked at lower rack of the oven at 170 degree Celsius for about 18 to 20 minutes, or till the top turns golden.


14. Unmould the bread by lifting up the parchment paper and onto a wire rack to cool down before serving. Enjoy 😄


Caramelised butter and honey at the base of the bread.


Bread glaze recipe adapted from 
with great appreciation :)


Sunday, 26 July 2015

Pain de Mie (using Cold Ingredients)


Pain de Mie, a French white bread, uses simple ingredients to bake a tender and slightly chewy bread.  I adapted the recipe from a Taiwanese baker, 

王传仁,who recommended adding icy cold water to the dough instead of room temperature water. The recipe was well-received by many home bakers, including me :)


Yield: one 20x10x15cm bread 
Raw dough weight: 574g
Bread Weight: 519 g
Pan size:
20x10x10cm Pullman tin
Baking temperature & Time:
170 degree Celsius for 50 minutes at lower rack

Ingredient A
185~195g cold water 冰水*
25g fine sugar 细砂糖
1/2  tsp salt 盐 ~4g
10g rice bran/veggie oil 米糠油/植物油
20g cold unsalted butter 冷无盐奶油

Ingredient B
300g bread flour 高筋面粉
12g milk powder 奶粉

Ingredient C
3/4 tsp instant dry yeast 即发干酵母

* If using Prima brand flour, add 195g
  If using Origin brand flour,add 185g
   of water
From my experience, Prima flour produces better elastic and smoother dough for this recipe.

Directions

1.  Pour ingredient A into the bread pan.


2. Add ingredient B above ingredient A.


3. Dig a hole in the centre of the flour, and pour ingredient C in.


5. Select "kneading" function and press start. The process will take about 1:30 hour to complete.


6. After the program ends, let the dough sits in the bread pan for an extra 20 to 30 minutes, or till the dough rises to almost the pan height.
As cold ingredients have been used in this recipe, they slowdown the proofing process. Therefore, it needs the extra time for the dough to rise taller.

After 30 minutes,

7. While waiting for the dough to proof, apply a thin coat of butter on the Pullman tin interior walls.

8. Invert the dough out of the bread pan and onto a floured work top. 
Press down the dough to release the trapped air. 
Wear a pair of disposable gloves to handle the slightly sticky dough.


9. Flatten the dough to release the trapped air. Divide the dough into 2 equal portions, about 287g each.


10. Shape the dough into 2 balls by pulling down the sides, and seal at the  bottom.
Cover and let them rest for about 15 min.

11. Flatten the dough and roll out into a flat oval dough.


12. Roll up the dough from the shorter side, cover with a lid, and let it rest for 15 minutes.


13. After the rest, roll out the dough into a flat dough again. The shorter length of the dough should correspond to the shorter width of the Pullman tin. 

14. Flip the dough over so the smoother side will be facing out after rolling up. Roll up the dough from the shorter end. 

Place the dough into a greased non-stick Pullman tin. The open end of the dough should be facing down.

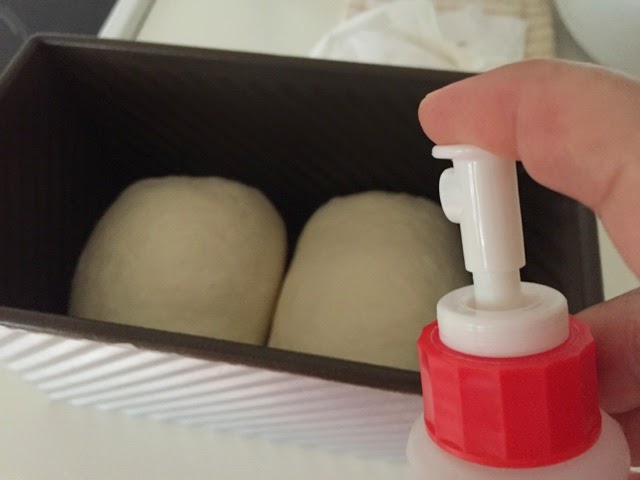
15. Spray some water over the dough and place the doughs in a closed oven.
Let the dough proof in a warm oven for about 50 minutes, or till the dough reaches about the rim of the Pullman tin.
To facilitates the second proofing, you may switch on the oven to its minimal temperature for about 1 minute.


16. After the second proofing and the dough has reached about the rim of the Pullman tin, remove the dough out of the oven. Preheat the oven to 170  degree Celsius.  And brush a coat of fresh milk over the dough.


17. Bake the dough at the lower rack of the oven at 170 degree Celsius for about 50 minutes. If your Pullman tin has a thinner wall, you can bake for about 40 minutes at the same temperature.


If the top of the dough brown too fast, you can cover the dough with an aluminum foil.

18. Remove the bread from the Pullman tin immediately after leaving the oven. Let the loaf cool down on a wire rack before slicing it.


22. Slice with a bread knife :)


With great appreciation 
Recipe adapted from