Using my Steamed Pandan Custard Glutinous Rice Cake recipe to prepared a black glutinous rice version. If you like the aroma of black glutinous rice, you may like this steamed cake, too 😋 The black glutinous rice grains added some crunchiness to the sticky rice layer 😉
Yield: one 14x10x3 cm cake
Pan size: rectangular glass bowl 14x10x5cm, tapered side, heat-resistant.
70g glutinous rice
Pan size: rectangular glass bowl 14x10x5cm, tapered side, heat-resistant.
Ingredients
Black Glutinous Rice Layer70g glutinous rice
30g black glutinous rice
2g low-sodium salt
25g low-fat coconut milk
2g low-sodium salt
25g low-fat coconut milk
50g soaked black glutinous rice water
1 blade pandan leaf
1 blade pandan leaf
Pandan Custard Layer
20g pandan paste*
100g low-fat coconut milk
1 egg, about 55~58g
10g rice flour
1g corn starch
15g fine sugar
20g raw sugar/fine sugar
* Blend 20g pandan leaves with 50g water, and collect 20g of it without straining.
3. Drain away the soaked water and collect about 50g of it for use later.
Add soaked mixed glutinous rice water till all the rice has been submerged.
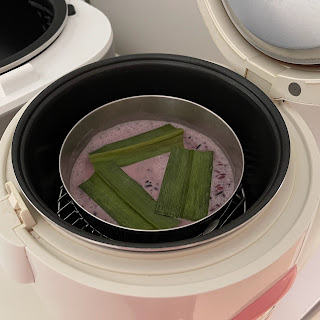
Place cut pandan leaf over the mixed glutinous rice.
6. Combine all the ingredients under the Pandan Custard Layer together in a bowl.
* Blend 20g pandan leaves with 50g water, and collect 20g of it without straining.
Directions
1. Line a 14x10x5cm glass bowl with parchment paper, and coat both the shorter edges with vegetable oil.
2. Rinse and soak both glutinous rice with warm water for 4 hours plus, or overnight.Pour coconut milk, 50g soaked mixed glutinous rice water, and salt to the soaked mixed glutinous rice in a heat resistant bowl.
Stand the bowl of glutinous rice over a steamer rack in the mini rice cooker.
Start the cooking process. When the program switches to "Keep Warm" mode, let the mixed glutinous rice simmer for about 5 minutes to dry up the rice. The cooking time was about 20 to 25 minutes, or till the rice is cooked.
5. Fluff the cooked glutinous rice before adding to the prepared glass bowl in Step 1. Press the cool mixed glutinous rice into the base of the bowl. Use the back of a spatula to compact the mixed glutinous rice layer.
6. Combine all the ingredients under the Pandan Custard Layer together in a bowl.
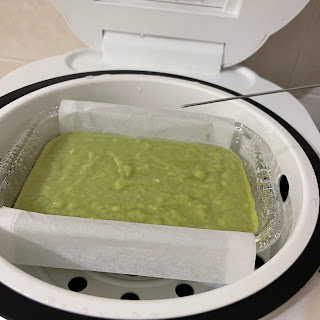
7. Pour enough water into the inner pot of a rice cooker to last for at least 20 minutes steaming. Stand the glass bowl over a steamer rack.
My IH rice cooker could not set the steaming time below 30 minutes 😔
20 minutes later ...
After the "Steam" program has completed, let the cake simmer for about 5 to 10 minutes in the rice cooker, or till the pandan custard has completely solidified.
8. Transfer the steamed cake out of the rice cooker to cool down over a wire rack.
Lift out the cake to cool further after about 15 minutes


