Friday, 22 January 2021

Condensed Milk Honey Cupcake

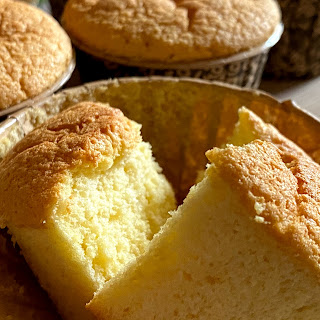
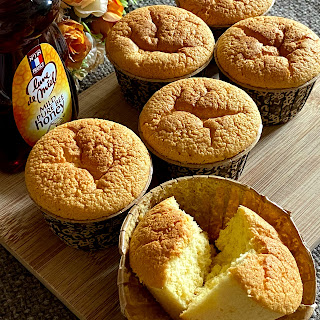
Should I name these condensed milk honey cupcakes as Ugly cupcakes? Although they did not have presentable appearances, they had a very nice aroma and cottony soft texture πŸ˜‹ I think if I bake them over low heat and longer duration, they may have a smoother dome crust. However, for own family consumption, looks not so important, taste and aroma matter more 😜

Yield: 7 cupcakes
Paper cup size: 5Dx4H cm
Baking temperature: Preheated oven at 160℃ for 20 minutes, off heat and keep in oven for 3 minutes. Bake at middle rack of the oven.

Ingredients

All ingredients in room temperature
Using 55~57g eggs

2 egg whites, 77g
40g raw cane sugar
pinch of salt

2 egg yolks, 36g

70g top/cake flour
1/8 tsp baking powder

10g condensed milk
20g milk
1/2 tsp vanilla extract

20g unsalted butter
10g honey


Directions

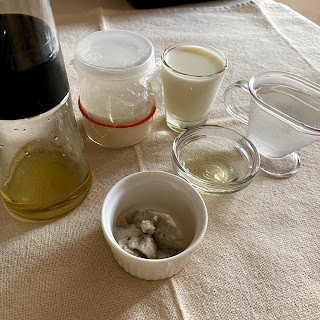
1. Melt unsalted butter and honey in a rice cooker using "Keep Warm" mode for about 10 to 15 minutes. Set aside in the rice cooker.


2. Mix condensed milk, milk and vanilla extract in a small glass. Set aside to return to room temperature.

3. Mix cake flour with baking powder in a bowl. Set aside.

4. In a clean, dry and oil-free mixing bowl, beat egg whites with salt and raw cane sugar,

till reaching firm peak stage.

Mix in the egg yolk, one at a time.

5. Sieve in 1/3 of the cake flour with baking powder from Step 3. Mix briefly using the whisks manually.

 Mix in 1/2 of the milk mixture from Step 2.

Fold in the remaining flour mixture and milk mixture in alternate sequence. End with flour mixture.

6. Transfer about 1/2 small bowl of batter to mix with the warm melted butter mixture from Step 1. Use a whisk to do the mixing.

End of mixing - no melted butter can be seen.

Pour the butter batter back to the main batter. Use a silicone spatula to do the folding.


5. Distribute the batter evenly among 7 paper cake cups, about 40g batter per cup.  Place over a baking tray.


6. Bake at middle rack of a preheated oven at 160℃ for about 20 minutes, turn off heat and keep the cakes in the oven for about 3 minutes.

7. Remove from oven and cool over a wire rack.


Enjoy the light buttery soft cupcakes πŸ˜‹


Steamed Milk Bun 蒸牛ε₯Άι¦’倴


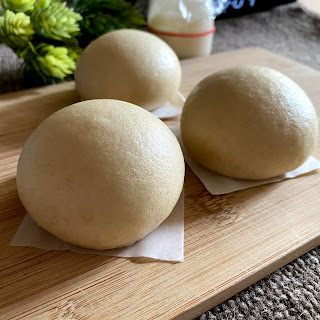
Came across a video (link to the video can be found at the end of the page) on steamed bun, followed its method but using my recipe to test. Happy to see the steamed buns have smooth skin after steaming, and maintain its soft crumb even after cooling down.


The buns still tasted better when serve warm.

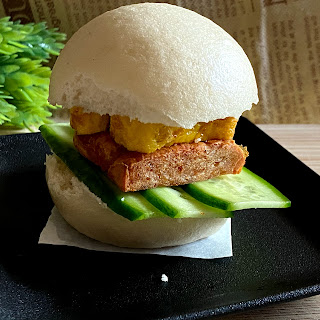
Used the steamed buns to make some tall sandwiches with thick luncheon meat, tamagoyaki, and thin slices of kyuri, or Japanese cucumber. My delicious lunch πŸ˜‹

Yield: 6 small buns

INGREDIENTS
60g plain flour plus/plain flour, unbleached
50g cake flour, unbleached
10g fine sugar
1g instant dry yeast
1g baking powder

10g multigrain soy pulp*
10g natural yeast/sourdough, 100% hydration #
50g milk, cold
5g egg white
5g water, to be added depending on dough condition

about 1/4 tsp rice bran oil, for coating the dough

Some potato starch for coating the shaped dough

* multigrain soy pulp can be replaced by about 5g milk.
# natural yeast can be replaced by 5g each of plain flour plus, and water, plus a two drops of vinegar.

DIRECTIONS
1. Mix plain flour plus, cake flour, fine sugar, instant dry yeast, baking powder in a mixing bowl.

2. Gradually stir in the natural yeast, multigrain soy pulp, cold milk, egg white and water. Stir in one direction till the mixture resembles bread crumbs. Knead and add the remaining liquid ingredients slowly till it forms into a big lump.

Coat the dough surface with about 1/4 tsp of rice bran oil, cover, and place in the mixing bowl to rest for about 10 to 15 minutes.

3. Knead the dough into a smooth dough. The dough is relatively harder and less moist than bread dough. A stiffer dough will allow the bun to keep its shape after steaming.

4. Divide the dough into 6 portions, about 33g each. Let the dough rest for about 10 minutes before shaping into smoother dough balls again.

Coat the shaped dough with a thin layer of potato starch.

Place the dough over a small piece of paper. Cover the shaped dough with a light towel, and let them proof for about 60 minutes.

60 minutes later, the shaped dough is puffier.

5. Steam the buns over boiling water in a steamer for about 10 minutes. When buns are about done, you can smell the nice aroma of bun. Turn off the heat, without opening the lid, let the buns simmer for about 5 minutes.

End of steaming and simmering.

Transfer the buns to cool down over a wire rack. Try to keep the buns in closed container or rice cooker to prevent the skin from drying up.

6. Serve the buns warm for better taste πŸ˜‹


Sunday, 10 January 2021

Peanut Powder Coated Moo-chi


My peanut mochi moooo~πŸ„ Tweaked my original peanut mochi recipe by adding bamboo charcoal powder to create the cow patched pattern. No difference in taste, just look different. Just having some fun preparing to usher the Moo Moo Year 😜

Yield: 3 to  4 persons

Ingredients

95g glutinous rice flour, about 1 cup
10g tapioca starch *
10g fine sugar
25g hot water
150~155g water

1/4 tsp bamboo charcoal powder

100g ground peanut powder + sugar #
10g white sesame seeds, roasted, optional

* tapioca starch can be replaced by glutinous rice flour
# the ground peanut powder I used have already added some sugar in it

Directions

1. Mix glutinous rice flour, tapioca starch and fine sugar in a bowl or measuring jug.

Dig a well in the center and pour hot water into it. Let the content stands for about 10 minutes without disturbing it.

Mix the content..

Followed by 150~155g of water.

Stir into a smooth batter.


Cover with a sheet of cling wrap and let the batter stands for 15 minutes to 2 hours. I let the batter stood for 2 hours.

2. Transfer about 45g of the original batter to a small pouring jug, and mix 1/4 tsp of bamboo charcoal powder to it. 


3. Mix the peanut powder and roasted white sesame seeds in a mixing bowl or plate. Set aside.

4. Heat about 1 tbsp of vegetable oil in a preheated non-stick flat base pan at low heat.

When the oil is hot, stir the batter and pour it into the pan.

Let the batter spread out on its own without disturbing it.

Pour the bamboo charcoal batter in small amount over the original batter to create the patched pattern.


Close the lid and let the batter heat for about 3 minutes at low heat.


5. The batter is ready when it solidifies. Use a spatula to roll up the glutinous rice cake.

Heat on both sides till the glutinous rice cake is cooked, or turns slightly translucent.

6. Coat a pair of kitchen scissors and tongs with non-stick spray or oil before use. Cut a small portion of the cooked glutinous rice cake and drop into the peanut powder mixture.


Cut the glutinous rice cake into smaller pieces and toss them to coat with the peanut powder mixture. The peanut powder prevents the cake cubes from sticking to each other.


7. Serve warm or cold πŸ˜‹