
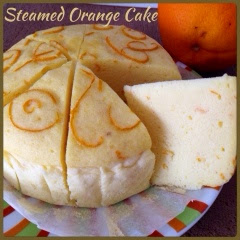
A simple and healthy steamed cake utilizing the orange peel as the flavouring ingredient. Next time when your cut an orange, consider to salvage the orange peel , and turn it into a light and refreshing cake ^.^
Yield: One 14cm round cake
Ingredients:
2 egg whites, room temperature
1/2 tsp lemon juice
50g fine sugar
50g fine sugar
2 egg yolks, room temperature
50g whole milk, room temperature
50g whole milk, room temperature
15g condensed milk
1 tsp orange peel, chopped
10g vegetable oil
10g vegetable oil
80g top flour
1/4 tsp baking powder
1/4 tsp baking powder
Some long orange peel for decoration

材料
2粒 蛋白, 室温
1/2茶匙 柠檬汁
50g 细糖
2粒 蛋黄, 室温
50g全脂牛奶
15g炼奶
1 小匙 橙皮碎
10g食油
80g低筋面粉
1/4小匙 泡打粉
一些长条橙皮做装饰用
Directions:
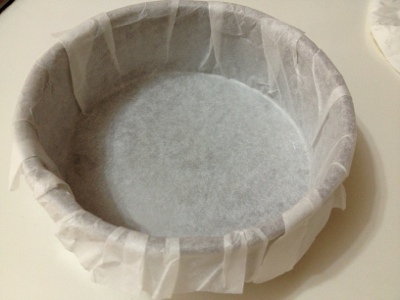
1. Line a 14cm cake tin with parchment paper. Set aside.
把一个14cm的蛋糕模铺上不沾粘烘烤纸。
2. Loosen flour with baking powder using a hand whisk.
将低筋面粉与泡打粉混均。

3. Pour milk, orange peel, condensed milk and vegetable oil in a bowl.
If your ingredients are cold, you can "keep warm" them in a rice cooker for about 3 to 5 minutes. Set aside.
将牛奶、橙皮丝、炼奶和油先倒入一个碗中。
如果材料是冷的,可用电饭锅加热 3~5分钟。待用。

4. Beat egg whites in a clean and grease free mixing bowl at high speed using an electric mixer till frothy. This takes about 15 seconds.
以高速将蛋白打成泡沫状,大约需15秒。

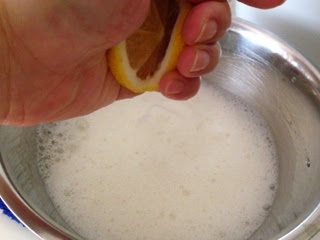
After the egg white turns frothy, add in the lemon juice, and beat at low speed for about 10 seconds.
当蛋白呈泡沫状,加入柠檬汁,继续以低速打发10秒钟。
将电动打蛋器减速至最低,分三次将糖加入蛋白中。待混均,再以高速打发蛋白至湿性发泡,大约1到2分钟。当举起打蛋器,蛋白的尖角会弯曲。最后以低速打1/2到1分钟,让蛋白更细密。


6. Add in egg yolks, one at a time, to the egg white batter and mix well.
加入蛋黄,混均才加入另一颗蛋黄。


7. Start to boil a small pot of water, to be ready for steaming the cake later.
可开始煮热水于一锅中。

8. Sieve in 1/3 of the flour mixture from (2), and mix manually using the whisks removed from the electric mixer. Stop mixing once no flour can be seen. This is to prevent deflating the batter too much and too fast.
将1/3面粉混合料分筛入蛋糊中,用打蛋器以手操作混合。

蛋糕糊留有些许面粉无大碍,在稍后的搅拌会慢慢消失。

9. Add in 1/2 of the milk mixture from (3) to the batter using the whisks.
将1/2的牛奶混合物 (3)慢慢的倒入面糊上,用打蛋器轻轻的和上层的面糊混均才做整体混合。

Add in the remaining flour and milk in alternating sequence, in the pattern of
Flour➡️milk➡️flour➡️milk➡️flour
将剩余的面粉和牛奶混合物轮流加入混合。
面粉➡️牛奶➡️面粉➡️牛奶➡️面粉
10. Finally, use a spatula to make a more thorough mixing by scrapping the side and bottom of the mixing bowl up. While scrapping and mixing, try to bang the mixing bowl a few times to get rid of trapped air.
Similarly, try to mix the batter with minimum mixing time.
最后一面轻敲钢盆,一面用刮刀从底部将面糊翻上,直至面糊细滑无汽泡。

10. Pour the batter slowly into the lined cake tin. This helps to break the trapped air bubbles when the batter flows down. Give the cake tin a few hard sturdy jerks to get rid of trapped air parcel in the batter.
再将蛋糕面糊一面慢慢倒入,一面轻敲蛋糕模,以铺平面糊和震掉汽泡。

Decorate the cake with the long orange peel.
以长条橙皮装饰蛋糕表面。

11. Put a steamer stand into the pot with boling water. Lower the cake tin into the pot. Steam the cake at medium high temperature for 9 minutes. Then reduce the heat to medium low for another 9 minutes.
将蒸架放入滚着沸水的锅,放入装着蛋糕糊的蛋糕模,用中高火,蒸9分钟,再转中小火,蒸9分钟,直至蛋糕熟透


12. Insert a thin stick into the middle of the cake to test the readiness of the cake. If the cake is done, remove from the pot. Before transferring the cake to a cooling rack, give the cake and tin 2 to 3 bangs on the work top. This helps to prevent the cake from excessive shrinking.
插入竹签查看蛋糕是否已熟。在将蛋糕移到架上降温前,趁热将蛋糕连同蛋糕模摔在台面2~3次,这有助避免蛋糕缩小太多。

13. Remove the cake from the cake tin after about 5 minutes and let it cool on the wire rack.
五分钟后给蛋糕脱模,继续置架上降温。

14. Cut and serve :)
切块享用 :)


No comments:
Post a Comment
I love seeing your comment and sharing it with other readers. Your comment would be published after moderation. Thank you :)