I came to know about this humble sweet bread recipe from my friend, JJ's blog. No milk, no butter, no egg, just water, sugar, flour, oil, salt and instant dry yeast. In spite of these simple basic ingredients, the bread was soft, moist, and slightly chewy. And its softness could last for at least 3 days.
This bread makes a good low fat sandwich loaf.
Bread weight: 459g
Raw dough weight: 492g
Ingredients
160g cold water 冷水
45g raw sugar 黄砂糖
3g salt 盐
20g coconut oil 椰油
210g bread flour 高筋面粉
50g top/cake flour 低筋面粉
3/4 tsp instant dry yeast 速发干酵母
Directions
1. Mix bread flour and top/cake flour in a bowl.
2. Pour ingredients into the bread pan in the sequence as they are listed in the ingredients list.
Colds water
Coconut oil
Dig a hole in the flour and pour the instant dry yeast in.
3. Transfer the bread pan to the bread machine.
4. When the countdown timer read "1:30" h, a series of beeps can be heard. Pause the program by pressing the "Stop/Start" button.
5. Invert out the dough to a floured work top,
6. Flatten it with your palm to release the trapped air.
Roll up the dough, pull down the side and tuck at the bottom to tighten the surface. Cover and rest for 10 minutes.
8. Flatten the dough and roll out into a flat oval dough.
9. Roll up the dough from the shorter side, cover with a lid, and let it rest for another 10 minutes.
10. After the rest, roll out the dough into a flat dough again.
11. Flip the dough over so the smoother side will be facing out after rolling up. Roll up the dough from the shorter side.
Place the dough back to the bread pan. The open end of the dough should be facing down.
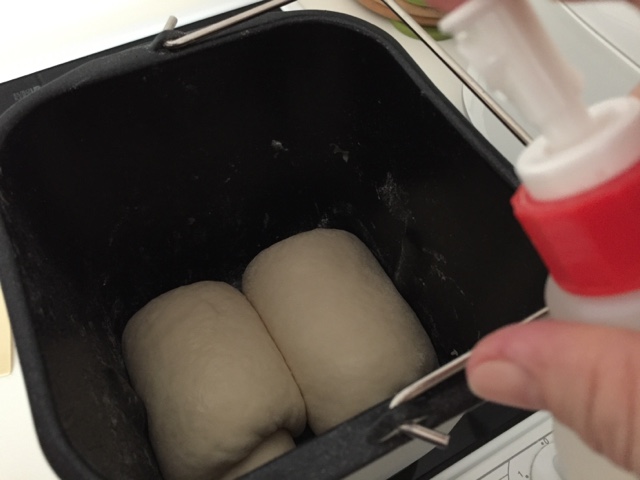
12. Spray some water over the surface, and press the "stop/start" button to resume proofing program.
13. When the countdown timer reads "0:46" h, press the "stop/start" buttom to pause the program.
Sprinkle some bread flour over the surface of the dough.
Press the "stop/start" button to resume. The baking process will start at "0:45"h.
14. Cover the window with a sheet of aluminum foil. This is to minimize heat loss through the window.
15. The bread is ready *\(^o^)/*
16. Remove the bread from the bread pan and cool on a wire rack.
Recipe adapted from
with great appreciation ^^


哇。。。妳做了哦,我到现在还是很记得那个味道和口感,简单的让人忘不了。。(^_^)
ReplyDelete哇。。。妳做了哦,我到现在还是很记得那个味道和口感,简单的让人忘不了。。(^_^)
ReplyDelete我得谢谢你的好分享,我才能在简单的食材中,烤出这么美味的面包 ^^
DeleteHi hi I am trying this bread with Mayer bread maker. But mine bm doesn't have sweet bread funstion. Can I use enriched bread function? Or common bread function?
ReplyDeleteHi, I think the main characteristics of Sweet Bread function, are the relatively shorter proofing and baking time, as well as the lower baking temperature. All these help to accommodate the higher sugar content of the dough.
DeleteIf your BM doesn't have Sweet Bread function, maybe you can use any of the two functions you mentioned, which has a shorter baking time :)
Many thanks for your advise.
ReplyDeleteGlad to share with you :)
Delete