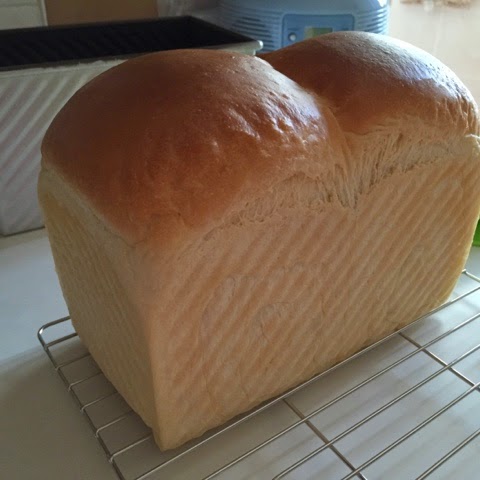
I was enticed into baking the French plain bread, Pain de Mie, after seeing so many soft bread postings by my Facebook friends. I have tried a good recipe using the breadmaker to knead, but the texture of the bread was not so satisfactory. To be frank, although the texture was soft, it was kind of a messy. The handkneaded loaf, on the other hand, has layers of distinct stringy texture :)
Yield: one 20x10x15cm bread
Weight: 527 g
Pan size:
One 20x10x10cm Pullman tin
Ingredient A
195g warm water 温水
1/4 tsp fine sugar 细砂糖
3/4 tsp instant dry yeast 即发干酵母
Ingredient B
300g bread flour 高筋面粉
12g milk powder 奶粉
10g coconut/vegetable oil 椰油/植物油
25g fine sugar 细砂糖
1/2 tsp salt 盐 ~4g
Ingredient C
20g unsalted butter, softened 无盐奶油
Directions
1. Add ingredient A to a bowl. Sprinkle dry yeast on the surface without stirring it.
The temperature should not exceed 38 degree Celsius in order not to affect the yeast.
Cover with a lid and let it stand for 15 minutes to activate the yeast.
After 15 minutes,
2. Pour all the dry ingredient B into a mixing bowl, and mix well.
Then pour in the coconut/vegetable oil.
3. Pour in the yeast-water mixture from (1). Stir in one direction to mix the ingredients into a lump till it pulls away from the wall.
4. Cover the dough with a lid and let the dough rest for 15 to 20 minutes. This allows the flour to absorb the liquid which would make kneading easier later.
5. Wear a pair of CPE gloves to handle the sticky dough. Start kneading the dough by slamming, pulling and folding, for about 10 minutes, or till the dough become smooth and elastic.
The stickiness would reduce after about 1 to 2 minutes into kneading.
Slam and pull;
repeat the process.
6. Spread out the dough and apply ingredient C, softened butter, to the dough.
7. After incorporating the butter to the dough, grab one end of the dough and slam it against the work top. Fold in, grab the adjacent end and repeat the process. Knead well for another 10 to 15 minutes till the dough can be stretched into a membrane.
8. Pull down the side of the dough and tuck in at the bottom. Store the dough in a clean mixing bowl lightly oiled. Spray some water and cover with a lid. Allow the dough to proof for about 1 hour, or till it doubles in size.
You may want to keep the proofing dough in a warm rice cooker to facilitate the proofing process. Place the mixing bowl above a steamer stand to avoid contacting the hot cooking pot.
Just turn on the "keep warm" mode for about 30 seconds.
9. While waiting for the dough to proof, apply a thin coat of butter on the Pullman tin interior walls.
10. After the dough has double in size, sprinkle some flour over, and transfer it to the work top.
11. Flatten the dough to release the trapped air. Divide the dough into 2 equal portions, about 281g each.
12. Shape the dough into 2 balls by pulling down the sides, and seal at the bottom.
Cover and let them rest for about 15 min.
13. Flatten the dough and roll out into a flat oval dough.
14. Roll up the dough from the shorter side, cover with a lid, and let it rest for 15 minutes.
15. After the rest, roll out the dough into a flat dough again. The shorter length of the dough should correspond to the shorter width of the Pullman tin.
16. Flip the dough over so the smoother side will be facing out after rolling up. Roll up the dough from the shorter end.
Place the dough into a greased non-stick Pullman tin. The open end of the dough should be facing down.
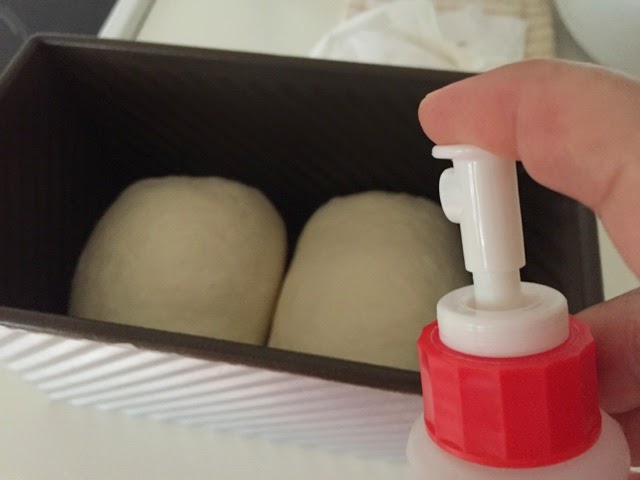
19. After the second proofing and the dough has reached about the rim of the Pullman tin, preheat the oven to 170 degree Celsius. And brush a coat of fresh milk over the dough.
20. Bake the dough at the lower rack of the oven at 170 degree Celsius for about 50 minutes. If your Pullman tin has a thinner wall, you can bake for about 40 minutes at the same temperature.
21. Remove the bread from the Pullman tin immediately after leaving the oven. Let the loaf cool down on a wire rack before slicing it.
22. Slice with a bread knife :)
With great appreciation
Recipe adapted from


No comments:
Post a Comment
I love seeing your comment and sharing it with other readers. Your comment would be published after moderation. Thank you :)