
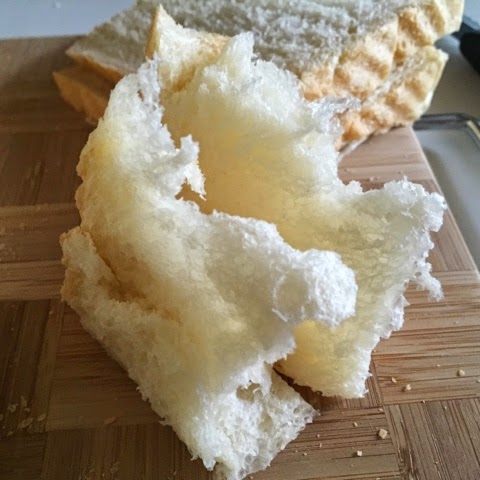
Pain de Mie is a French term for plain white bread. Recently, there has been a frenzy sharing of a recipe by a Taiwanese baker 王传仁 (Wang Chuan Ren) over the social media. I'm uncertain whether the recipe I followed replicate from his. I have made a slight modification and kneaded the dough using a breadmaker. The bread is tender and soft. In spite of its ordinary ingredients, the plain bread has an unique aroma that can be served as a toast or sandwich. Even munching the plain slice is a pleasure :)
Yield: one 20x10x10cm bread
Weight: 527 g
Appliances:
Whirlpool breadmaker BM1000
One 20x10x10cm Pullman tin
Ingredients
20g unsalted butter 无盐奶油
65g hot water* 热水*
130g water* 水*
10g coconut/vegetable oil 椰油/植物油
25g fine sugar 细砂糖
1/2 tsp salt 盐
280g bread flour 高筋面粉
20g top/cake flour 低筋面粉
12g milk powder 奶粉
3/4 tsp instant dry yeast 即发干酵母
* the quantity of hot and cold water need not be exact, as long as both add up to 195g will do.
*热水和室温水的份量可稍作调整,只要两者加起来是195g就行。
Directions
1. Pour hot water and unsalted butter in a heat resistant bowl. Cover with a lid for 5 minutes to melt the butter.
This step is optional. I prefer to work with warm ingredients :)


Add 130g of room temperature water to the butter mixture.


2. Pour the warm mixture from (1) into the bread pan.

3. Add in the coconut/vegetable oil.

4. Add in the sugar and salt.


5. Add in the bread and top flour.


6. Add milk powder to a corner.

7. Dig a hole and pour in the instant dry yeast.

8. Place the bread pan into the bread maker. Select "dough" function and start the process.


The dough is ready.

9. Sprinkle some bread flour over both the work top and dough before inverting it out.

10. Flatten the dough to release the trapped air. Divide the dough into 2 equal portions, about 283g each.
The dough maybe quite sticky, so wear a pair of disposable gloves to handle it.


11. Shape the dough into 2 balls by pulling down the sides, and seal at the bottom.
Let them rest for about 15 min.


12. Flatten the dough and roll out into a flat oval dough.

13. Roll up the dough from the shorter side, cover with a lid, and let it rest for 15 minutes.


14. After the rest, roll out the dough into a flat dough again. The shorter length of the dough should correspond to the shorter width of the Pullman tin.

15. Flip the dough over so the smoother side will be facing out after rolling up. Roll up the dough from the shorter end.

Place the dough into a greased non-stick Pullman tin. The open end of the dough should be facing down.
16. Spray some water over the dough and place the doughs in a closed oven.
Let the dough proof in a warm oven for about 50 minutes, or till the dough reaches about 4/5 height of the Pullman tin.
To facilitates the second proofing, you may switch on the oven to its minimal temperature for about 1 minute.


>>>Covered Pullman Tin<<<
17. Slide the lid on and preheat the oven to 210 degree Celsius for 10 minutes.

Bake at 210 degree Celsius for 50 minutes at lower rack of the oven.

Remove the bread from the Pullman tin immediately and cool on a wire rack.


<<< Open Pullman Tin >>>
17. After the second proofing and the dough has reached about 4/5 height of the Pullman tin, preheat the oven to 170 degree Celsius. And brush a coat of milk over the dough.

18. Bake the dough at the lower rack of the oven at 170 degree Celsius for about 50 minutes.

19. Remove the bread from the Pullman tin immediately after leaving the oven. Let the loaf cool down on a wire rack before slicing it.

20. Slice with a bread knife :)


With great appreciation
Recipe adapted from
Hi,
ReplyDeleteIs the bread still soft the next day? I realized bread made from bread maker is not as soft when butter is added in together with all the ingredients when the gluten is not formed yet.
Hi, I kept the balance bread in the fridge and heat up in a oven toaster the next day after spraying some water on it. The crumb still soft, but not as soft as in the first day. To me, it's acceptable :)
DeleteHi,
ReplyDeleteMay I know if this bread can be made without bread maker. What if I use the hand knead method as in your Sweet Milk Bun recipe?
Hope to hear from you. Thanks.
Hi Jenny, yes, you can hand-knead the dough following the sweet milk bun method. You can add the coconut/vegetable oil to the ingredients from the start and keep the butter till the dough has becomes smooth and elastic. Happy baking :)
DeleteThanks for your reply.
DeleteI really love your Sweet Milk Bun recipe, my kids like it very much.
As for this bread, should I add the yeast to the water first to activate it? Then only I add into the mixture of flour, milk powder, salt, sugar and oil?
Thanks..
Hi, I have tried this recipe with hand knead instead of bread maker. It turns out soft!!! Not sure if it remains soft tomorrow..
DeleteThanks for the great recipe. This is the first time I bake homemade bread loaf and I am very happy with the results!
Hi Jenny, sorry for the late reply. Happy to know that you like the recipe ^^
DeleteSharing with the hand-kneaded version of the same bread ;)
http://mymindpatch.blogspot.com/2015/05/hand-kneaded-pain-de-mie.html
This comment has been removed by the author.
ReplyDelete