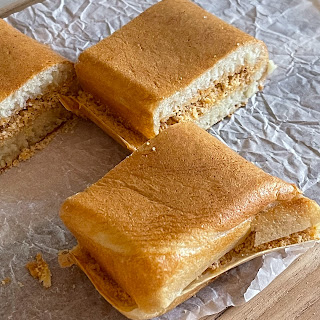
After about one week of non-stop trying, I finally achieved the pancake of my desired texture, taste and size - the recipe is eggless; the pancake has crispy edge; soft yet springy crumb; and a snack size portion 😀
I have been queuing at a pancake or min jiang kueh stall almost every weekend to buy some delicious pancakes for my family. However, besides the long waiting time, the stall ran out of pancakes very fast, or did not have the fillings I wanted. Those are the reasons forcing me into replicating pancakes at home. Although the recipe I came out has not 100 percent matched the stall standard, it is quite close I would say 😉
Everyone has their own preferences of pancakes, if you like crispy crust, soft and springy crumb pancakes, you may want to try out my recipe below 👇😃
Video of my red bean paste pancake 📹
Scroll to the end of this recipe to see the 4-portion recipe
Servings: 2 to 3 small portions
Frying pan size: 14x15 cm non-stick tamagoyaki pan or round frying pan
Ingredients
55g plain flour
5g tapioca starch/plain flour
15g raw sugar/fine sugar
1g baking powder
pinch of baking soda
1/8 ~ 1/4 tsp instant dry yeast *
pinch of vanillin powder, optional
pinch of low-sodium salt
19g hot water, above 80℃
50g low fat milk/ whole milk, room temperature
20g water, room temperature
4g rice bran oil/mild flavour vegetable oil, optional
Fillings
10g creamy peanut butter
25g sugar peanut powder
* If you prefer a shorter proofing time, add a bigger portion of instant dry yeast. Or else, keep it at 1/8 tsp.
Directions
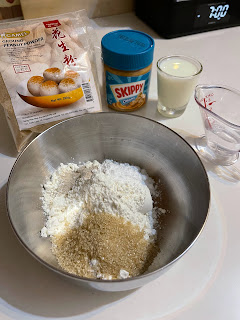
1. Mix plain flour, tapioca starch, raw sugar, baking powder, baking soda, instant dry yeast, vanillin powder, and low-sodium salt in a small mixing bowl using a hand whisk.
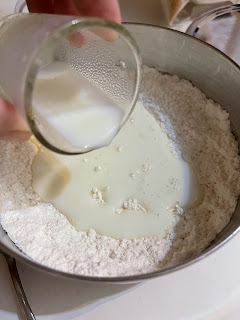
2. Add hot water to the flour mixture from Step 1.
3. Without stirring the content in Step 2, pour milk into the mixing bowl.
Using the hand whisk, give the batter about a 1-minute of quick stirrings in one direction until gluten form, or till the batter becomes smooth and glossy.
4. Add 20g of water to the batter, followed by the rice bran oil, stir till the batter is well mixed
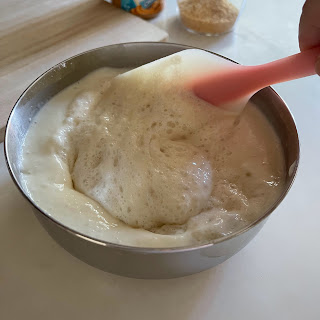
5. Cover with a lid, and let the batter proof for about 1 to 3 hours.
About 3 hours later 👇
6. Apply a very thin coat of oil over a non-stick frying pan and heat over medium-low flame till evenly warm up. While the pan is heating up, briefly stir the batter to release the trapped bigger air bubbles.
Let the batter rest till the pan has heated up.
7. When the pan is evenly heated up, pour in the batter.
The pancake will take about 10 to 12 minutes to finish cooking 🍳
Give the pan two rounds of swirling to form a thin skirting around the edge of the batter.
Wait for the batter to cook till the pancake edge shrinks away from the pan,
and most of the pancake surface is cooked, or only left a small patch of batter un-cooked at the center.
Cover the pan with a wooden chopping board or lid. This helps the pancake to cook faster.
The pancake is cooked when the edge is brown and the surface is dry. Let the pancake cook for a while after removing the lid, this helps to dry the pancake, or else the base would be wet.
8. Remove the pan from the heat source,
and run a silicone spatula around the edge of the pancake to loosen it from the pan.
Transfer the pancake to a wooden board lined with parchment paper,
and fold the pancake in half. If the pancake is to lie with the whole crispy crust facing down, the crust would become soggy because of the accumulated condensation of the remnant steam. Let the pancake rest for about 2 to 3 minutes.
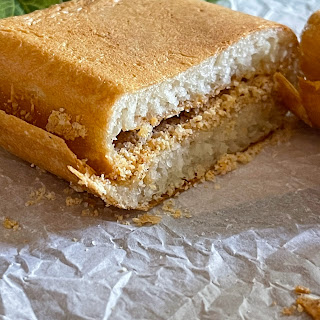
9. While the pancake is still warm, open up the folded pancake, apply a thin layer of creamy peanut butter over the soft face of the pancake
Sprinkle sugar peanut powder over the peanut butter.
Spread out the sugar peanut powder evenly over the pancake face.
Fold the pancake in half again.
10. Cut the pancake and enjoy it warm or cold 😋
Red Bean Paste Pancake
Servings: 4 small portions
Frying pan size: 11x12 cm non-stick tamagoyaki pan or round frying pan
Ingredients
70g plain flour
10g tapioca starch/plain flour
20g raw sugar/fine sugar
1/4 tsp baking powder
pinch of baking soda
1/4 tsp instant dry yeast
pinch of vanillin powder, optional
pinch of low-sodium salt
20g hot water, above 80℃
65g low fat milk/ whole milk, room temperature
25g water, room temperature
4g rice bran oil/mild flavour vegetable oil, optional
Fillings
100g red bean paste
- Divide the batter into two portions and cook in a smaller tamagoyaki pan 11x12 cm twice. So, you will get two smaller pancakes. Cut the pancakes into halves to get 4 portions 😋