Showing posts with label Breadmaker. Show all posts

Friday, 29 May 2015

Breadmaker Sweet Egg Loaf 面包机鸡蛋甜吐司


Adding egg to the bread not only help to make the bread softer, but also gives it a lovely yellow hue. 
This recipe included a few extra steps which involved taking out the dough to roll flat and shape it during the second proofing period.The extra steps helped to reduce the appearance of prominent air sacs in the bread. It is perfectly alright to skip these steps :)

Yield: One 14Lx10Wx13H cm loaf
Weight: 455 g

Appliances: Whirlpool Breadmaker 1000

Ingredients
175g  egg + whole milk 鸡蛋 + 牛奶
20g condensed milk 炼乳
20g unsalted butter 无盐奶油

40g raw sugar 黄砂糖
1/4 tsp salt 盐

225g bread flour 高筋面粉
25g top/cake flour 低筋面粉
3/4 tsp instant dry yeast 即发干酵母


Directions
1. Add cold fresh milk to cold egg, to make up a total mass of 175g.

2. Add cold condensed milk and butter to (1) and keep warm in a rice cooker for 15 ~ 18 minutes to melt the butter.
(Turn on the "Keep Warm" mode for 10 minutes, and let the ingredients stay in the rice cooker till the butter melted)


3. Remove (2) from rice cooker and let it cool down for a few minutes if it is too hot. 
The temperature should be comfortable to your hands.

4. Pour (3) into the bread pan with sugar and salt.

5. Add in the bread flour and top/cake flour.

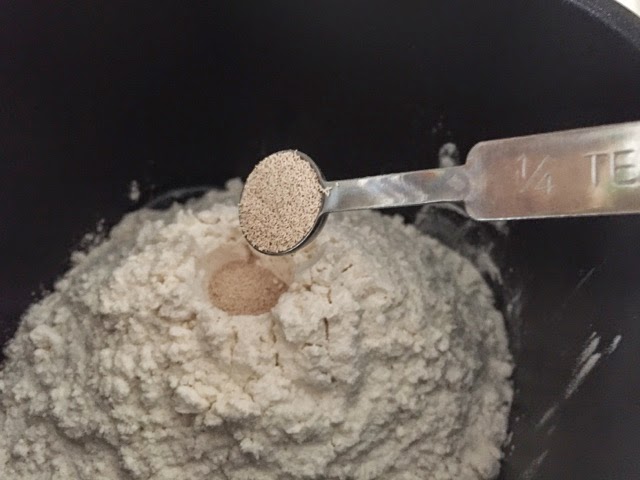
6. Dig a hole and pour in the instant dry yeast.

7. Place the bread pan into the bread maker and select the "sweet dough" function and your preferred crust "colour", and press start.


<<<<<<<< OPTIONAL STEPS>>>>>>>
8. When the countdown timer appear at 1:55, remove the dough and kneading blade from the bread maker*. 
Wear a pair of disposable gloves to handle the sticky dough.
* you can also let the process continue by skipping step 8 to 13.

9. Sprinkle some bread flour over both the work top and dough before transferring it out.

10. Flatten the dough and fold in the four sides. Cover and let the dough stand for 5 minutes.


11. After the rest, flatten the dough and roll out into a flat oval dough.

12. Flip the dough over so the smoother side will be facing out after rolling up. Roll up the dough from the shorter end. 

13. Place the dough back to the bread pan. The loose end of the dough should be facing down.
Spray some water over the dough and close the lid. Let the dough continue to proof.

<<<<<<<< END>>>>>>>>

14. When the countdown timer reads 1:05, brush a thin coat of milk over the dough. Close the lid and let the baking continues.


To prevent the loaf from developing a pale spot on the crust, cover the window with a sheet of aluminum foil.


15. Remove the bread from the bread pan immediately after leaving the bread machine. Let the loaf cool down on a wire rack before slicing it.

16. Slice with a bread knife :)


Sunday, 24 May 2015

Breadmaker Pain De Mie 面包机庞多米


I love this simple and yet aromatic loaf of white bread. My past two bakes were based on 300g flour weight and bake in a 20x10x10cm Pullman tin. I've proportionate the previous recipe and came out with a smaller quantity recipe to suit my small BM. Further, this round I used the icy cold water, which most recent Pain de Mie recipe based on, instead of using warm water.
Personally I felt the BM kneaded and baked loaf was not as good as the handkneaded and oven baked loaves, but the aroma of the BM bread was still comparable to the oven baked ones :)

Yield: one 12x11x12cm bread 
Weight: 430 g

Appliances:
Whirlpool breadmaker BM1000

Ingredients 

162g ice cold water 冰水

15g coconut/vegetable oil 椰油/植物油
21g fine sugar 细砂糖
1/2 tsp salt 盐
10g milk powder 奶粉

250g bread flour 高筋面粉
3/4 tsp instant dry yeast 即发干酵母

10g unsalted butter 无盐奶油


Directions
1. Pour fridge cold water with some ice cubes to make up to 162g in total mass.

2. Pour the icy cold water from (1) into the bread pan.

3. Add in the coconut/vegetable oil.

4. Add in the sugar and salt.


5. Add in milk powder.

6. Add in bread flour.

7. Dig a hole and pour in the instant dry yeast.

8. Place the bread pan into the bread maker. Select "dough" function and start the process.


9. Add in butter when the timer reads 1:20 (10 minutes after the program started).

The dough is ready.

10. Sprinkle some bread flour over both the work top and dough before inverting it out.

11. Flatten the dough to release the trapped air. 
The dough maybe quite sticky, so wear a pair of disposable gloves to handle it.


12. Fold in the four sides of the dough and flip over (so the folded sides will be facing down). Cover with a lid and let it rest for about 15 min.


13. After the rest, flatten the dough and roll out into a flat oval dough.

14. Fold in the two longer wings towards the centre.


15. Roll out the dough into a flat dough again. The shorter length of the dough should correspond to the longer side of the breadmpan. 

16. Flip the dough over so the smoother side will be facing out after rolling up. Roll up the dough from the shorter end. 

Place the dough back to the lightly greased bread pan. The loose end of the dough should be facing down.

17. Spray some water over the dough and place the bread pan into the bread machine and close the lid.
Let the dough proof in a closed BM for about 50 minutes, or till the dough reaches about 4/5 height of the bread pan.


18. After the second proofing and the dough has reached about 4/5 height of the bread pan, brush a coat of milk over the dough.


19. Select the "Bake" function and the bake "colour". Start the program.

To prevent the loaf from developing a pale spot on the crust, cover the window with a sheet of aluminum foil.

20. Remove the bread from the bread pan immediately after leaving the bread machine. Let the loaf cool down on a wire rack before slicing it.

21. Slice with a bread knife :)


Based on my previous handkneaded recipe