Showing posts with label Rice cooker egg. Show all posts

Wednesday, 10 August 2022

Steamed Ajitama Tamago (Seasoned Egg)


Not a perfect Ajitama tamago with gel-like yolk, but this is just my first step to cooking the Japanese seasoned soft-boiled egg using steaming method. Half-cooked yolk is better than raw yolk, hehe πŸ˜† My purpose of steaming the eggs instead of boiling them in a big pot of water was to save water and precious energy. Using just 40ml of water is more energy efficient than boiling a big pot of water for just 2 eggs πŸ˜ƒ

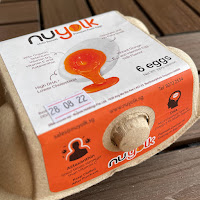
I first tried to prepare the seasoned soft-boiled egg using the more nutritious NuYolk egg. However, my first few early attempts failed with the egg white sticking to the membrane and the shell. Later, after searching for solutions, then realized the protective coconut oil coating could be the main cause of the failure. I cleansed away the coconut oil coating and kept the eggs at room temperature for 24 hours before cooking them. Amazingly, the problem was solved πŸ˜„


Ingredients
2 eggs, about 55g each, poke a hole at the broader end of the eggs.


Marinade
50g hot water
15g yosenabe sauce/soy sauce *
3g low-sodium salt
4g raw sugar
1g dark soya sauce for colour
70g ice cubes

* Yosenabe sauce saved the trouble of having to boil soya sauce in mirin and dashi broth.

Directions

1. Rinse eggs, and place in two small metal cups lined with wet tissues. 
If you’re using “nu yolk” eggs, you need to clean away the coat of protective coconut oil on the shell, and let the egg rest for 24 hours before steaming. This helps to reduce the difficulty in peeling the egg shell later.

2. Poke a shallow hole at the broader end of the egg. Do not poke through the membrane underneath the egg shell.

3.  Pour 40ml of water into the inner pot of a mini rice cooker. . 

Place the two eggs in metal cups into the rice cooker. Close the lid and start the cooking process

Start a 10-minute countdown timer at the same time.

When the timer rings, switch to “Keep Warm” for 1 minute.

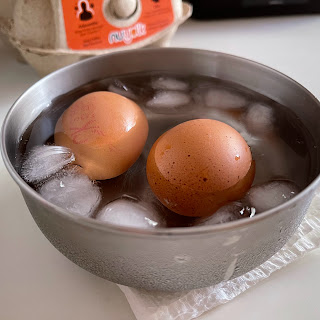
4. Prepare a bowl of ice water while waiting. 

After the 1-minute keep warm function ends, submerge the eggs in the ice water for 10 minutes. 

Crack the egg shell and let the eggs continue to soak for 5 minutes before peeling off the shells.


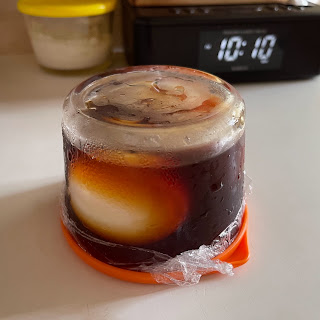
5. While waiting to peel the eggs, dissolve all the marinating ingredients, except the ice cubes, in a small cup big enough to hold two eggs. 


Add the ice cubes after all the sugar has dissolved.

6. Add the two eggs to the marinade and cover with a lid. Swirl the cup occasionally to ensure even coating of the marinade around the eggs. Keep the eggs with marinade in fridge overnight.


7. Cut the eggs and serve in ramen 🍜 

Saturday, 16 October 2021

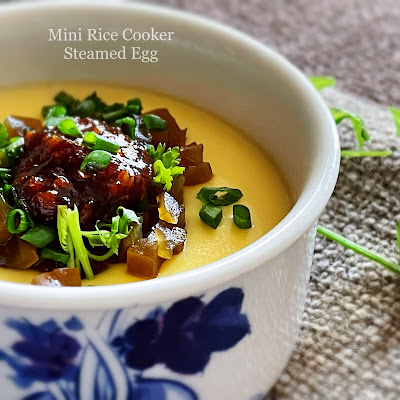
Mini Rice Cooker Steamed Egg


I like to use mini rice cooker to cook simple dish as I do not really have to watch over the cooking. Only have to time the cooking. Happy that the steamed egg cooked using the mini rice cooker was so smooth and silky just like θ±†θŠ± 😍

In general, the egg to liquid ratio for the steamed egg is about 1:2. In other words, 60g of egg will require about 60x2 = 120g of liquid. And this 120g of liquid include the liquid condiments. You can lower the liquid ratio to 1.9 or 1.8 if you prefer a firmer texture.

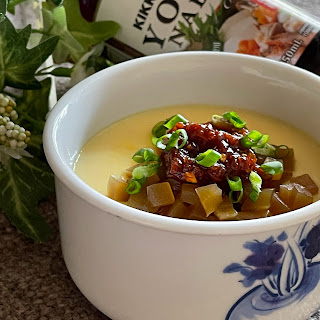
Topped the steamed egg with sweet and sour sambal chilli and pickled lettuce bits for a sweet and spicy version.


For a little luxury version, the steamed egg can also be served with BBQ chicken and pickled lettuce bits πŸ˜‹


Video showing the making process and the end product πŸ˜ƒ

Ingredients
All ingredients in room temperature

1 egg, 60g
25g low fat milk
90g water
5g yosenabe sauce*


Toppings
Quantity can be adjusted according to your taste
1/2 tsp sambal chilli paste for nasi lemak
1/2 tsp crispy shrimp chilli/hae bee hiam
1/4 tsp raw sugar, optional
juice from 1 green lime
2 tsp low-salt pickled lettuce θœεΏƒ, chopped finely
Some cut green scalllion

* 5g yosenabe soup sauce can be replaced by 4g light colour soy sauce and 1g hua diao jiu or rice wine, and a little mushroom powder/chicken stock powder. 


Directions

1. Coat a heat-resistant bowl with sesame oil, or any mild flavour oil. Set aside.

2. Add egg, milk, water and yosenabe sauce to a glass, and stir using a fork. Try not to stir air into the mixture in order to get a smooth texture later.


3. Pour the egg mixture into the sesame coated bowl. Skim off any bubbles on the surface of the egg mixture.


4. Cover the bowl with an aluminum sheet at the opening. Poke 4 pin-size holes to the aluminum sheet.

5. Pour about 100g of water into the inner pot of a mini rice cooker. Place a steamer stand in the pot.

6. Place the bowl from Step 4 into the rice cooker pot. Cover the lid, and start the cooking process. At the same time, start a 10-minute countdown timer.


7. When the timer buzzes, turn off the rice cooker powder, open the lid, and let the bowl of steamed egg sit in the pot for 5 minutes. If you are not sure whether the egg is cooked, open the aluminum sheet to check. If you swirl the bowl lightly, the steamed egg should wobble like jelly. Otherwise, continue to steam for a few more minutes.

I prefer to let the steamed egg cools down for about 15 minutes before serving.

8. While waiting, prepare the topping by combining sambal chilli paste, crispy shrimp chilli, raw sugar, and green lime juice together into a smooth paste.


Cut the pickled lettuce and green scallion into bits.

9. To serve, open the aluminum sheet, add the cut pickled lettuce, prepared sambal chilli and green scallions to the steamed egg. Enjoy πŸ˜‹