
A milk-rich loaf of bread which included fresh milk, condensed milk and milk powder as part of the dough ingredients. The crust was brushed with fresh milk just before baking, and brushed with melted butter after leaving the oven for the final touch.
This recipe baked my ideal milk bread in terms of colour, texture and shape. The bread has a nice and soft golden crust that encased the entire bread.

The crumb had an appealing soft yellow hue which I loved very much. The softness of the bread crumb could maintain till the 4th day 😜

Although the bread was soft, it still can hold its shape after cooling down 😃

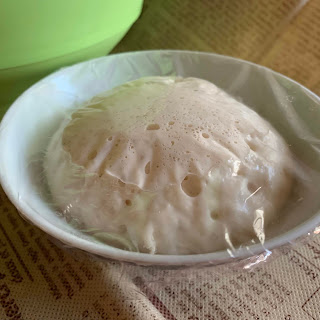
Sponge
15g bread flour
2g instant dry yeast
15g water
20g natural yeast *
* natural yeast can be replaced by 10g each of bread flour and water.
Mix all the ingredients and let it stands for about 60 to 90 minutes.
Milk Dough
Ingredients
200g bread flour
80g Prima plain flour plus
30g raw cane sugar
3g low-sodium fine salt
7g milk powder
52g sponge from above
20g beaten egg
10g condensed milk
150g fresh milk, cold
10g cold water, added depending on dough condition
30g unsalted butter, added after gluten formed
1 tsp milk as milk wash
3~5g melted butter to be applied after baking

Directions
1. Mix all the dry ingredients in the mixing bowl of stand mixer.

2. Add all the wet ingredients, except the unsalted butter, into the mixing bowl. Add the softened butter after gluten has formed. Continue to knead till reaching window pane stage.

3. Transfer the kneaded dough to a mixing bowl coated with a thin layer of oil. Spray some water over, cover and let the dough proof for about 1 hour, or till double in size.

 |
| End of 1-hour proofing |

5. Take a dough and roll flat to about 0.5cm thick. Roll up into a log, cover and and let the dough rest for about 10 minutes.

Roll out the dough into a long dough of about 0.5cm thick again. Roll up like a swissroll and seal at the end.

Lower the dough into the bread pan (Jamie Oliver 1.5L bread pan 21x13x10 cm) coated with a thin layer of butter. Spray some water, cover with a tea cloth, and let them proof for about 1 hour, or till reaching the rim of the pan.

 |
| End of 1-hour second proofing |


Bake at low rack of a preheated oven at 190℃, lower temperature to 180℃ for 20 minutes, further lower to 170℃ for 10~15 minutes, or till the top has become golden.

7. Transfer the bread out of oven, and remove from pan immediately.

Let the bread rest on a wire rack.

Apply melted butter to the entire hot crust immediately.


Cut and enjoy 😋


