Thursday 25 October 2012

Pandan bread


Yield : two 14x8x4 cm cake tin of bread

Ingredients:
200g bread flour
110g low fat milk
20g evaporated milk
30g raw sugar
1 tsp dry yeast
20g salted butter, softened
5g pandan leaves, cut into small pieces
(Pandan is also known as screw pine)

Syrup glaze
1 tsp sugar syrup
1 tsp water

preparing the glaze.


Direction:
1. Blend low fat milk, evaporated milk and pandan leaves in a food processor. This is to grind the pandan leaves into particle size. Keep warm the pandan milk mixture in a rice cooker.

Pandan leaves and milk.

2. In a clean mixing bowl, pour in the bread flour and dig a well in the middle. Add a tsp of raw sugar and yeast to the well. Sprinkle the rest of the sugar at the edge of the flour. Add in about 3 tsp of pandan milk mixture into the well to activate the yeast. Wait for about 1 minute, then pour in the remaining pandan milk mixture and stir to mix all ingredients together.

Add pandan milk mixture to the
yeast to activate it.

Use the hand to knead the dough at the
initial stage

3. When all the ingredients form into a big lump, use an electric hand mixer fixed with dough hooks, to start kneading. The first kneading takes about 5 minutes, or until the dough surface become smoother.

Start kneading using the dough hooks.

4. Add in softened butter, 10g at a time. Continue to knead till all butter incorporates with the dough. After adding the second 10g butter, the second kneading takes about 3 minutes, or until the dough no longer feel sticky. At the end of the second kneading, you should be able to stretch the dough into a thin film.

After about 5 minutes of kneading,
add in the softened butter.

When the kneadind is done, the dough is
smooth and elastic.

5. Shape the dough into a ball, and place on a lightly greased parchment paper. Place the dough into a rice cooker to begin the first proofing. Switch on the 'keep warm' mode for 5 minutes, turn off, and let the dough sit in the cooker for about 50 minutes.
 
Shape the dough into ball before
putting inside a rice cooker to proof.


1st proofing in the rice cooker.


Using the 'keep warm' mode of the
rice cooker to proof.

6. To test whether the first proofing is complete, coat your index finger with flour, then poke into the middle of the dough, if the gap did not close up, then the proofing is done. Otherwise, continue your proofing for another 5 minutes and test again.

When the 1st proofing is done, the gap will
not close up.

7. Take out the dough from the rice cooker, and lightly deflate the dough. Fold the sides of the dough to the middle, roll it up, and let it stand for 10 minutes.

Deflate the dough after the 1st proofing.

After 1st proofing, fold in the 4 sides and
roll into a ball.

8. While waiting for the dough, lightly grease and sprinkle flour to 2 cake tins. Preheat the oven to about 50 degree Celsius  for 10 minutes, getting ready for the second proofing.

Grease the cake tins and sprinkle flour onto them.


9. Cut the dough into 4 equal portions using a dough cutter. Shape the doughs into 4 pillow shapes, and put into two cake tins.

Divide the dough into 4 portions.

10. Place the doughs together with a small cup of hot water into the warm oven. The hot water is to keep the dough moist. The second proofing takes about 20 minutes to complete.

Allow some gaps between the doughs and the tin, to
allow room for expansion.

Put a small cup of water in the oven to keep
the humidity high during proofing.

Doing 2nd proofing in the oven
set at low temperature.

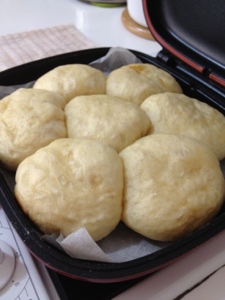
11. When second proofing is done, start baking the bread dough at 170 degree Celsius for 10 minutes or when the top of the bread start turning brown, then turn off the upper heating. Continue the lower heating for another 15 minutes. To test whether the bread is done, press the surface lightly, if it springs back, then the bread is done.

Turn off the upper heat, when the top
of the bread turns brown.

12. Remove the hot bread from the oven, and brush syrup glaze evenly on the bread surface. Return the bread to the oven for 2 minutes, then take out to apply the second coat of glaze.

Brush the glaze on the hot bread.

13. Cool the bread in the cake tins on a wire rack.
You may savour your bread when it cools down :)

The cooked pandan bread cooling on a rack.
 

Pumpkin rice vermicelli 南瓜米粉


Serving  : 2 adults

Ingredients:
100g dry rice vermicelli, soaked
2 fresh shiitake mushrooms, sliced & toasted
1x2cm wedge pumpkin, julienned
1x4cm carrot, julienned 
2 leaves cabbage, julienned
1 tbsp dry shrimp
4 cloves garlic, chopped
1/2 big onion, chopped
100ml water
1 tbsp light soya sauce
1 tsp sugar
1/2 tsp salt
Dash of pepper
Dash of seasoning powder


Directions:
1. Soak rice vermicelli in cold water.

Soak the rice vermicelli in cold water.

2. Clean and slice shiitake mushrooms, grill in toaster using high heat for 5 minutes.
If you are using dry mushroom, you may skip this step. Cut the soaked mushroom into slices, and add to step (3) together with the garlic and dry shrimps.
Sliced the shiitake mushrooms and grill
in toaster in high heat.

3. Heat 1 tbsp of olive oil in non-stick pot. Stir-fry garlic and shrimp till fragrant, then pour in chopped onion. When the onion soften, add in the carrot and pumpkin. When the carrot and pumpkin have softened, add in the toasted fresh mushroom and water.

Stir-fry the garlic and dry shrimps till fragrant.

Stir-fry the carrot and pumpkins till soft.

Add in the water and mushroom when
the carrot and pumpkin softened.

4. When the gravy starts to boil, add in the light soya sauce, sugar, salt, pepper and seasoning powder. Turn the heat down.  When the gravy begins to boil again, stir in the soaked rice vermicelli and mix well.  Turn off the heat after 2 minutes. Let the remaining heat simmer the rice vermicelli to cook.
Do not boil the rice vermicelli as it will become soggy.

When the gravy begins to boil, add in the
rice vermicelli.

5. When the rice vermicelli soaked up all the gravy, the cooking is done.
Serve the dish warm :)
The pumpkin rice vermicelli is done.

Wednesday 24 October 2012

Sweet sauce minced pork potato


Yield: serve 4 persons (small eaters)

Ingredients:
2 potatoes, cut in thick slices
2 cloves garlic, chopped
80g minced pork

Marinating ingredients:
1 tsp light soya sauce
1/2 tsp raw sugar
Dash of pepper
Dash of seasoning powder

Sauce ingredients:
1/2 tbsp light soya sauce
1/2 tbsp sweet soya sauce
100ml water
1 tsp potato/corn starch mixed with 1 tbsp water

The sauce may adjust according to your preference :)

Directions:
1. Peel the potatoes and cut into thick slices. Rinse the sliced potatoes to wash away the extra starch.

Sliced the potato and soak in the
water to wash away the starch.

2. Sprinkle some salt onto the drained potato slices and rub onto every surface,. Put the potato slices in a heat resistant bowl. Pour 100ml of water into a rice cooker pot, and place the bowl of potato in.  Turn on the rice cooking mode to cook the potato.  When the rice cooker 'beep', the potato will be cooked. Set aside.


The raw potato slices.

Sprinkle about 1/2 tsp of salt
onto the potato before cooking.
Rub the salt onto all the potato surface.

Cook the potato slices in rice cooker by
adding 100ml water to the pot.


Start the rice cooking mode to
cook the potato slices.

The cooked potato slices - soft but not mashy

3. Marinate the minced pork for 10 minutes.

Marinate the minced pork for 10 min.

4. Heat the pot using medium heat.  Pour in about 2 tsp of olive oil to stir fry the chopped garlic till fragrant. Stir in the marinated minced pork.  When the pork starts to turn pale, pour in the water, light soya sauce and sweet soya sauce.


Stir-fried the garlic till fragrant.
Stir-fried the minced pork in medium heat.
Add in water when the minced pork
starting to turn pale.


When the sauce is about to boil, add in
the cooked potato slices.

Stir in the starch water at the end of cooking.


5. When the gravy is about to boil, stir in the cooked potato slices to mix well. Finally, add in the starch water.

6. Scoop out the dish and serve with warm rice :)


Monday 22 October 2012

Happycall Custard Buns


Yield: 8 custard buns

Water Roux (50ml for 180g flour)
1 tsp flour
40ml water

Mix water and flour together and heat over low flame until the mixture thickens. Stirring regularly.
(The water roux helps to keep the bread moist for a longer period of time).

custard cream:
Ingredient A
180ml milk
15g salted butter

Ingredient B
2 egg yolks
40g sugar
20g plain flour
1 tbsp corn flour

Ingredient C
1 tsp vanilla essence

Directions
1. Warm ingredient A (I keep warm in rice cooker for 15 min instead of heating over stove)

2. Mix ingredient B together using a whisk.

3. Pour warm ingredient A into mixture of ingredient B in three portions. Stir well after each pour.

4. Heat up the mixture of ingredient A&B in a ceramic pot. Add in ingredient C too.
 
The custard mixture just before
heating up.

5. Heat and stir until the mixture thicken with show of swirl lines. Remove the pot from heat source, and whisk for another 30 sec.

When the custard is done, you can
see swirl lines when you stir.

Scoop out the custard into a clean container, and
keep in a fridge after cooling down.


6. Scoop out the custard cream into a container. When returns to room temperature, cover the container and keep in the fridge for 2 hours.

Bun dough
Ingredients:
180g bread flour
2 tbsp raw sugar
1 tsp yeast
50ml milk
50ml water roux
15g butter, softened
1/2 egg, beaten

Directions:
1) Put 180g bread flour into a mixing bowl and dig a well in the centre.

2) Pour sugar, warm milk and yeast into the well. Let it stand for a while to activate the yeast.

Dig a well in the middle of the flour, pour in
sugar, yeast and milk.

3) Add in the water roux and mix well into a big lump.

Pour in the water roux when the
yeast has been activated

4) Pour the beaten egg in and use a handheld mixer with kneading hooks, to start kneading the dough.

Mixing the beaten egg to
the dough.

5) When the egg is well incorporate into the dough, add in the butter.

Knead in the butter

6) Continue to knead until the dough become smooth and elastic.

If the kneading has complete, you should be able
to stretch the dough without breaking.

7)Shape the dough into a ball and place into a rice cooker lie with a piece of baking sheet. Sprinkle a few drops of water onto the dough, covers and let the rice cooker runs the 'keep warm' mode for 7 minutes. Turn off the 'keep warm' mode, and let the dough continue to proof for about 50 minutes.

The dough just before the first
proofing.

8) When the time is up, coat your index finger with flour and insert into the centre of the dough. If the hole never close up, then first proofing is done. Take out the dough and punch down to release the trapped air. Fold 4 sides of the dough in, and shape into a ball again. Return the dough to the rice cooker to undergo second proofing for 30 minutes.

To check whether the proofing is completed, test it with
your index finger coated with flour. If the gap did not
close up, the proofing has completed.


Punch down to deflat the dough afte
first proofing.

9) When 30 minutes is up, take out dough and press out the air again. Roll the dough into a long roll about 30 cm in length. Use a dough cutter to cut the dough into 8 equal portions.

Divide the dough into 8 portions.

10) Sprinkle some flour on worktop. Take the first portion of the dough, flatten and roll out to a diameter of about 8 cm. The edge should be thicker than the centre. Put the roll-out dough onto a small saucer. Scoop a custard cream into the centre and wrap the dough into a ball. Place the sealed opening downward into the HCP lined with gridiron and parchment paper. Close the lid and let the buns undergo final proofing for 45 minutes.


Sprinkle some flour onto the saucer, before
placing the dough.

Place a rolled out dough onto
the saucer.

Scooop a spoonful of custard onto the

Wrap up the bun.


Seal the bun by pinching the end.
Place a gridiron into the pre-heated HCP.

The custard buns just before baking.


11) Add 1 tsp of syrup to 1/4 tsp black sugar, and 1 tsp egg, blend well. Use a brush to brush a thin film of egg wash on top of the buns before baking.

The brown sugar glaze.

12) Start baking the buns in medium low heat for 10 minutes, then lower the heat and continue to bake for 10 minutes. To check whether the buns are cooked, lightly press the surface of the bun, if it bounces back, then it is done. Otherwise, continue to bake for another 5 minutes and check again.

The buns baked in HCP.

Gaze the buns before baking.

13) Lift the buns out of the pan, and let them cool on a wire rack. Serve or keep in a plastic bag when they cool down :)


Buns cooling on a rack.