
I was attracted to a Japanese language recipe because of the nice soft yellow bread the picture shown. Thanks to Google translator, I was able to decipher the ingredients from the list of Japanese terms. I put all the ingredients together and baked into 16 mini buns using my method ^^
The bread was light and soft with a sweet butter aroma :)
Yield: 16 mini buns in a 20cm square pan
Raw dough: 406g
Bread weight: 388g
Ingredients
140g egg + cold fresh milk*
20g raw sugar
2 g salt
40g cold unsalted butter
200g bread flour
4g instant dry yeast^
* add one whole egg to a container placed oven a scale. Then top up fresh milk to reach 140g in total.

^ 4g of yeast is about 1 tsp.
All the ingredients.

Directions
1. Line a 20cm square pan with parchment paper.

2. Pour all the ingredients into the bread pan following the sequence listed in the ingredients.


3. Place the bread pan into the bread maker, select the "dough kneading" function, and start!the machine.


15 to 20 miinutes.
As cold ingredients have been used in this recipe, they slowdown the proofing process. Therefore, needs the extra time for the dough to rise taller.

After 15 to 20 minutes,

5. Sprinkle some flour over the dough and work top before inverting out the dough.
Press down the dough to release the trapped air.


6. Divide the dough into 16 equal portions, about 25g each. Shape them into 16 ball shape doughs, by rolling up and pulling down the sides of the dough, and seal at the bottom.
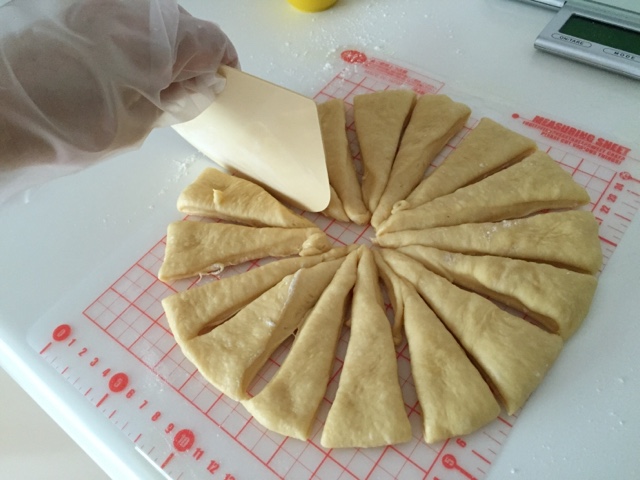


Roll to shape.
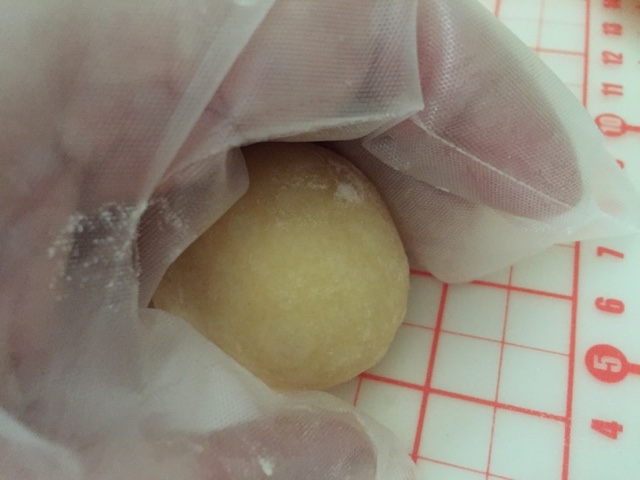
Place the dough in the prepared square pan.

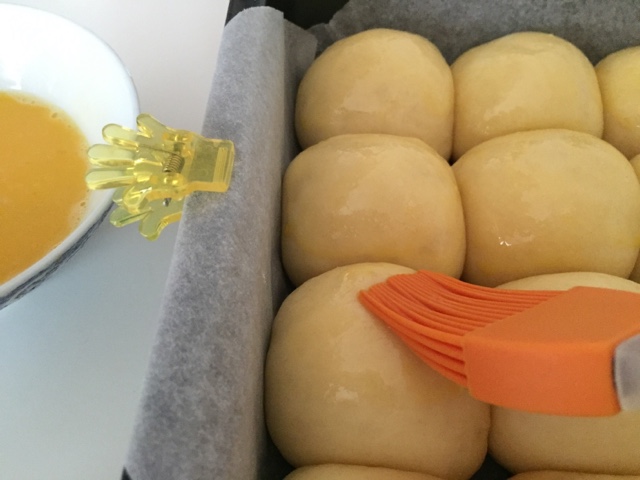
7. Spray some water over the doughs. Place in a warm and closed oven to proof for about 30 to 35 minutes, or till the doughs are almost 80% touching each other.


8. Remove the dough from the oven and preheat the oven to 170 degree Celsius.
9. Brush some beaten egg over the surface.

10. Bake at 170 degree Celsius for about 15 minutes at the lower rack.

Then further reduce the temperature to 150 degree Celsius and bake for another 2 minutes, or till the bread turns golden.

End of baking process.

11. Allow the bread to rest in the pan for 5 minutes before unmoulding the bread by lifting up the parchment paper. Let the bread cool down on a wire rack before serving. Enjoy 😄


Serving with whipped cream, yummy!

Recipe adapted from
with appreciation :)
Hi, Goh NgaiLeng, so tis bread recipe only need proof 1 time?
ReplyDeleteHi, Goh NgaiLeng, so tis bread recipe only need proof 1 time?
ReplyDeleteHi Hwee Yong, the first proofing was done in the BM. So the proofing in the oven was the second proofing :)
Delete