

Yield: 9 small buns in a 20 cm square pan
Raw dough weight: 479g
Baking temperature: Preheat oven to 200℃, lower rack, bake at 200℃ for 10 minutes, reduce to 180℃ for 10 minutes.
Yudane Dough
11g bread flour
10g very hot water/boiling water
1. Warm up a small non-metal mixing bowl by soaking with hot water (above 80℃) for about 2 minutes.

2. Pour away the hot water, and pour the bread flour into the warm cup. Dig a hole in the middle of the flour.

Pour 10g of hot water to the flour.


The dough will be about 50℃ after mixing.

3. Wrap the yudane dough using cling wrap.
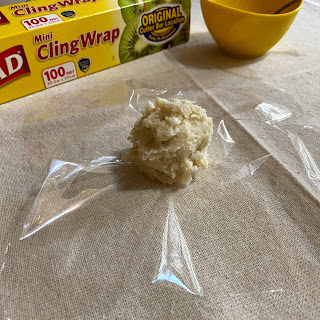
Let the yudane dough cool down to room temperature before cooling in the fridge overnight.

Before keeping the yudane dough in the fridge, store it in a small plastic container.


Pause for about 15 seconds before mixing the ingredients into a sticky dough.


Milk Bread Dough
Ingredient A
180g bread flour
40g superfine wholegrain flour/bread flour
30g raw sugar
1g instant dry yeast (use 2g for faster proofing)
Ingredient B
30g natural yeast/sourdough, 100% hydration*
20g yudane dough from above, cold
125g milk, cold
10g beaten egg
25g water, cold, to be added depending on dough condition
2g low-sodium salt
20g unsalted butter, softened
Filling
30g slightly salted butter, cold
Topping
egg wash
60g cheddar cheese, grated
* 30g natural yeast can be replaced by 15g each of bread flour and water, with a tiny amount of instant dry yeast. Let the mixture stands for about 1 hour before use. You can also keep the poolish dough overnight in the fridge. Thaw the poolish dough for 1 hour before use if store in the fridge.


Directions
You can knead the dough till window pane using your prefer method.
1. Mix Ingredient A in a mixing bowl.


 |
| The slaps and folds |
 |
| Reaching window pane |
4. Shape the dough into a ball, spray some water over, cover with a lid, and let the dough undergo first proofing for about 90 minutes, or till double in size.
 |
| 90 minutes later |
5. Invert the dough over a floured worktop, deflate and divide into 9 portions. Shape into 9 balls, cover, and let them rest for 15 minutes.

 |
| After 15-minutes rest |
While waiting for the resting dough, cut the 30g of cold butter into 6 portions each. Return to chill in the fridge till needed.


 |
| I coated too much, hehe 😉 |
Arrange the shaped dough in a 20cm square pan lined with parchment paper. Spray some water over, cover with a cloth, and let them proof for about 60 minutes, or till double in size.
 |
| After 60 minutes proofing |
6. Preheat the oven to 200℃ for 10 minutes. While waiting, brush a thin coat of egg wash over the shaped dough. Cover the top of the shaped dough with a good amount of grated cheddar cheese.


 |
| Enjoy the smell of the freshly baked bread😊 |

Serve warm to enjoy the crispy cheese crust and aromatic melted butter soaked crumb 😋


Hi
ReplyDeleteI loved your recipes.
For above recipes, can I keep in fridge and bakes it the next morning?
Hi NoviceBaker, thank you for liking my recipes. Yes, you can keep the dough in the fridge, and shape + bake it in the next day. You can even shape the dough and keep it in the fridge. However, you'll need a big fridge to hold the shaped dough in a well-sealed container to prevent moisture loss. That's why I haven't try the second method ;)
Delete