
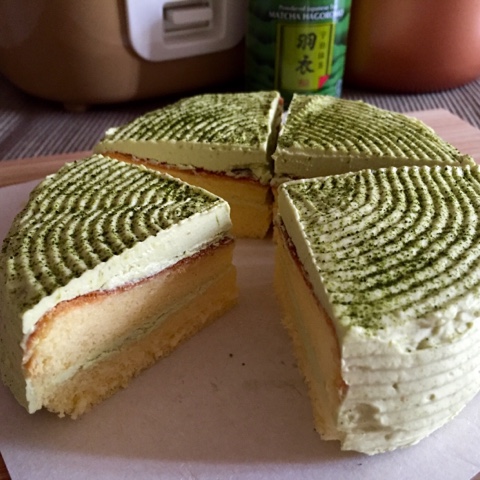
A mini sponge cake which used only a single 55g egg to prepare. Apparently, in terms of energy efficiency, this small cake was not feasible to be baked in a big built-in oven. Therefore, baking in a mini rice cooker seemed to be a more viable option.
To make up the volume, as well as covering up all the imperfect corners, the cake was coated with matcha ermine cream. Owing to my poor icing skill, the cake was crudely decorated ><
In spite of the crude look, my dear family commented that the taste was wonderful :)
Matcha Ermine Cream
Ingredients
10g fine sugar
40g fresh milk
5g all purpose flour
40g salted butter, slightly softened
10g icing sugar
1/8 tsp matcha/green tea powder
Directions
1. Add sugar, fresh milk, and all purpose flour into a small metal cup, and mix well.

2. Heat over low heat till the mixture thickens. Stirring regularly.


3. After the milk roux has cooled down to room temperature, seal with a sheet of food wrap and store it in the fridge till needed.

4. After whipping the softened butter till creamy, add in the icing sugar and whip till it is light and pale.


5. Blend in the matcha powder.


6. Add in the cold milk roux, spoon by spoon. Mix well before adding the next spoon.


7. Cover and keep in the fridge till needed.

Milk Sponge Cake
All ingredients in room temperature
Ingredient A
25g fresh milk
5g condensed milk
10g coconut/vegetable oil
Ingredients B
30g top/cake flour
1/8 tsp baking powder
Ingredient C
1 egg whites
25g fine sugar
1 egg yolks
Directions
1. Lightly coat the rice cooker pot with butter and dust with some plain flour. Line the bottom with parchment paper. Set aside.
2. Mix ingredient A together and set aside.

3. Loosen the ingredient B using a hand whisk. Set aside.

4. In a clean and dry mixing bowl, beat egg white till frothy.

Slowly add in the fine sugar, in 3 batches. Continue to beat till the whisks can draw up a long and thin meringue.


5. Beat in the egg yolk. Continue to beat till the batter can hold its shape for at least 5 seconds.


6. Fold in ingredient A and B in alternating sequence. Start with flour and end with flour.


Do not over mix.

8. Pour the batter into the lined rice cooker pot.


9. Place the pot into the pre-heated rice cooker.
Preheat the rice cooker using "Keep Warm" function.


When the cooking mode switch to "Keep Warm" mode, turn on another "5-minute countdown timer".

When the countdown timer rings, manually turn on the "Cooking" mode.
Repeat this process till the "20-minute countdown timer" is up.

10. Use a cake tester to check whether the cake is bake through.

Drop the hot cake with the pan 3 times from a height of about 10cm. This is to prevent the cake from over shrinking.
9. Allow the cake to cool in the pot for about 20 minutes, before transferring out.


10. After the cake has completely cooled down, remove the parchment paper

11. Divide the cake into half.

12. Spread cold matcha ermine frosting in between layers, on top and side of the cake.
Run a cake decorating comb round the cake to make some simple patterns to the cake icing.
Sprinkle with some matcha powder.
Sorry I'm unable to share my sub-standard icing skill here ><

13. Store the cake in the fridge for about 60 to 90 minutes before slicing.

14. Thaw the cake for about 5 minutes before serving. Enjoy :)


No comments:
Post a Comment
I love seeing your comment and sharing it with other readers. Your comment would be published after moderation. Thank you :)