
I modified the recipe slightly to tailor to my small bread maker. Owing to the relatively high yeast and sugar porportions in the recipe, I chose to use cold water and butter to slow down the proofing process, as the original recipe called for a 2:45 hour long first proofing. In spite of using cold ingredients to slow down the proofing process, I still had to cut down on the proofing time, as the inflating dough outgrew the bread pan size when it was only half way through the first proofing. Luckily, I was still able to bake a good soft loaf of white bread ^^
Yield: one 20Lx10Wx15H cm
Appliances: Whirlpool breadmaker BM1000
Raw dough weight: 591g
Bread weight: ~520g
Baking Temperature & Time:
170 degree Celsius for 50 minutes at lower rack of the oven
Ingredient
150g cold water
40g fine sugar
1/2 tsp salt
18g milk powder
30g beaten egg
40g unsalted butter
300g all purpose flour
1 tsp instant dry yeast, 4.5g
Some beaten egg as egg wash
Directions
1. Lightly grease a 20x10x10cm pullman tin with butter and set aside.

2. Pour cold water into the bread pan.

Then follow by the rest of the ingredients according to their listed sequence.
+ sugar

+ salt

+ milk powder.

+ beaten egg

+ cold unsalted butter

+ all purpose flour.

3. Dig a hole in the centre of the flour, and pour 4.5g or 1 tsp of instant dry yeast in.


4. Select "dough kneading" function and press start. The process will take about 1:30 hour to complete.


End of the process.

5. Allow the dough to continue proofing for another 20 minutes, or another 1:15 hours.
The original recipe required to proof the dough for 2:45 h. I shortened the proofing time as my small bread pan could not hold the inflated dough any further. However, the few resting time between shaping the dough would partially compensate for the proofing time missed. ^^

6. Sprinkle some all purpose flour over both the work top and dough before inverting it out.

7. Flatten the dough to release the trapped air. Divide the dough into 2 equal portions, about 294g each.


8. Shape the dough into 2 balls by pulling down the sides, and seal at the bottom.
Cover and let them rest for about 15 min.

9. Flatten the dough and roll out into a flat oval dough.

10. Roll up the dough from the shorter side, cover with a lid, and let it rest for 15 minutes.


11. After the rest, roll out the dough into a flat dough again. The shorter length of the dough should correspond to the shorter width of the Pullman tin.

12. Flip the dough over so the smoother side will be facing out after rolling up. Roll up the dough from the shorter end.

Place the dough into a greased non-stick Pullman tin. The open end of the dough should be facing down.
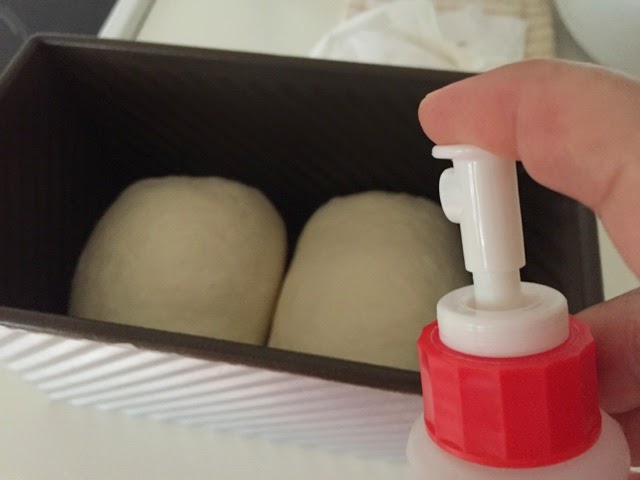
13. Spray some water over the dough and place the doughs in a closed oven.
Let the dough proof in the oven for about 60 minutes, or till the dough reaches almost the rim of the Pullman tin.

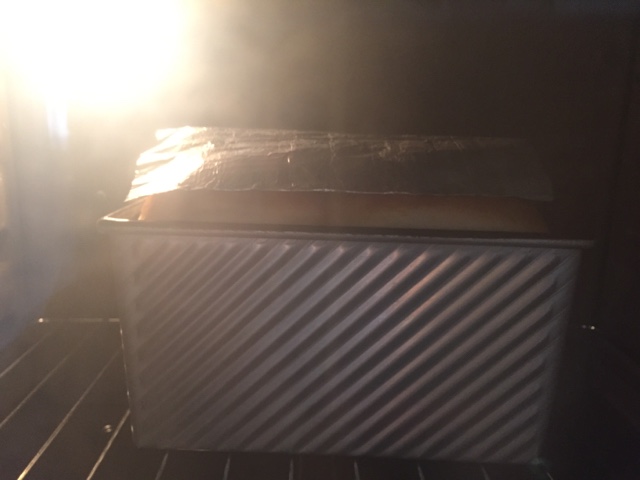
14. After the second proofing and the dough has almost reached the rim of the Pullman tin, remove the dough from the oven and start to preheat the oven to 170 degree Celsius. And brush a coat of egg wash over the dough.


15. Bake the dough at the lower rack of the oven at 170 degree Celsius for about 50 minutes. If your Pullman tin has a thinner wall, you can bake for about 40 minutes at the same temperature.


16. Remove the bread from the Pullman tin immediately after leaving the oven. Let the loaf cool down on a wire rack before slicing it.


17. Slice with a bread knife :)


Recipe adapted from Daniel Leong's sharing

The bread is so soft, can't wait to try out. Thanks for sharing!
ReplyDeleteThank you Lady Coco Doodle for liking my bread. Happy baking :)
DeleteI like your Pullman pan. MAY i know where you bought it.
ReplyDeleteThanks.
Hi Annie, I bought it from Phoon Huat about 2 years ago :)
DeleteI am a fan of your baking skills!!! I love to bake, and I am literally and seriously following your recipes!!! Love your bread maker!! I will definitely try to find out it and purchase it..Thank you for sharing!! Plss keep sharing!!!
ReplyDeleteI am a fan of your baking skills!!! I love to bake, and I am literally and seriously following your recipes!!! Love your bread maker!! I will definitely try to find out it and purchase it..Thank you for sharing!! Plss keep sharing!!!
ReplyDeleteWhoa!!! U made it look doubly good!! Can't wait to make it again.
ReplyDeleteHi the bread looks so soft and nice. Even more so that u used all purpose flour and not bread flour. Thanks !
ReplyDeleteThank you June Quek :) It surprised me too, when I first tried use AP flour to bake ><
DeleteNgaileng, you also follow the recipe using all purpose flour?
ReplyDeleteYes, Rachel, I followed the recipe closely :)
DeleteNgai leng, will I attain the same softness in the bread if I use bread flour instead of all purpose flour?
ReplyDeleteHi Nutella, I believe using bread flour should have a better texture than using plain flour :)
DeleteThank you! Will try this
DeleteHappy baking :)
DeleteHi, I'm kinda of confused on the yeast measurement... As some I come across some recipe for a tsp=2.8g and now your TW bread is a tsp=4.5g. If you have any guide ? Thanks
ReplyDeleteHi Felicia, as I followed 1/2 of the original recipe shared by Daniel, so I'm not sure there's a variation in the yeast quantity. I believe some of the bakers may have reduced the quantity of the yeast to prevent the dough from over-inflated during the rather long 1st proofing time ;)
DeleteCan i just choose basic or sweet mode and leave it shaping n baking in the bread machine?
ReplyDelete